Solution - Xcode Won't Build Or Run
Xcode often won’t build or run for an unknown reason. In this article, I’ll go over some of the common solutions to fixing this.
The fixes start from the easiest to the hardest, so I recommend you read this post in order.
Clean Your Project
Cleaning your project is one of the easiest ways to fix your Xcode build.
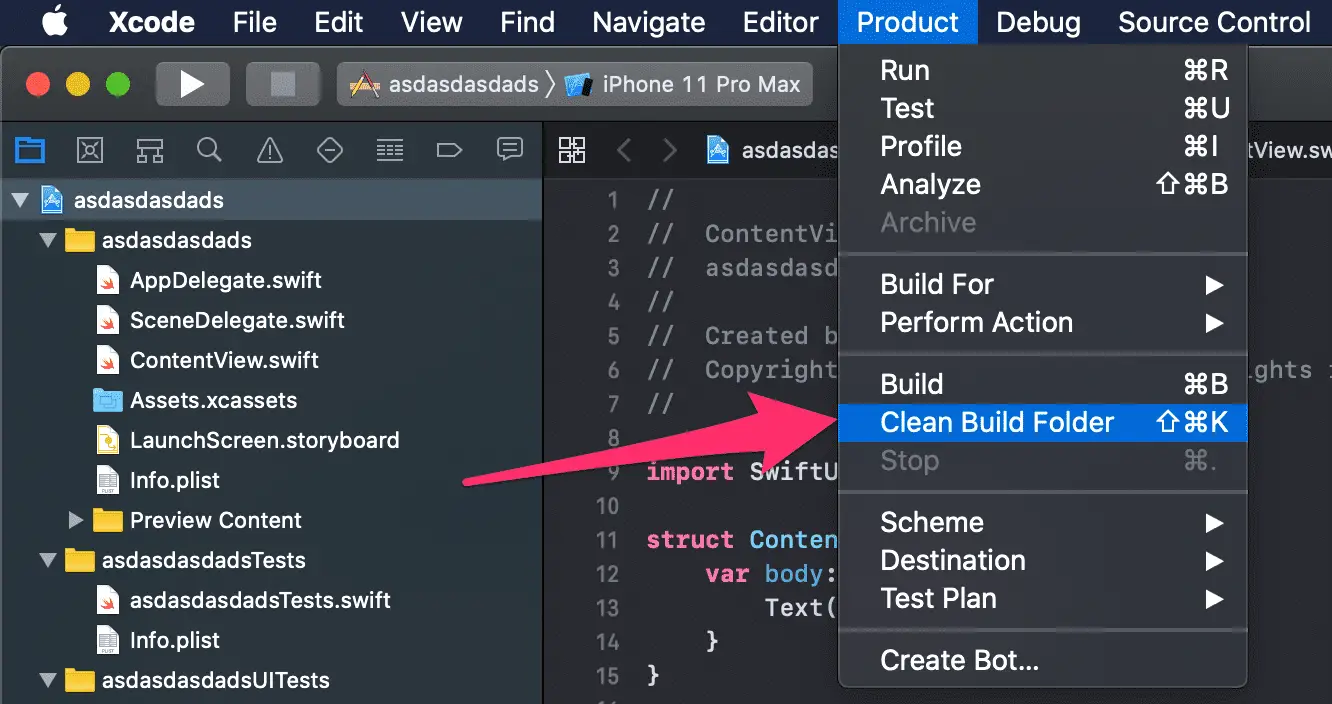
This can be achieved by going to Product > Clean Build Folder.
Or by using the keyboard shortcut Cmd + Shift + K.
Xcode will begin to clean your build folder - this might take a couple of minutes.
Once it’s completed, you can try running and building your project again.
This will solve build problems most of the time and I use this hotkey pretty often.
Hopefully, that solved the problem, if not read on.
Delete Derived Data
Deleting derived data is the next step if cleaning the build did not solve the problem.
Derived data is where Xcode stores a lot of intermediate build files, indexes, and other files.
It makes your build process faster… most of the time.
Sometimes the derived data can get into a bad state and prevent a build from working.
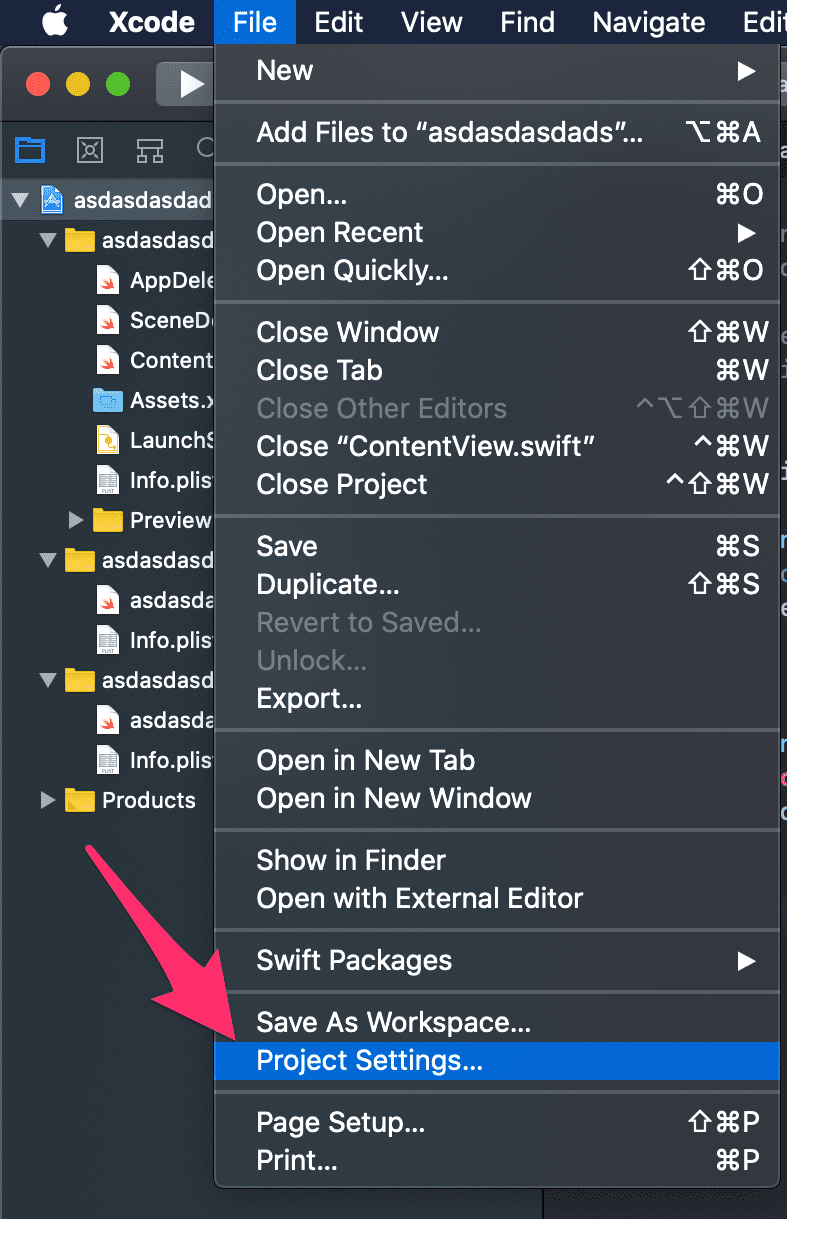
To delete your derived data, go to File > Project Settings or if you have a workspace go to File > Workspace Settings.
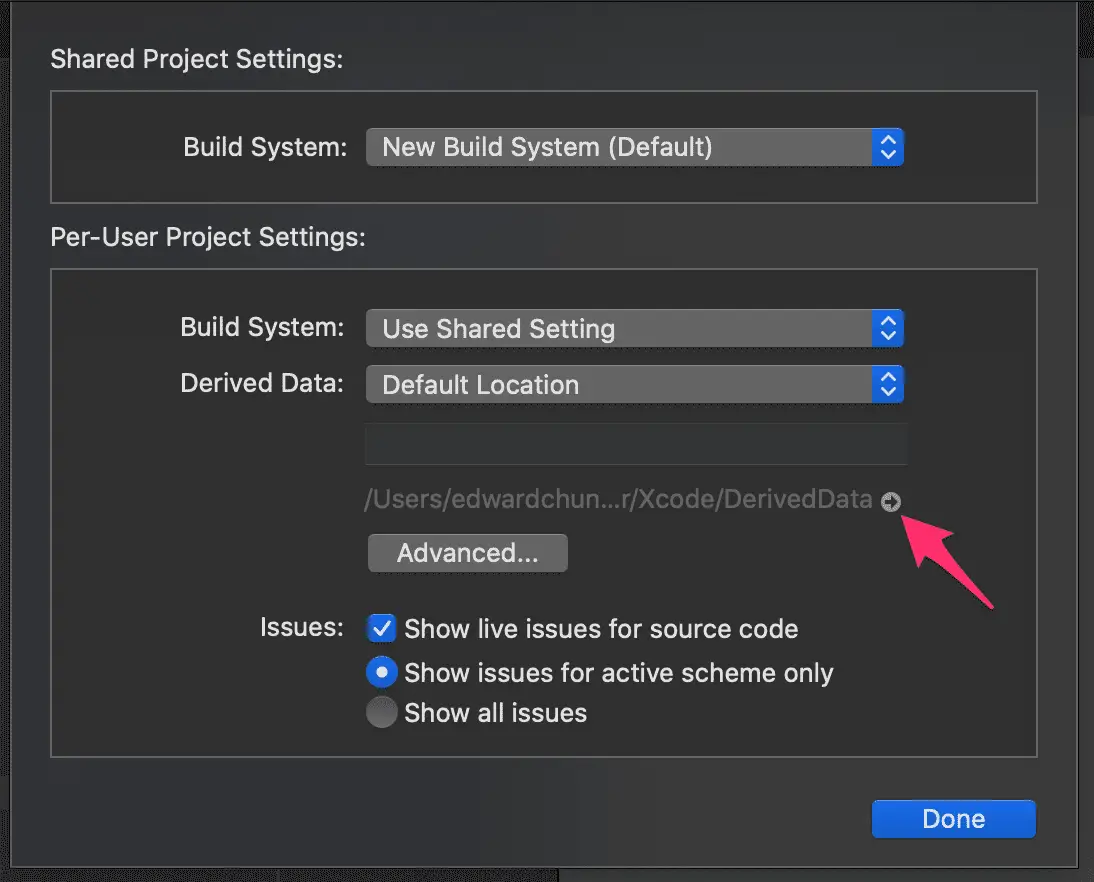
Once you’ve opened it up you will see the location of where your derived data is and a little arrow next to it.
Click on the arrow and that should open up finder with the Derived Data folder selected.
Delete this entire folder and then try rebuilding your project.
Hopefully, that solved your problem!
If not, keep reading…
Refresh Your Pods
The next thing I would try is to refresh or reinstall your Pod files.
Pods are dependencies that your project or workspace needs to build.
Sometimes your pods can get into a bad state and prevent your project from building correctly.
Note that this step is only relevant if you use CocoaPods to manage your dependencies.
For this step, you’ll have to open up your terminal and navigate to your project folder.
Once you are there, run the following commands.
pod cache clean --all
rm -rf Pods
pod install
These commands will clean out your dependencies and then reinstall them fresh.
Once the pods have finished reinstalling, you can try to rebuild and re-run your project.
Hopefully, that fixes it!
Restart Your Computer
If cleaning your project, deleting derived data, and refreshing your pods did not fix the problem, then the next step is to restart your computer.
I try to avoid doing this because it’s a little disruptive to my workflow, but at least reboots are pretty quick these days - especially if you have an SSD (solid-state drive).
Once your computer has restarted, retry running your project.
Update Xcode
The next step is to update your Xcode version.
There is a chance that Apple has already released a fix to your problem.
To update your Xcode version, simply open up the App Store and search for Xcode.
There should be an update option next to it, click it and wait for that to install.
You can also go to the Update section of the App Store to see what available updates there are for your computer.
Then restart Xcode and try to rebuild your project.
Revert Any Recent Changes
If the above steps didn’t work, I’d guess there was a recent change to your project that is causing it to break.
Try to remember what you’ve changed recently and then revert it.
Even better, if you managed your source code with Git, you can look through the Git history to see the latest commits.
Be sure to ask any of your teammates if they’ve made any changes that could potentially break the build.
Revert any of these changes and try to build your project again.
It’s also a good idea now to check if you can build a fresh new Xcode project.
This will help you determine if the problem is with your project or with your development environment.
Reinstall Xcode
If none of the steps above work and you’ve determined it’s a problem with your development environment and not your project, it’s time to reinstall Xcode.
This is somewhat of a pain to do, so I recommend you try the above steps first.
But if it doesn’t work, open up your Applications folder.
To do that, open Spotlight Search (CMD + Spacebar) and search for Applications.
Once that folder is open, find Xcode, right-click it and select delete.
Update Your Operating System
This is really a last resort and not recommended unless you are still stuck.
If none of the above steps have worked, the last thing to do is update your operating system.
There is a chance that Apple has fixed the bug in the latest MacOS.
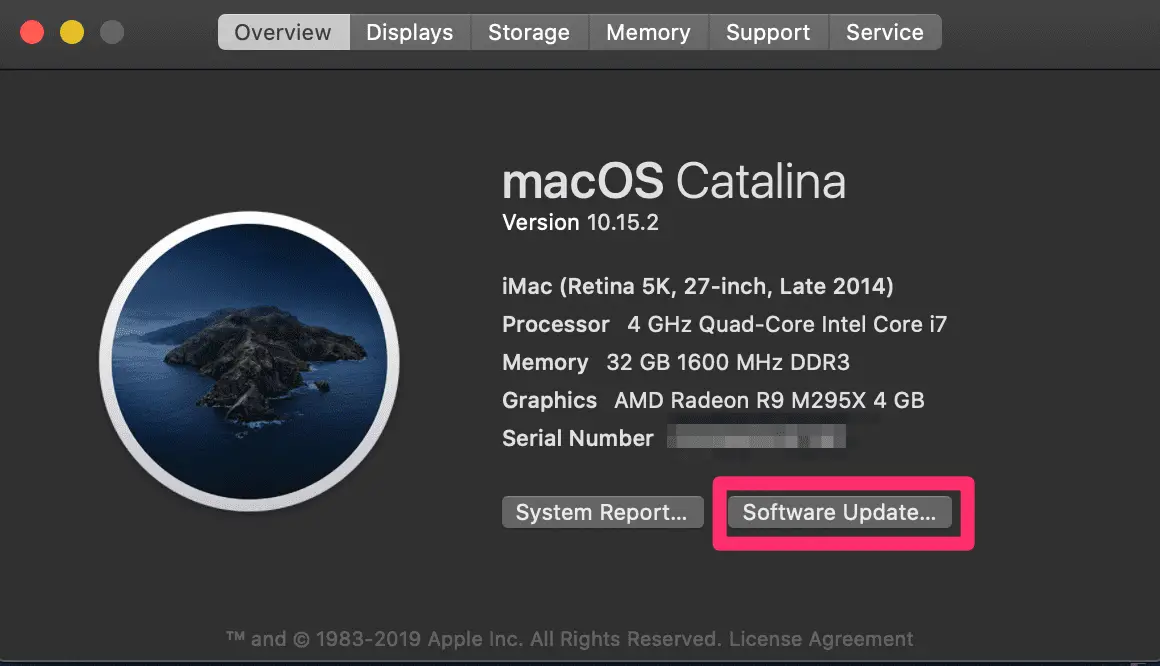
To update your operating system, click the Apple icon in the top left-hand corner of your screen and select About This Mac.
On the overview screen, there should be a Software Update button and then you can select the Update Now button.
This should update your machine and hopefully fix your problem.
Eddy Chung
Similar Posts
- Solution: Can't Update Xcode From App Store, Hangs Indefinitely
- Explained: 1x 2x 3x Images In Xcode
- How To Compile In Xcode
- How To Delete Projects In Xcode
- How To Show Library Pane In Xcode
- How To Setup App Icon in Xcode
- Minimum And Recommended Hardware Specifications For iOS Development
- What is Xcode and why do I need it?
- Xcode – Keyboard Shortcuts & Productivity Tips
- Best Backend For iOS App

The Complete iOS App Development Bootcamp
Disclosure: This website may contain affiliate links, meaning when you click the links and make a purchase, we receive a commission.


