How To Add a Button in Xcode (Swift)
Buttons are great. They’re super common in almost all iOS apps. So how can you button_make one?
In this article, I’ll go over a couple of different methods of implementing buttons in Xcode.
Interface Builder
The interface builder is a great tool for building user interfaces quickly. Let’s see how we would add a button using it.
Create a new project and open up Main.storyboard.
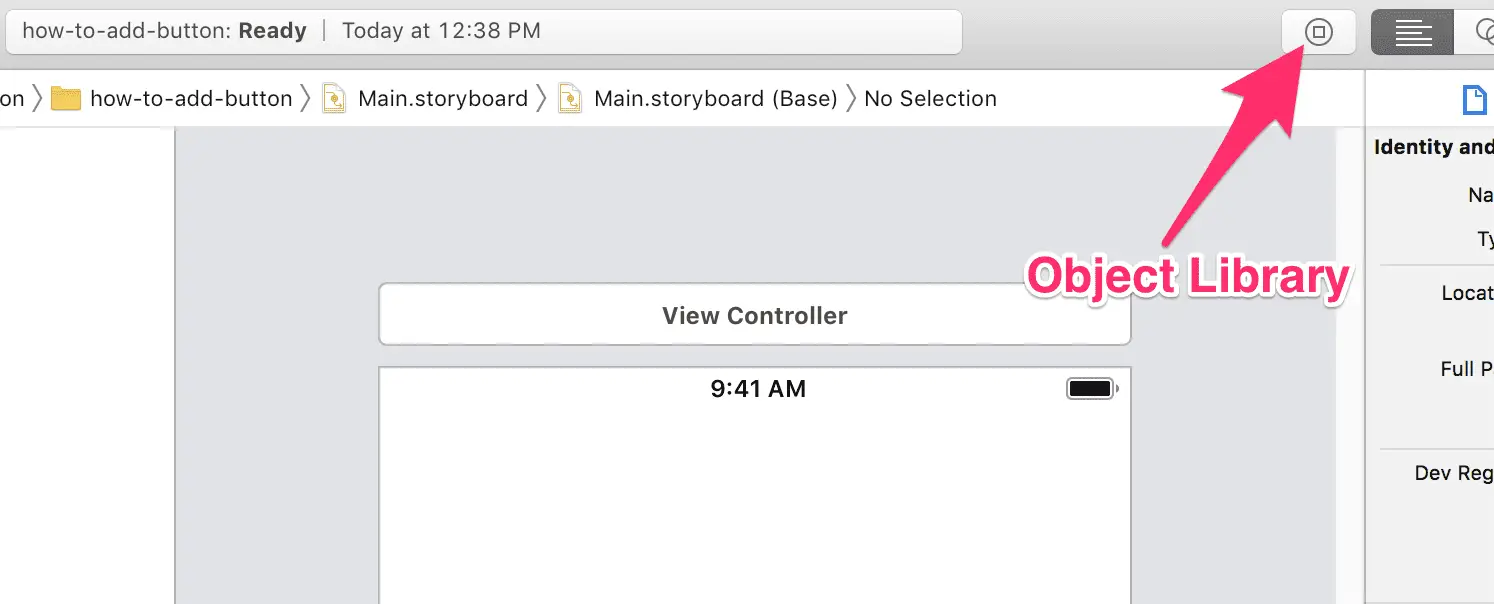
Open up the Object Library by clicking the button in the top right or by using the keyboard shortcut (CMD + Shift + L)
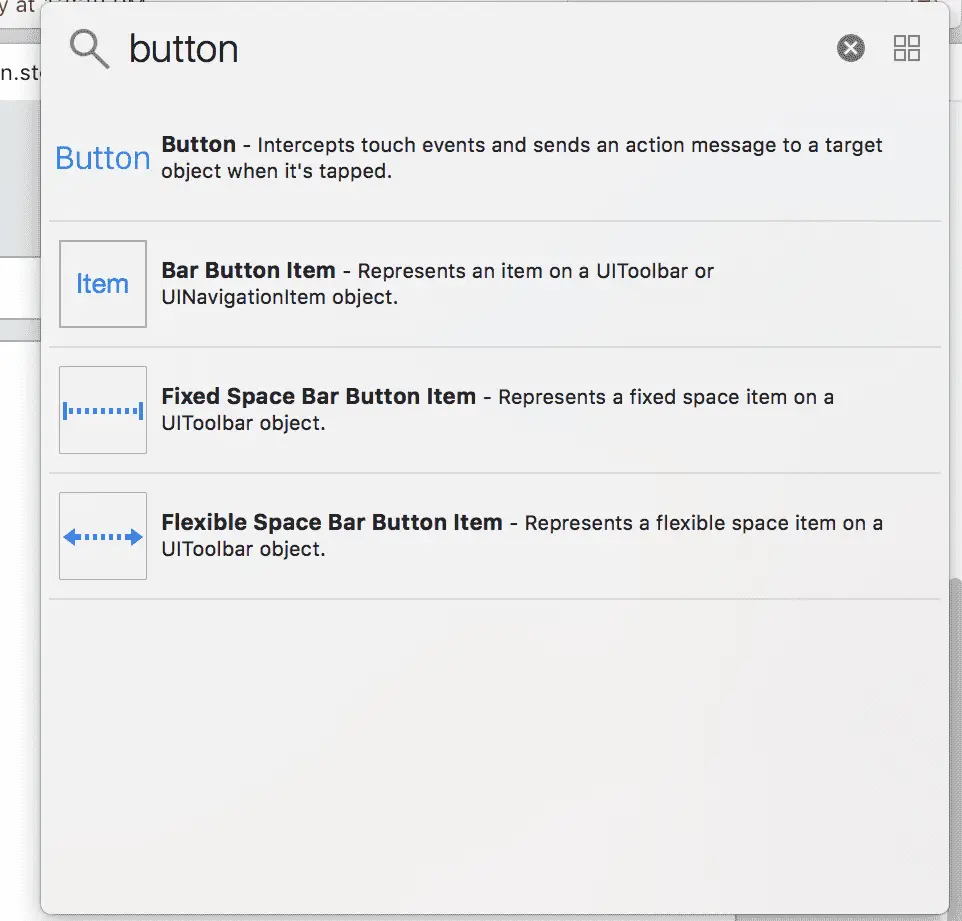
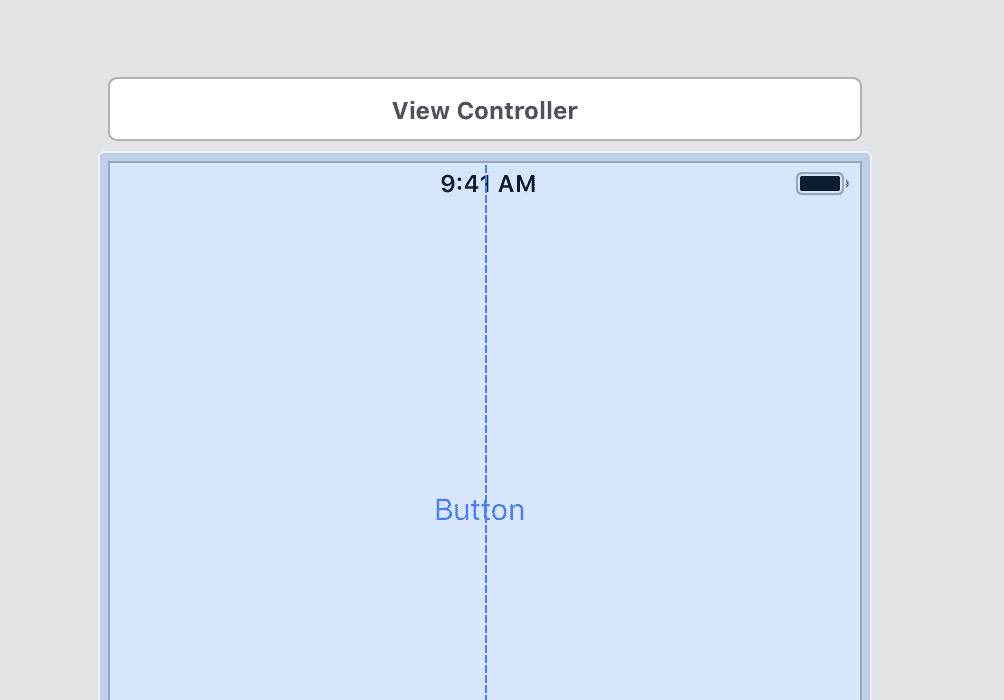
Search for a button in this dialog and drag the Button object onto your storyboard screen.
You can then modify the styles and text of the button to suit your liking.
Modifying button style in the interface builder
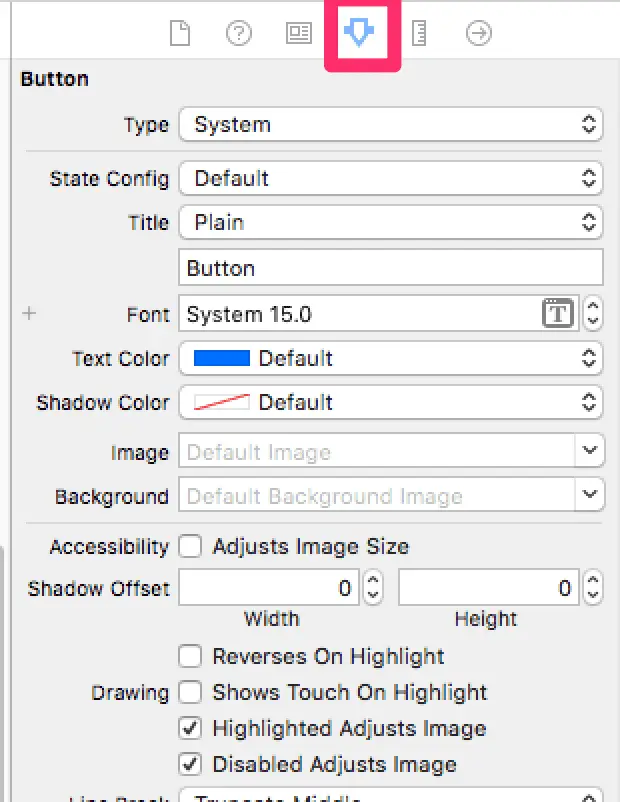
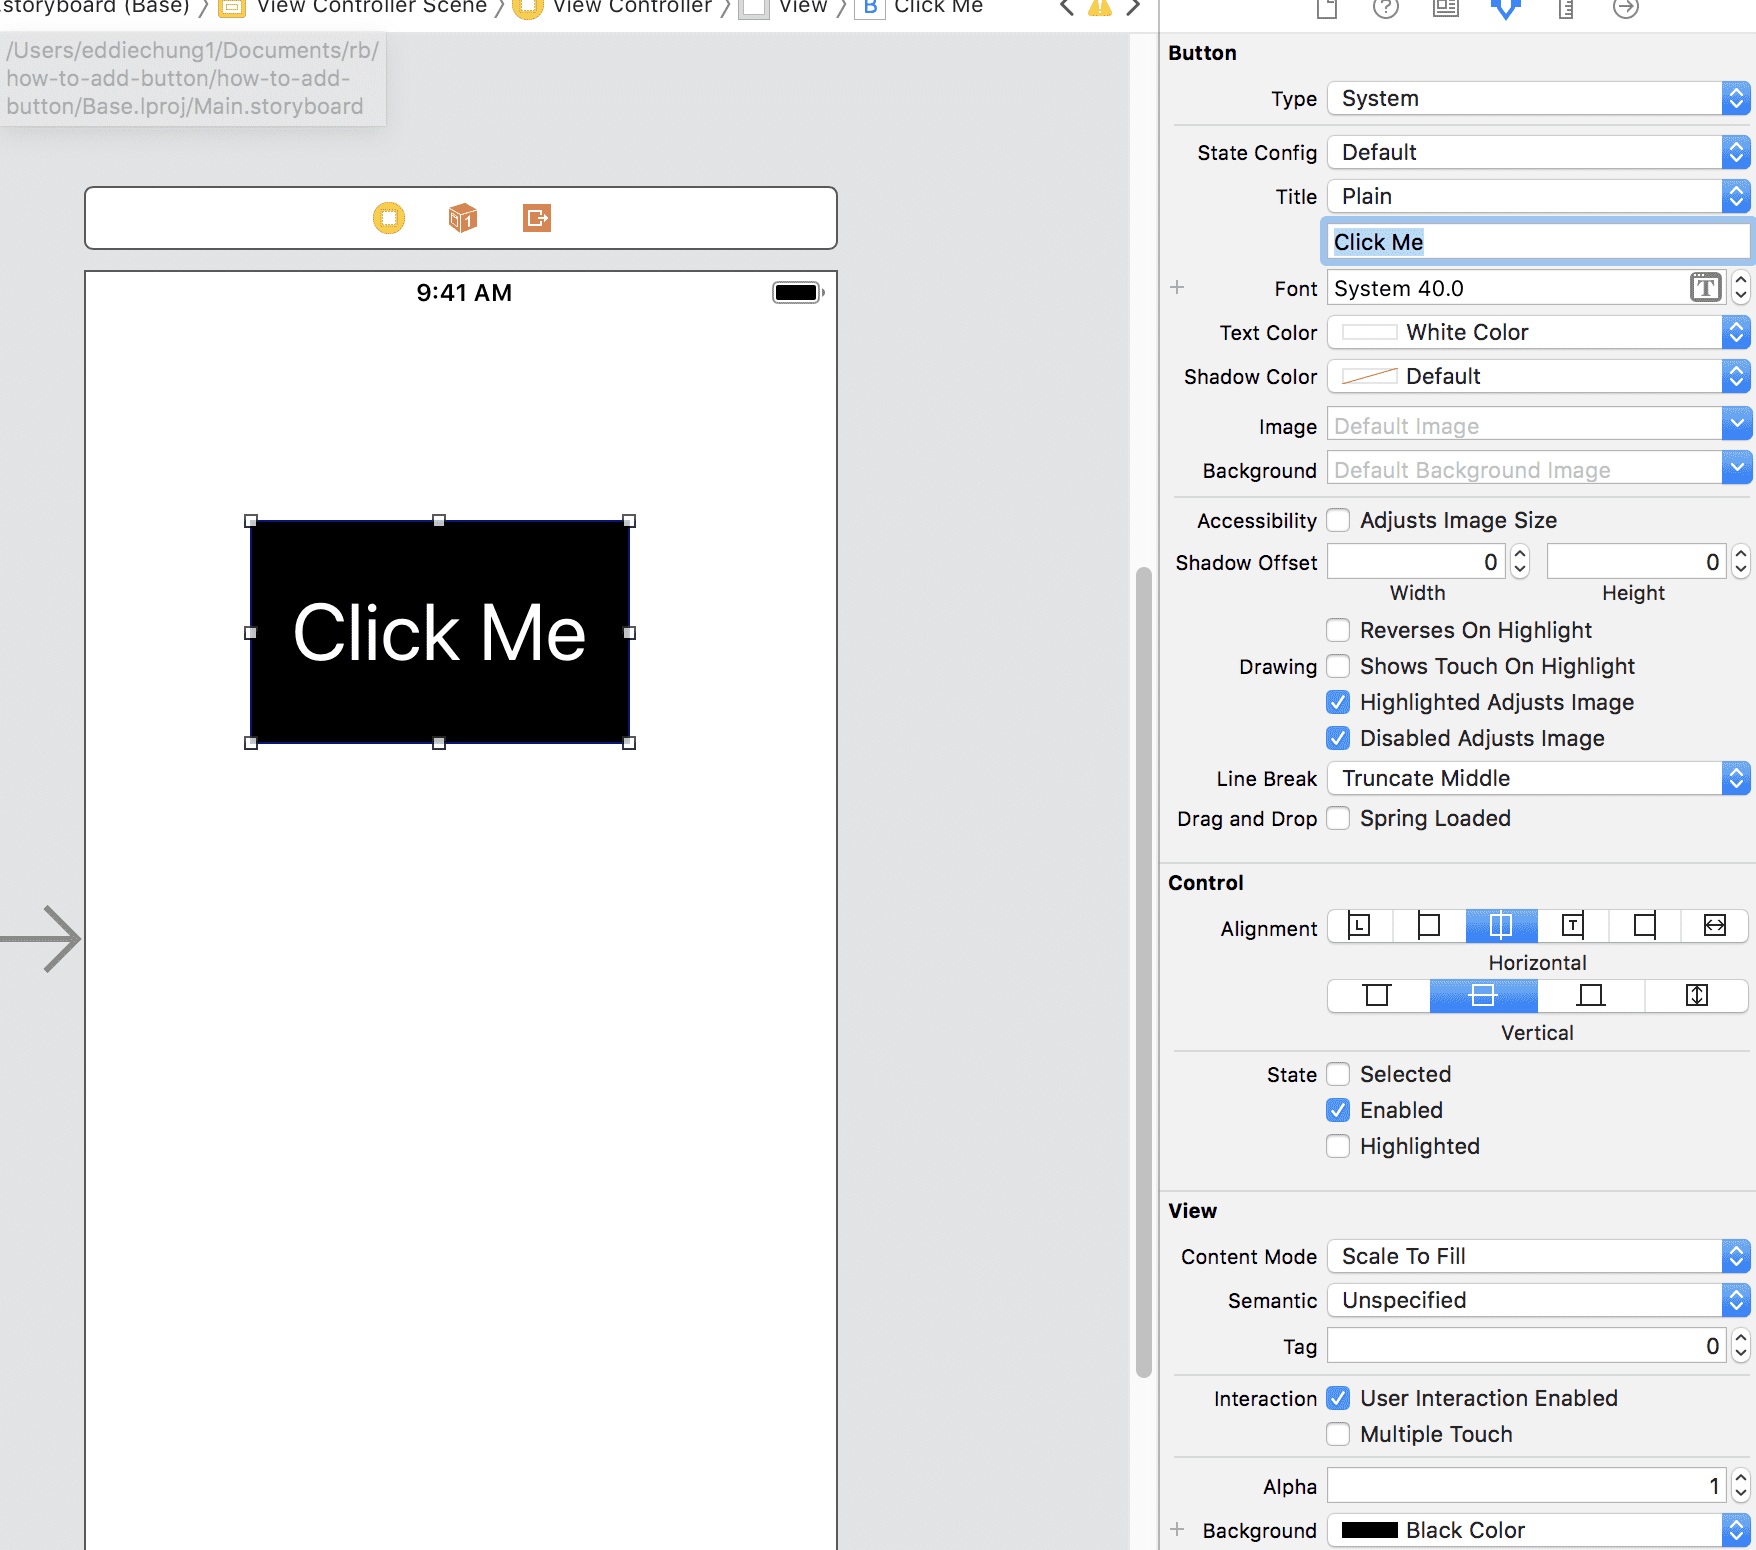
To modify the button style in the interface builder, open up the Attributes Inspector. You can click on it in the right-hand pane or use the keyboard shortcut (CMD+Option+4).
Here we can modify the Title of the button and various other properties such as: Font, Text Color, Background and many more. For this example, I changed the text to “Click Me” and the button text color to white with a black background:
There are endless possibilities on how to modify your button’s style. Play around and explore the Attributes Inspector tab.
Adding IBOutlet to Swift code
How about if we want to access this button in our Swift code? To do that we must create an IBOutlet. IBOutlets stand for interface builder outlets. They provide a reference to objects in the interface builder in code.
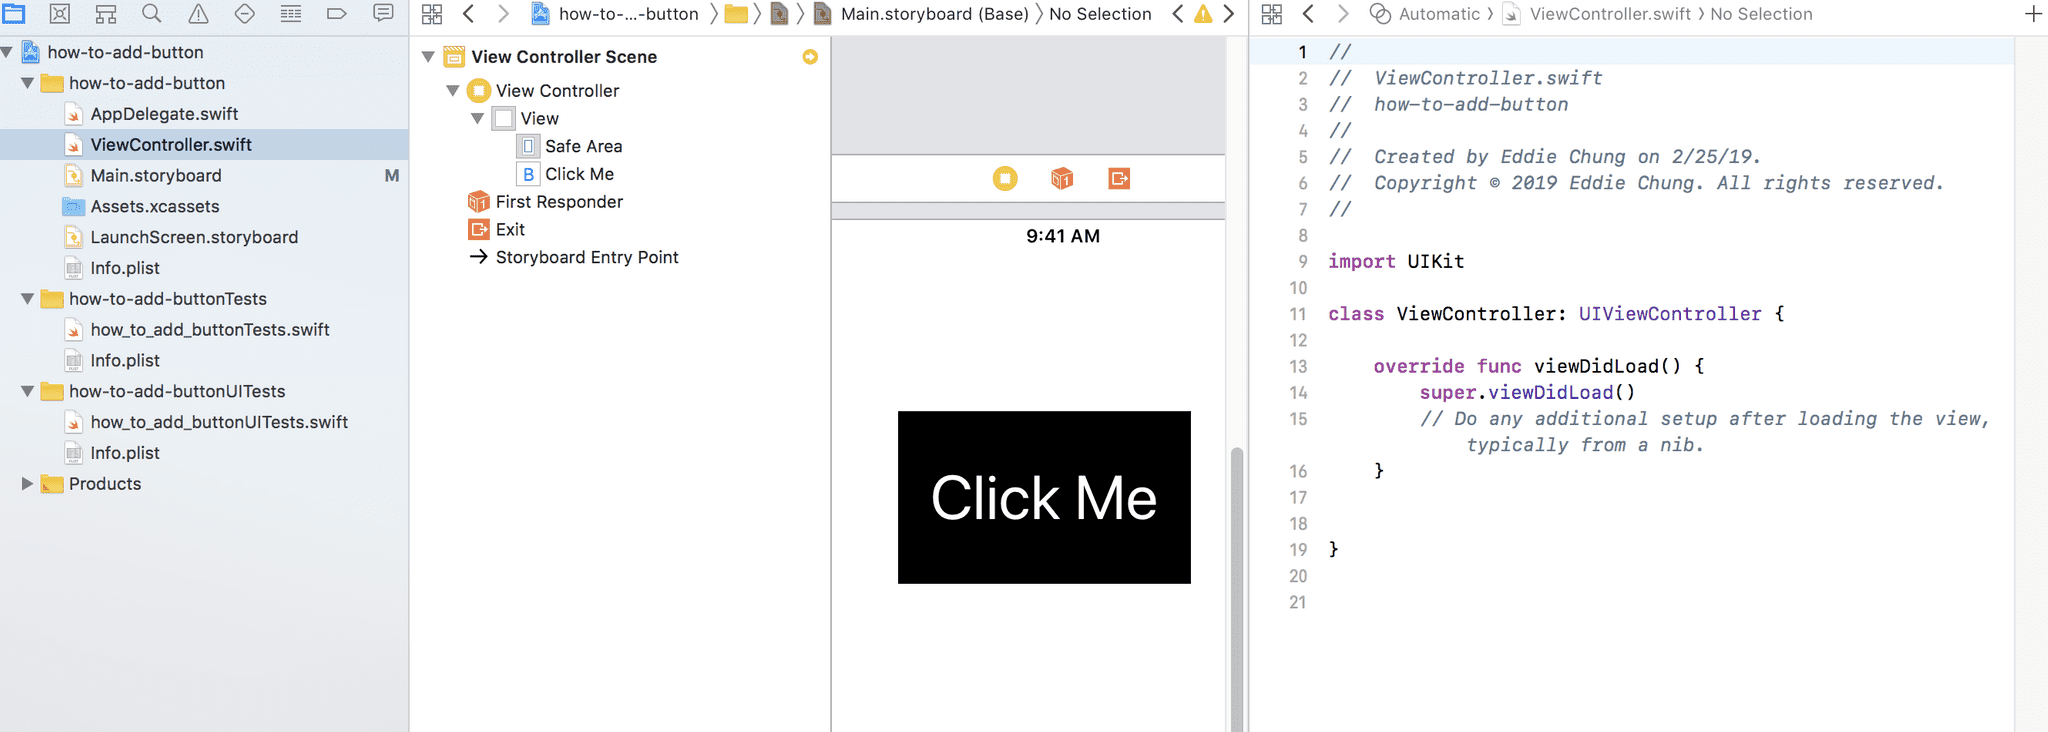
To create your own button IBOutlet, open up the ViewController.swift in your assistant editor. You can do this by holding Option on your keyboard and clicking the ViewController.swift file in your Project Navigator.
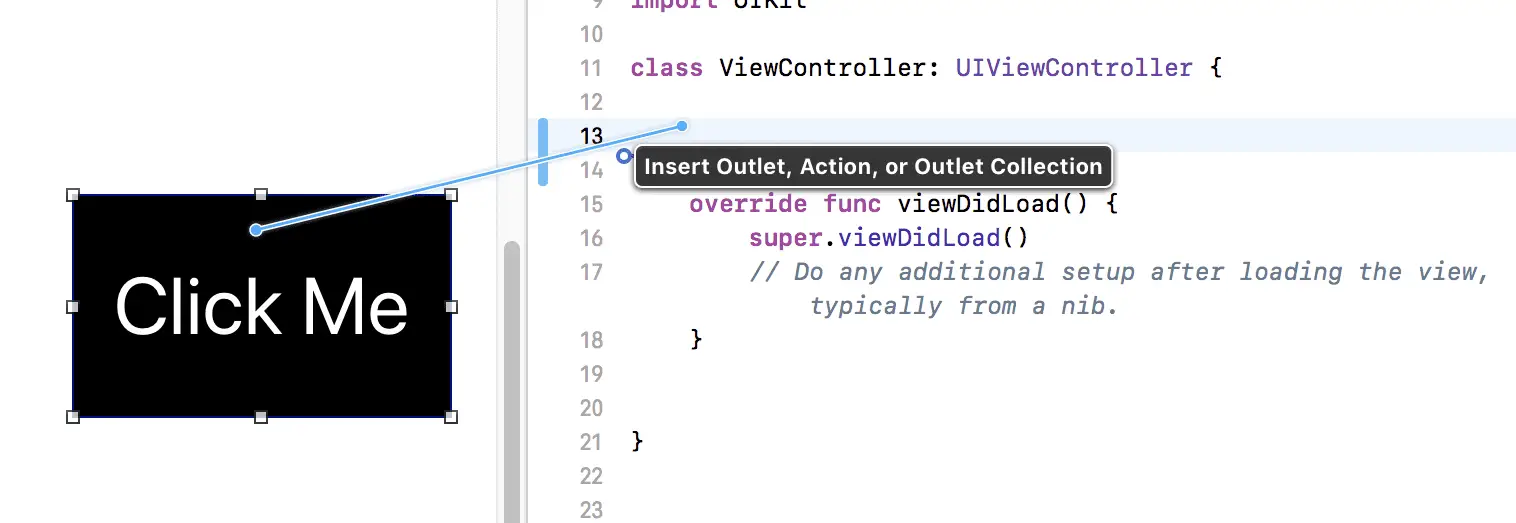
Now click on the button, hold CTRL and then drag it to your Swift file.
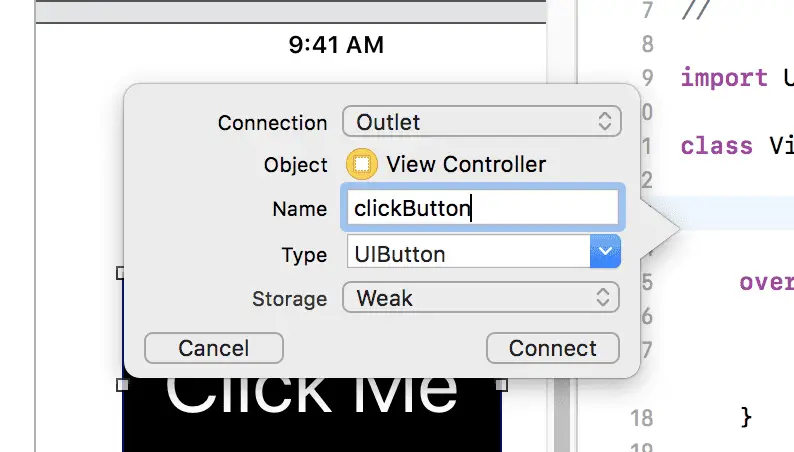
This will open an IBOutlet dialog. I will name mine button clickButton. Click connect to create the IBOutlet.
Now we can modify button properties in Swift code. For example to hide this button, I would write this code in viewDidLoad():
import UIKit

class ViewController: UIViewController {
    @IBOutlet weak var clickButton: UIButton!

    override func viewDidLoad() {
        super.viewDidLoad()
        clickButton.isHidden = true
    }
}
You can modify any of the properties in code such as: background color, font, size, image, button type and more.
If you want to learn more about all the different properties you can modify about a button, check out the Swift documentation here on UIButton.
IBAction to handle clicks
What if you want to execute some code when a button is pressed? You’ll need to create an IBAction for this. An IBAction is an interface builder method that is connected to a certain action of an object.
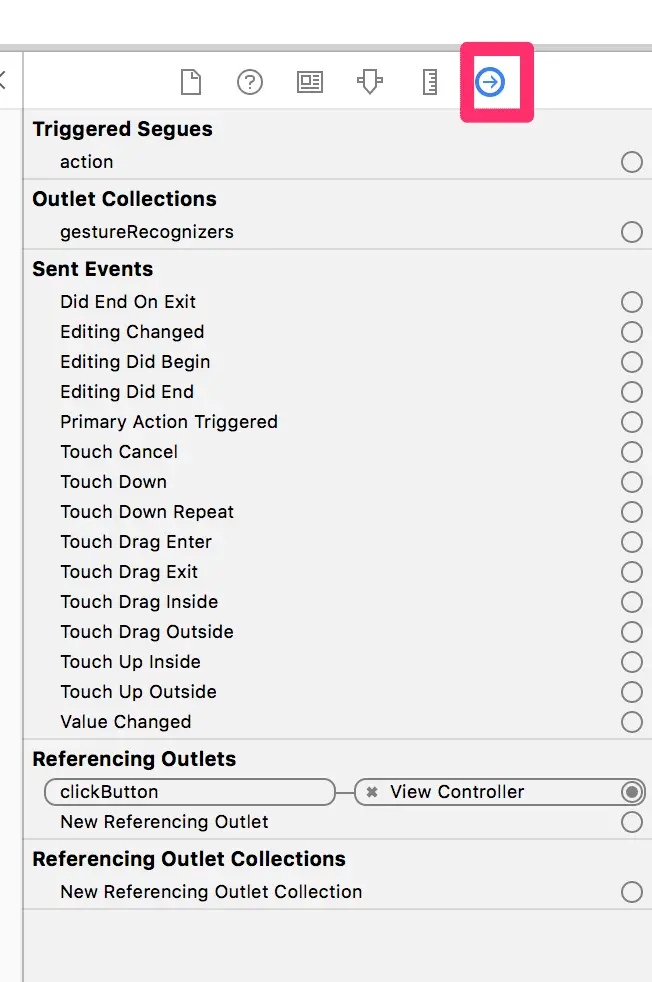
For our button, we can connect the touch up inside IBAction to our code. Open up the Connections Inspector on the right-hand pane or use the keyboard shortcut (CMD+Option+6). button_make sure your button is selected when you do this.
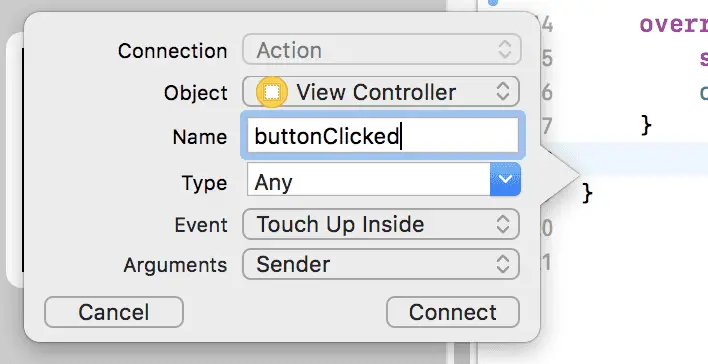
Here we see a list of different Sent Events that we can connect. For most cases with UIButton you’ll want to use the Touch Up Inside event. Drag the outlet into your code:
I’ll name this IBAction buttonClicked.
Inside this function, you can execute any code. For our example, we’ll just print to console.
@IBAction func buttonClicked(_ sender: Any) {
    print("Button Clicked!")
}
A common use-case for button is to change screens. Any Swift code can be executed in an IBAction.
Creating a button in the interface builder is simple and easy to do. Hopefully this tutorial enabled you to create buttons in your app. The next section will talk about creating a button purely in code without the use of the interface builder.
Programmatically with only code
If you’ve chosen to work only in code, you can also create a UIButton quite easily.
Here’s the Swift code to create a UIButton:
override func viewDidLoad() {
  super.viewDidLoad()

  let button = UIButton(frame: CGRect(x: 0, y: 0, width: 100, height: 50))
  button.setTitle(" Button", forState: .Normal)
  self.view.addSubview(button)
}
The x and y parameters will determine where the button is placed on the subview. The height and width are also set through the CGRect. The default color of the button text is white, so you might not be able to see the button if you have a white background.
You can modify all the button properties in code to your liking.
Modifying button styles in code
Let’s go over some common button style changes in code.
To set the title color you can use the setTitleColor method:
button.setTitleColor(.red, for: .normal)To set the background color of a button, you can use the backgroundColor property.
button.backgroundColor = UIColor.blackTo change the font of the title, you can use an attributed string.
let buttonText = "ButtonText"
let font = UIFont.systemFont(ofSize: 20)
let attributes = [NSAttributedString.Key.font: font]
let attributeString = NSAttributedString(string: buttonText, attributes: attributes)
button.setAttributedTitle(attributeString, for: .normal)
To learn more about the different properties you can set in code, check out the official Swift docs.
Handling clicks
Handling clicks is important. To create a handler in code, we’ll do the following:
button.addTarget(self, action: #selector(buttonClicked), for: .touchUpInside)This code adds a target to the selector buttonClicked for the action .touchUpInside. Touch up inside is the most common one you’ll use for button clicks. You can read about all the other touch events here:
Now we need to create a method buttonClicked:
@objc func buttonClicked(_ sender: Any) {
    print("Button Clicked!")
}
You’ll notice that we need to put @objc prefix in front of our function. This is necessary and Apple says the following regarding it:
Apple on @objc
In Objective-C, a selector is a type that refers to the name of an Objective-C method. In Swift, Objective-C selectors are represented by the Selector structure, and can be constructed using the #selector expression. To create a selector for a method that can be called from Objective-C, pass the name of the method, such as #selector(MyViewController.tappedButton(sender:)). To construct a selector for a property’s Objective-C getter or setter method, pass the property name prefixed by the getter: or setter: label, such as #selector(getter: MyViewController.myButton).
Of course, you can run whatever code you want inside this function. We’re just doing a simple print for the purposes of this tutorial. Common actions including pushing a new view controller or modifying variables.
Related Questions
How do I add an image to a button?
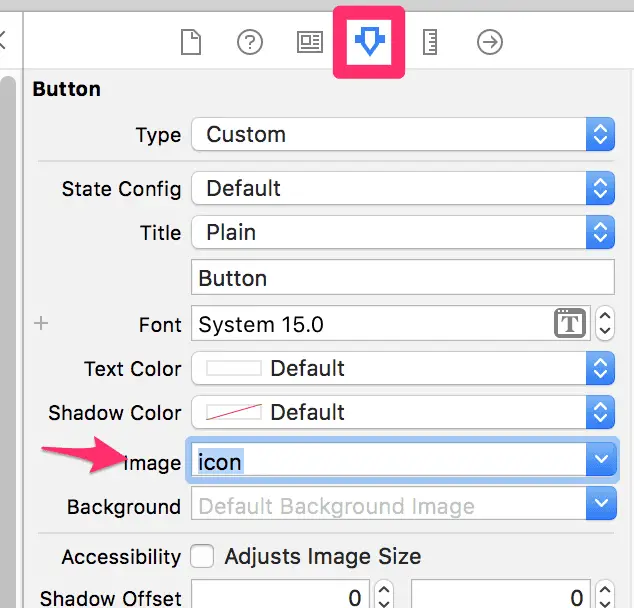
You can add an image to a button in the interface builder. Open up the Attribute Inspector pane and modify the image property:
You can also do this in code like so:
let image = UIImage(named: "image") as UIImage?
button.setImage(image, for: .normal)
self.view.addSubview(button)
How to disable a button?
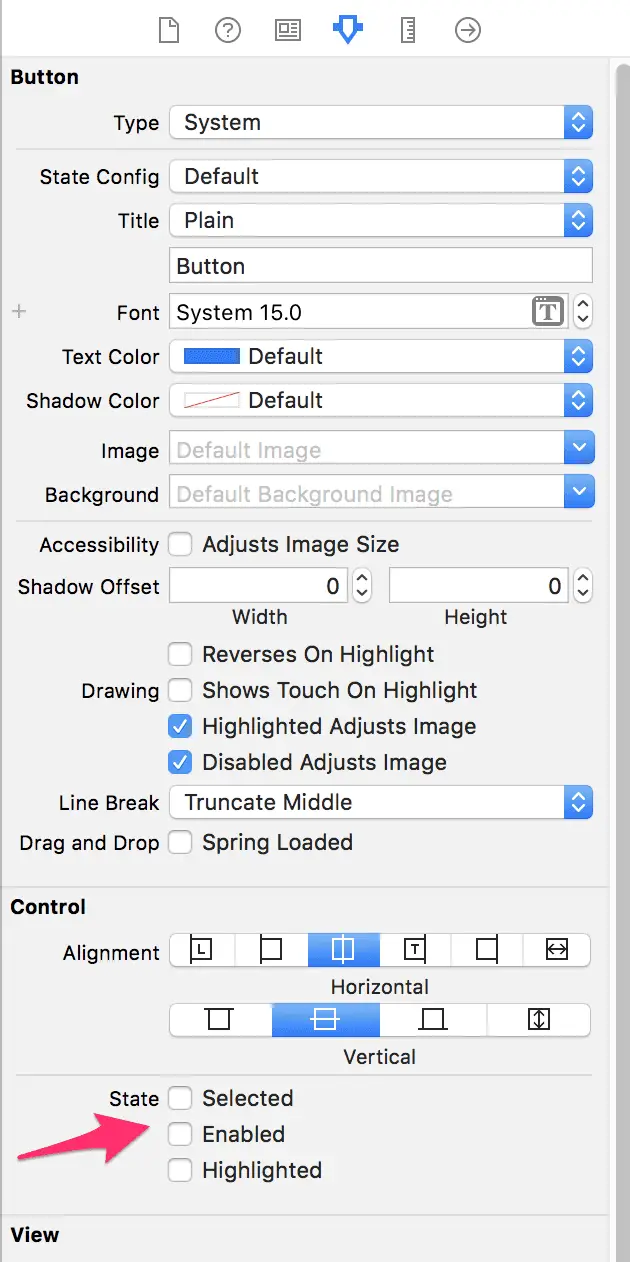
To disable a button in Swift, set its isEnabled property to false.
button.isEnabled = falseYou can also uncheck the checkbox in the Attributes Inspector
Eddy Chung
Similar Posts
- How To Change Text Or Title Of UIButton in Swift Programmatically
- How To Change UI Button Image In Swift Programmatically
- How To Make A Phone Call In Swift
- How To Set Back Button Text In Swift
- Best Backend For iOS App
- 10 Steps To Become An iOS Developer With No Experience
- Build An Alert Dialog Box With Text Input In Swift
- The Best Tools For iOS Developers
- Best Programming Languages To Learn For Mobile App Development
- Solution: Can't Update Xcode From App Store, Hangs Indefinitely

The Complete iOS App Development Bootcamp
Disclosure: This website may contain affiliate links, meaning when you click the links and make a purchase, we receive a commission.
