Hello (SwiftUI) World - Beginner Tutorial For SwiftUI
Hello SwiftUI World!
In late 2019, Apple released SwiftUI, a new way of building user interfaces for iOS apps.
Many developers, including myself, are super excited about it.
I’ve already written an article about whether you should learn SwiftUI or Storyboards.
In this post, I’ll cover some of the basics of iOS development - with SwiftUI.
Starting A SwiftUI Project
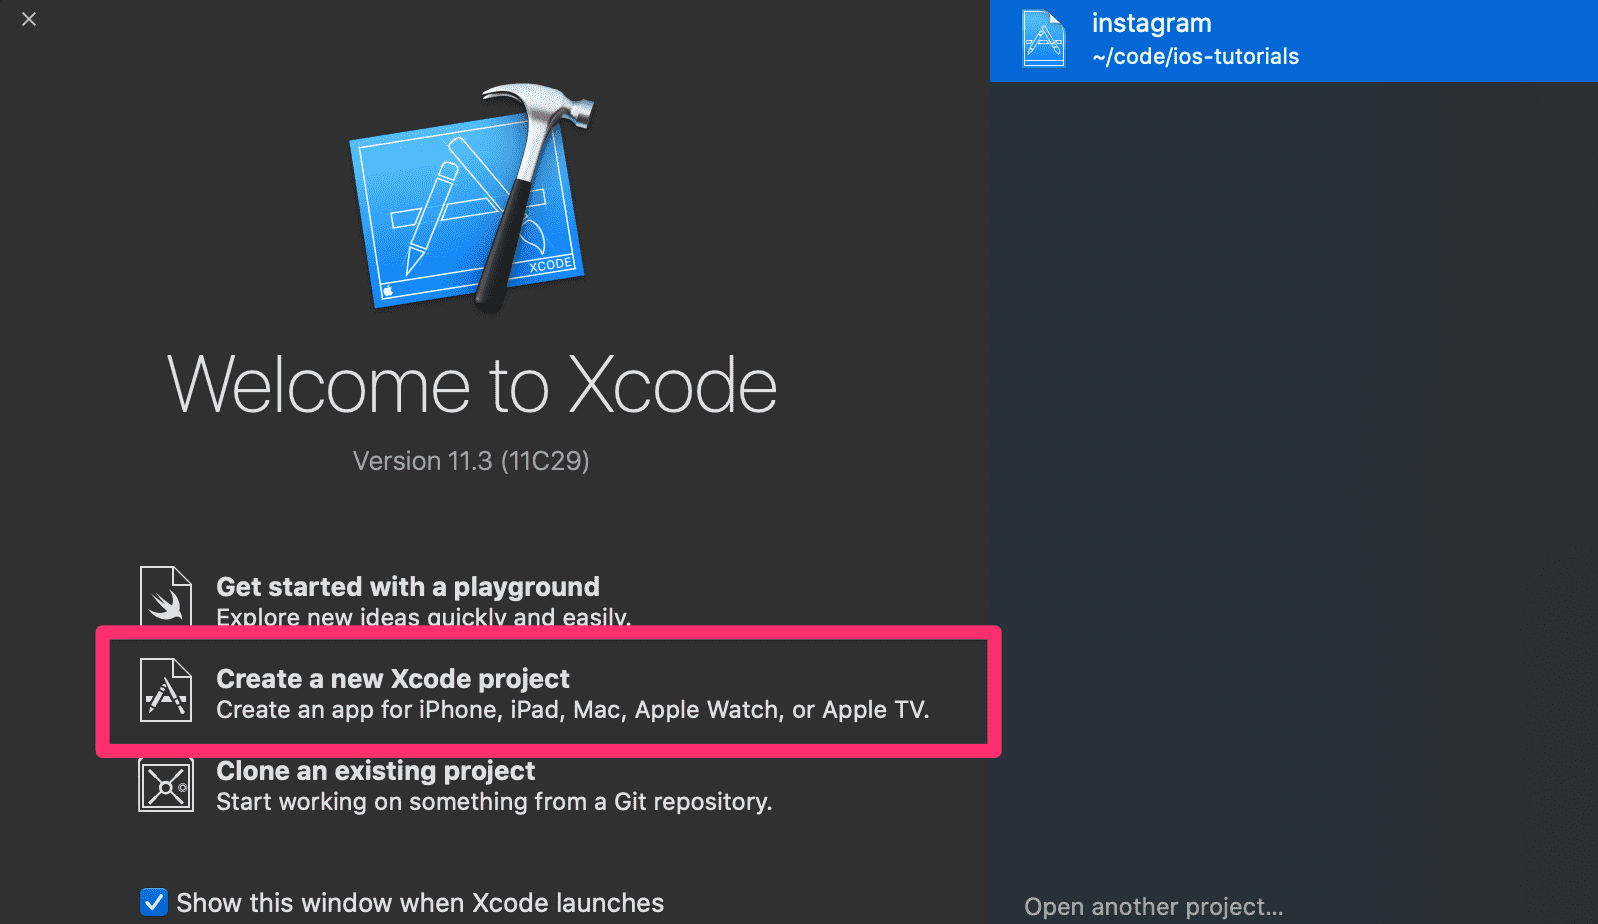
Open up Xcode and click Create a New Xcode Project.
Don’t have Xcode installed? Check out my installing Xcode video.
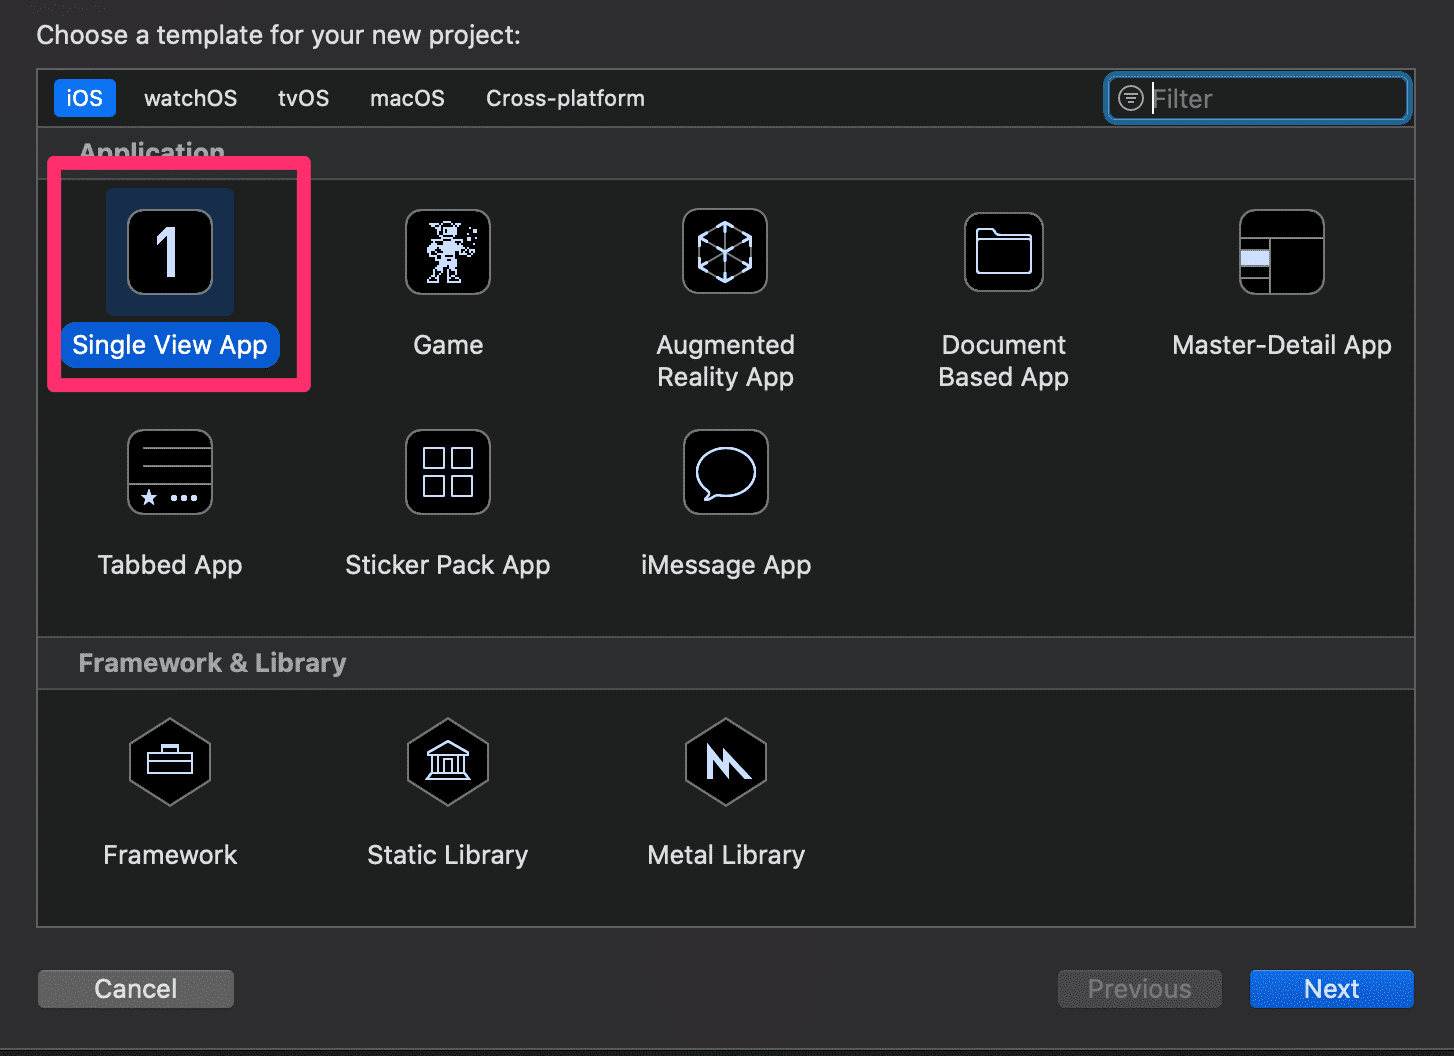
Select Single View App.
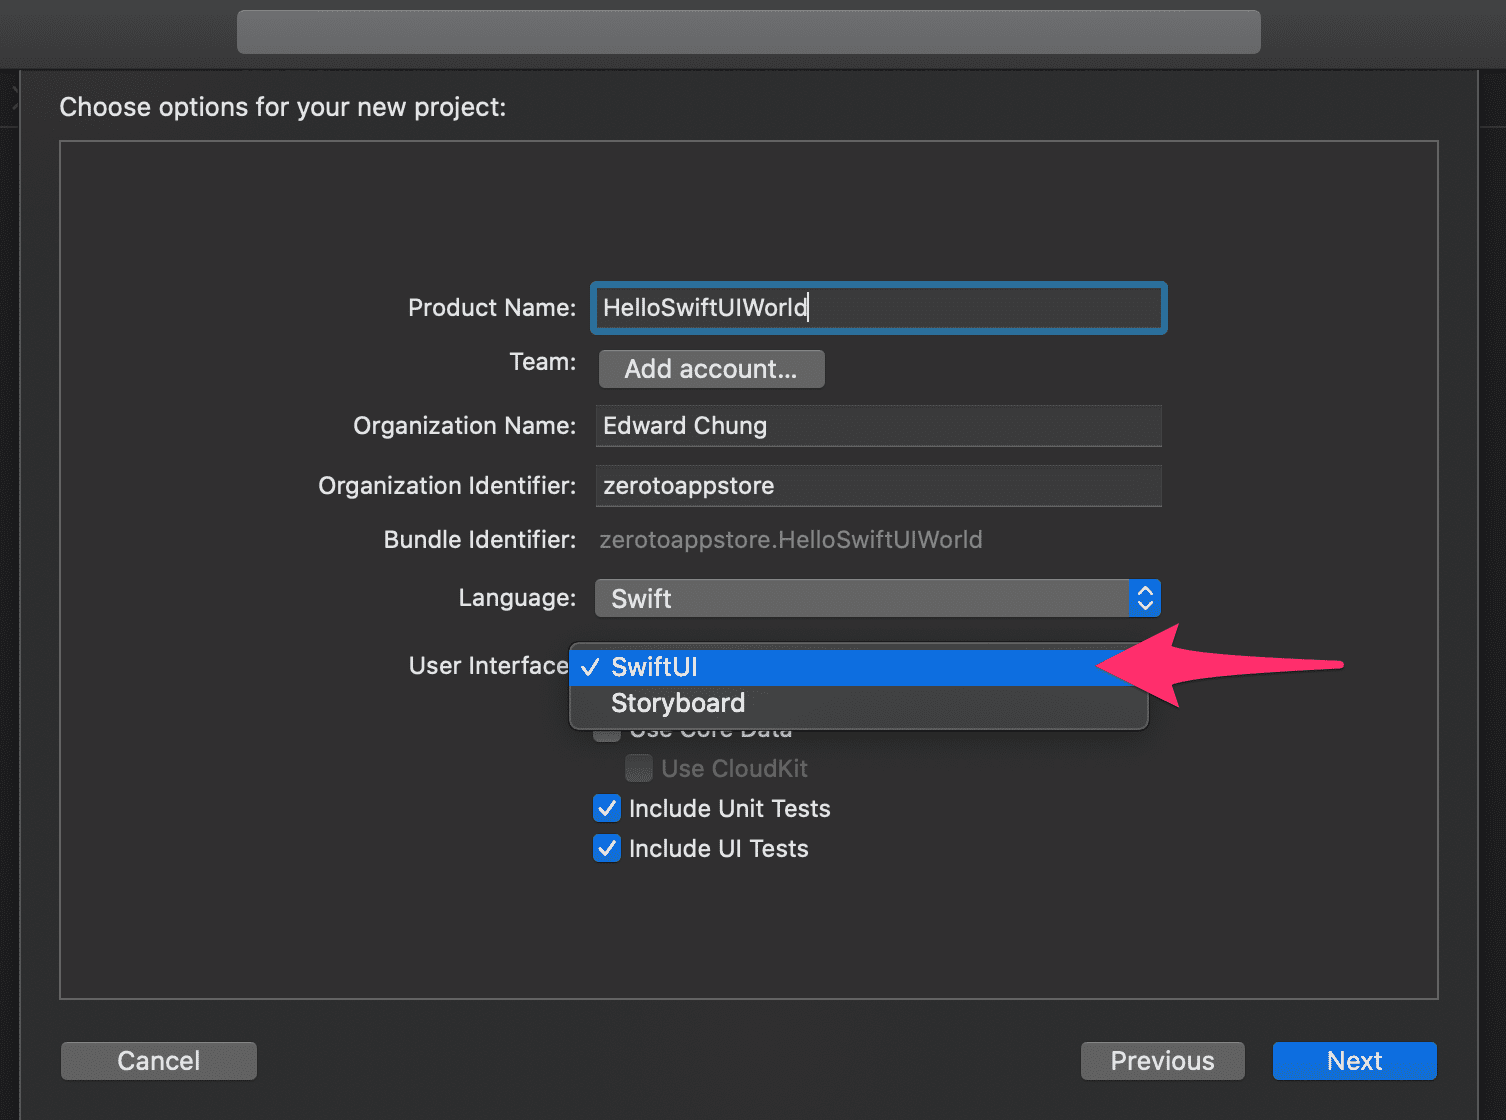
Hit next and fill in Product Name, Organization Name, and Identifier.
Be sure to select Swift as your language and SwiftUI as your user interface.
If SwiftUI is not an option, double-check you are running the latest Xcode version. You’ll need Xcode 11 or higher for SwiftUI.
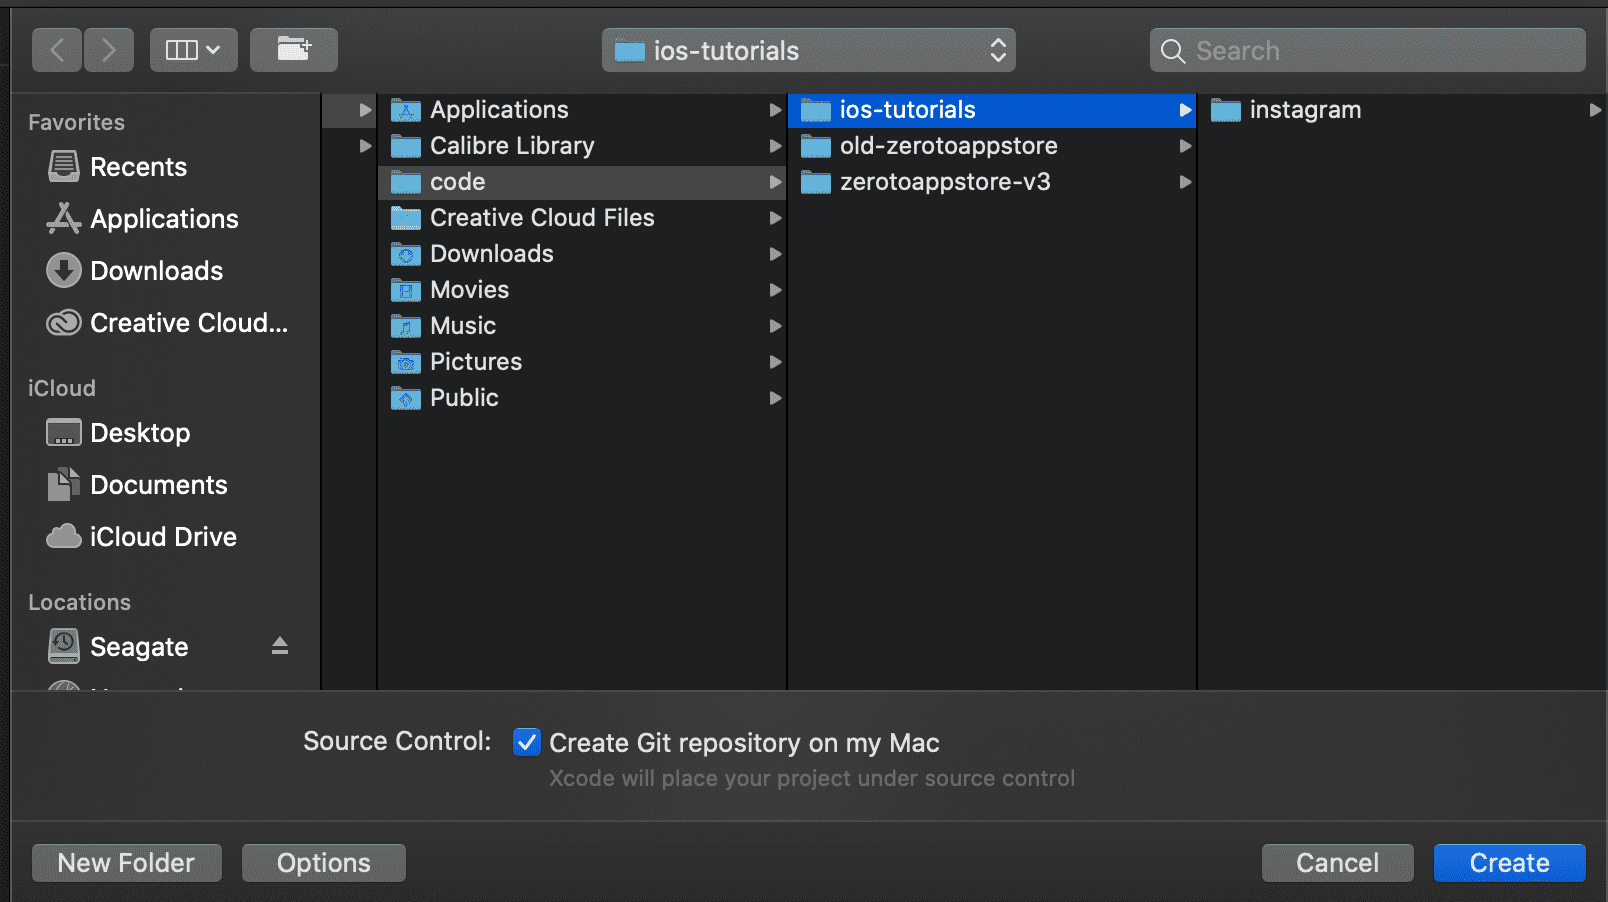
Hit next and choose where to save your project. Anywhere you’ll remember is fine.
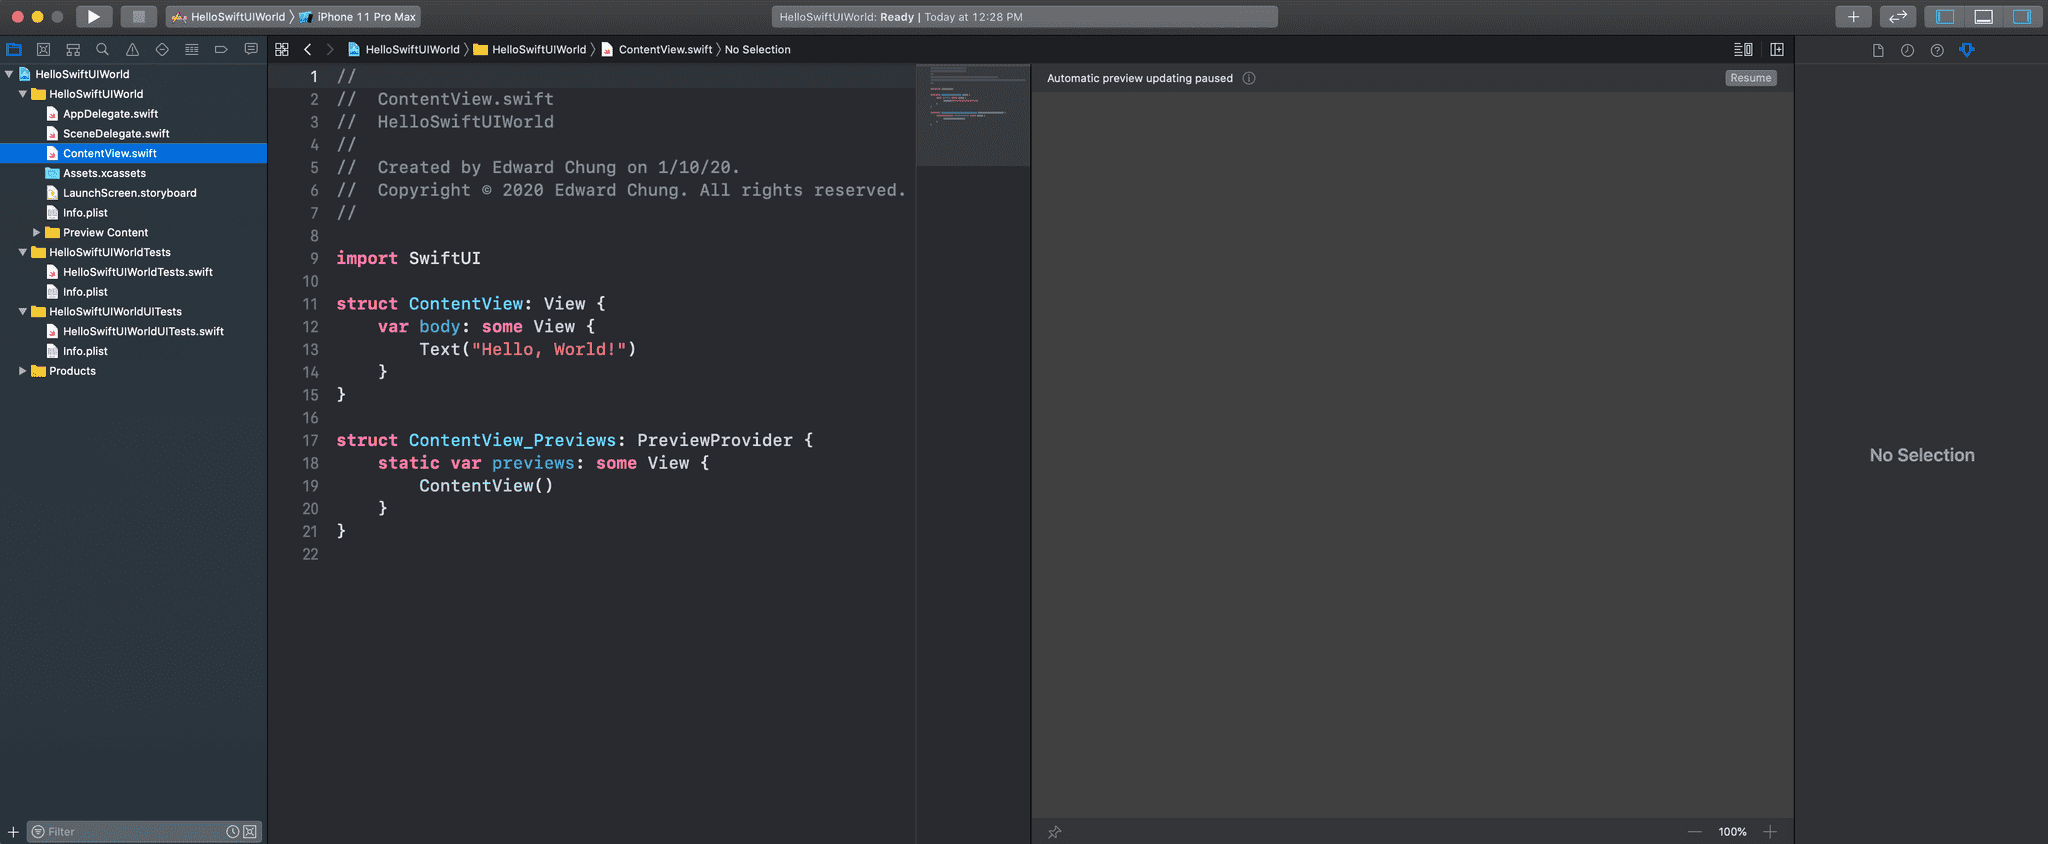
Hit create and you’ll be greeted with this project in Xcode:
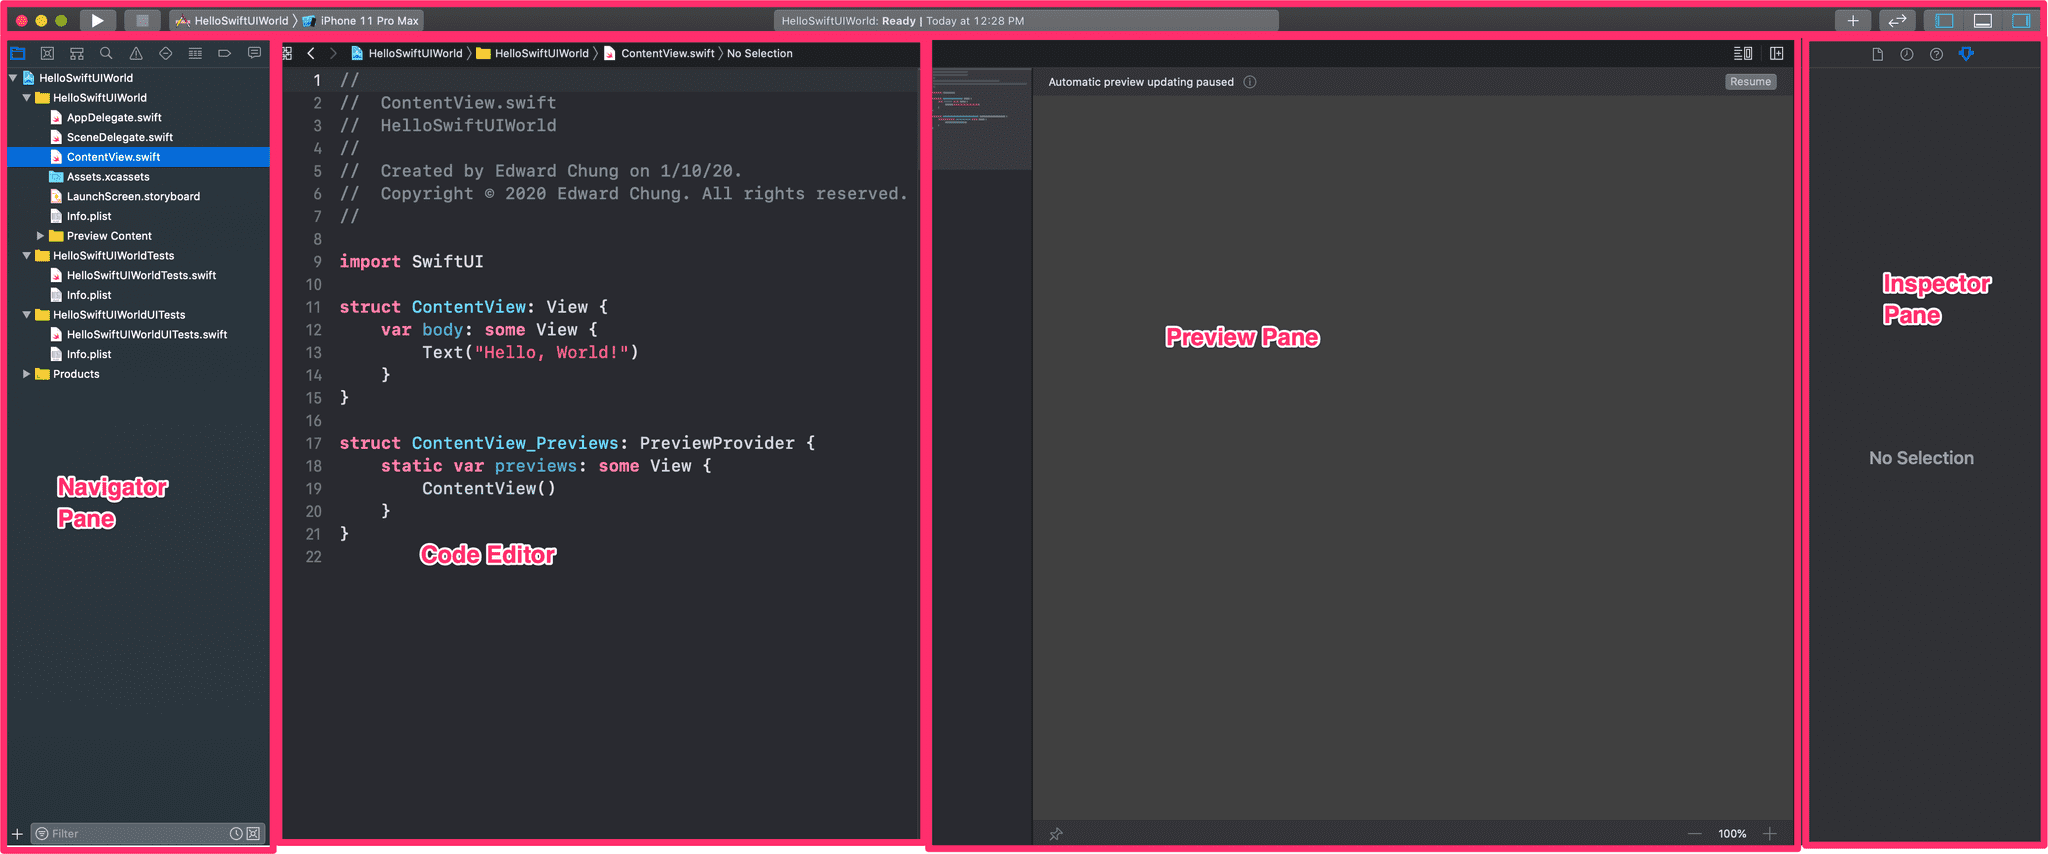
Let’s go over some of the different sections of Xcode.
Toolbar
The toolbar is the top bar in Xcode.
In the top left of the toolbar, you’ll see a play button and a stop button.
These buttons you’ll use often to run or stop your app.
Next to it, you’ll see the scheme that’s active and the device you’re going to be running on.
Schemes are just build settings for your iOS app.
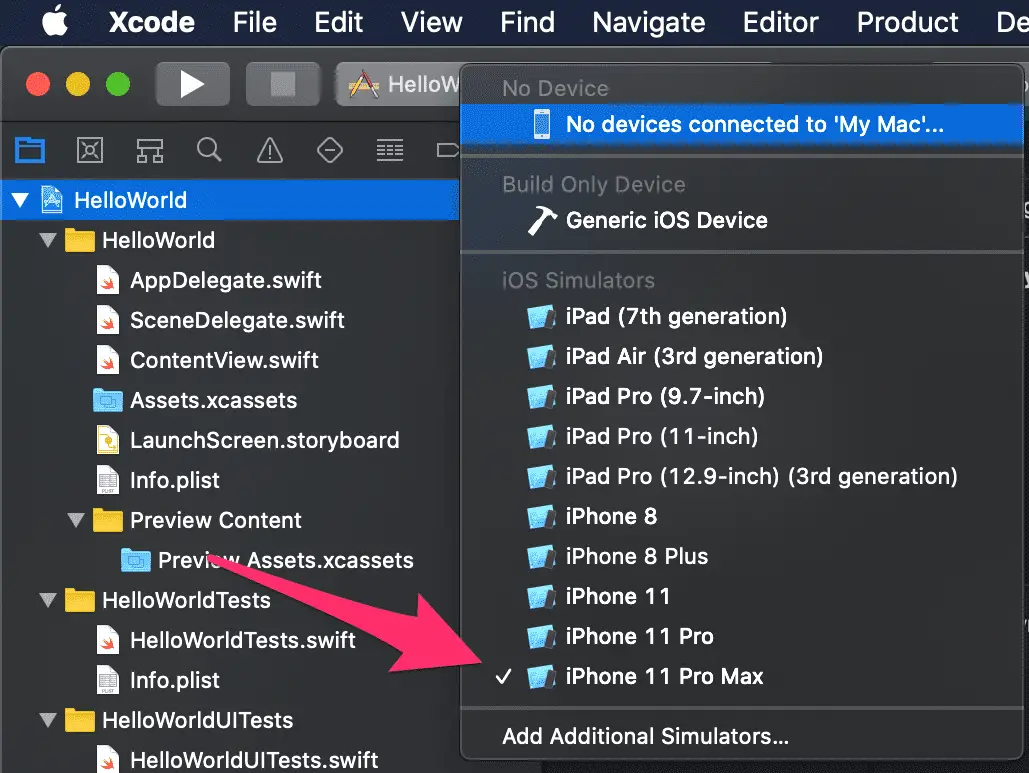
If you select the device dropdown, you’ll be greeted with a bunch of simulators you can test your app on.
On the right, you’ll see a plus sign which opens the object library. Here’s a bunch of UI elements and code snippets you can add to your project.
Next to that, you’ll see a code review button, this is mostly if you’re working in teams and have to review your teammate’s code.
On the far right, you’ll see three buttons that hide and display different panes.
If you can’t find a certain pane, be sure to check here to ensure it’s visible!
Navigator Pane
The Navigator pane is on the far left of Xcode.
Here’s where you’ll see various tabs. Each of these tabs allows you to browse different files, errors or other information.
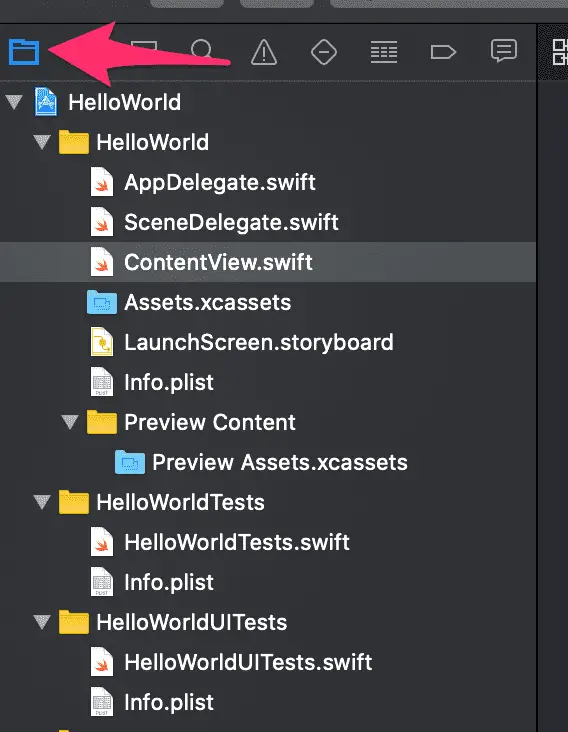
For now, let’s just take a look at the Project Navigator tab.
Project Navigator
The Project Navigator is the tab you’ll be using most often in your Navigator Pane.
Here you’ll see all the files in your project.
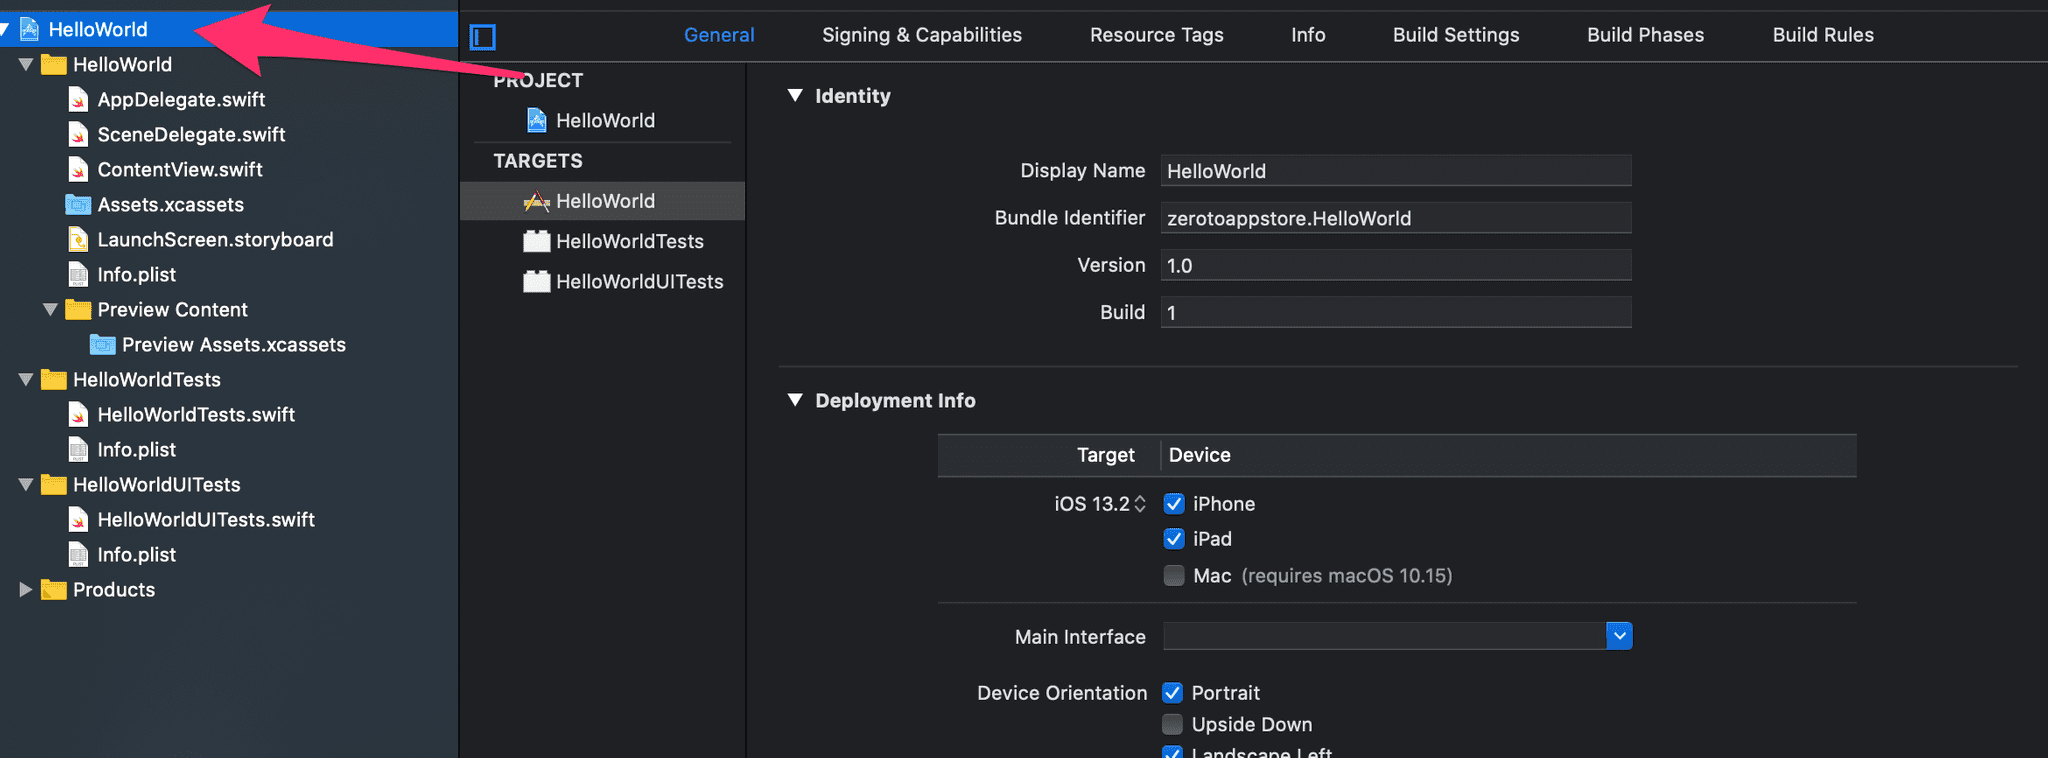
At the very top of this navigator you’ll see your Project Settings.
Here you’ll be able to modify high-level settings for your iOS app.
This includes information such as the name, minimum deployment version (for example iOS 13+), the App Icon and more.
Generally, you won’t modify these settings too often, only at the beginning and end of your project.
Underneath your project name, you’ll have a folder that has the same name as your project.
Here’s where most of your source code lives and where you’ll be spending the most time.
The first two files are the AppDelegate.swift and SceneDelegate.swift.
This is where you’ll write code that you want to execute when your app launches or your scene launches.
A single app may have multiple scenes. For example, check out this split-screen note app. Two scenes in one app.
Next, you have your content view, this is the first screen that loads in your iOS app. Right now is it just says “Hello World”.
Assets.xcassets is where you’ll store images, icons, and other graphic assets.
LaunchScreen.storyboard is how you design your launch screen.
Info.plist describes permissions (for example: location, contacts, phone call) and other settings for your app.
Preview content is where you’ll add assets that are required for your previews to run in Xcode.
The next two folders are where you’ll write tests HelloWorldTests and HelloWorldUITests.
Lastly, the Products folder is where your finished products live, you won’t be using this too often.
Code Editor
Open up ContentView.swift and you’ll see the code editor.
Here’s where most of your work will be done.
It’s where you’ll write SwiftUI code and regular Swift code.
Above it, you’ll see the jump bar.
The jump bar allows you to navigate through different parts of your project, even if your project navigator is closed.
Preview Pane
To the right of the code editor, you’ll see a preview pane.
Note that you’ll only see this when a SwiftUI file is open in the code editor.
Here’s where you’ll see a live preview of your application.
This pane makes development so much faster - trust me, I’m so glad Apple added this.
At the top, you may see a Resume button if your preview has been paused.
Clicking resume will tell Xcode to build the preview.
You should see a hello world app like this:
You can do more than just preview your app in this pane, if you hold command + click on an element, you’ll see a menu.
Here you can add different things and it will modify your code to match!
Lastly, there’s a play button here in the bottom right of the preview app.
If you hit the play button, the app will be in “Live Preview” mode, essentially running your app but still enabling you to update it via code.
Inspector Pane
The far right-hand pane is the inspector pane.
If you noticed, you can modify your view from this pane as well!
Click on the Text in your view and then select a new font size - like Large Title.
Now you’ll notice the text will increase in size and your code will be updated.
You can change the color as well, green for example, and you’ll notice the same thing.
Modify The Text
Let’s modify our text in the code.
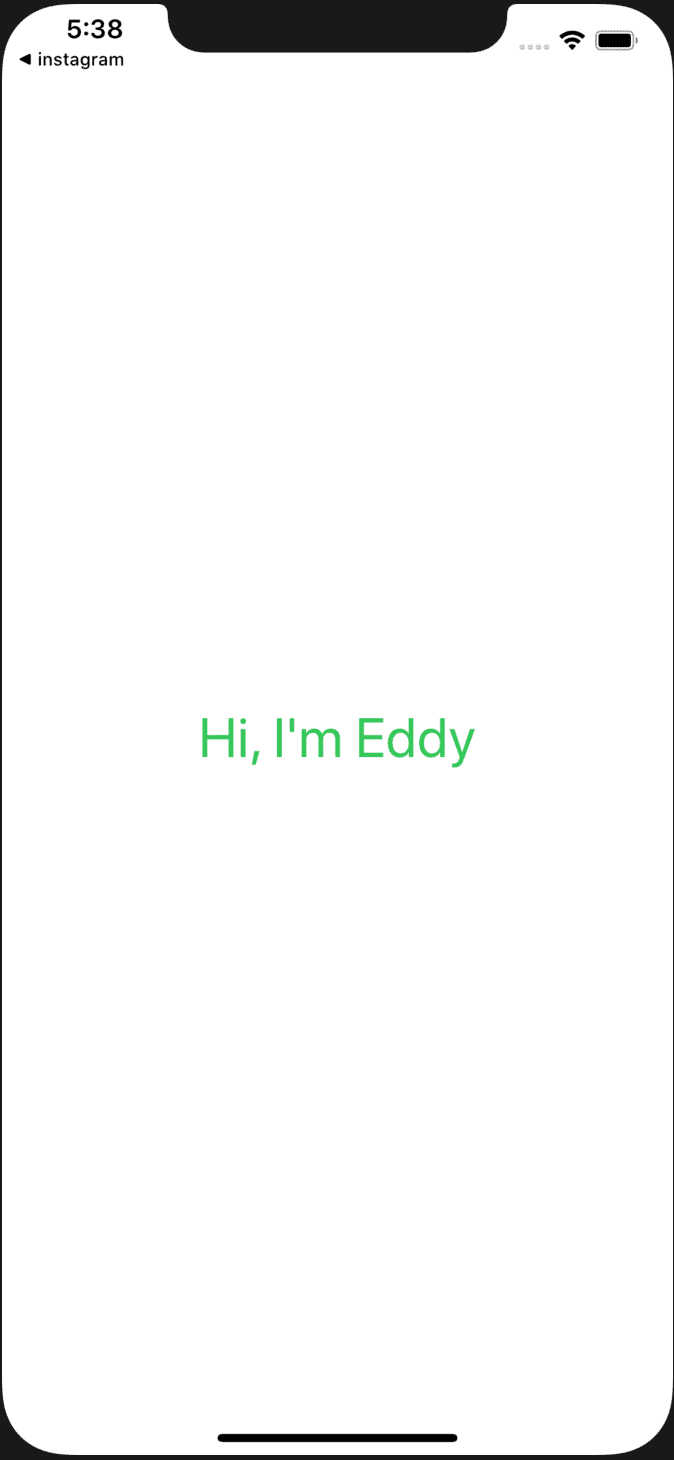
Change the “Hello World” text to anything you’d like, I’ll use “Hi, I’m eddy”.
Notice that your preview window will update.
Run Your Application
The last step is to run your application.
If you have an iPhone you can plug it into your computer now.
Be sure to unlock it and select “Trust” when prompted on your phone.
If you don’t have an iPhone, don’t worry, you can run your fresh new application on a simulator.
Select the device you want to run on from the drop-down menu.
And then hit the play button!
Now you’ll have a SwiftUI app running on your phone or simulator.
Eddy Chung
Similar Posts
- How To Make an iOS App For Beginners - Lesson 1 Hello World
- 10 Steps To Become An iOS Developer With No Experience
- Best Programming Languages To Learn For Mobile App Development
- Can you build an iOS app without an iPhone or iPad?
- Can I Develop iOS Apps On Windows?
- Colors & Font Styles In Xcode - Lesson 2
- Explanation & Solution for 'fatal error: unexpectedly found nil while unwrapping an Optional value'
- How long does it take to learn iOS development?
- How To Make Gmail iOS App in Swift
- How To Make An iOS Game - Beginners Tutorial

The Complete iOS App Development Bootcamp
Disclosure: This website may contain affiliate links, meaning when you click the links and make a purchase, we receive a commission.
