How To Make Spotify Player iOS App in Swift
Spotify is an amazing music streaming service. Millions of artists and songs can be streamed through their iOS app.
The streaming service has over 200 million monthly active users. The user interface design is beautiful and its one of the few apps I use on a daily basis.
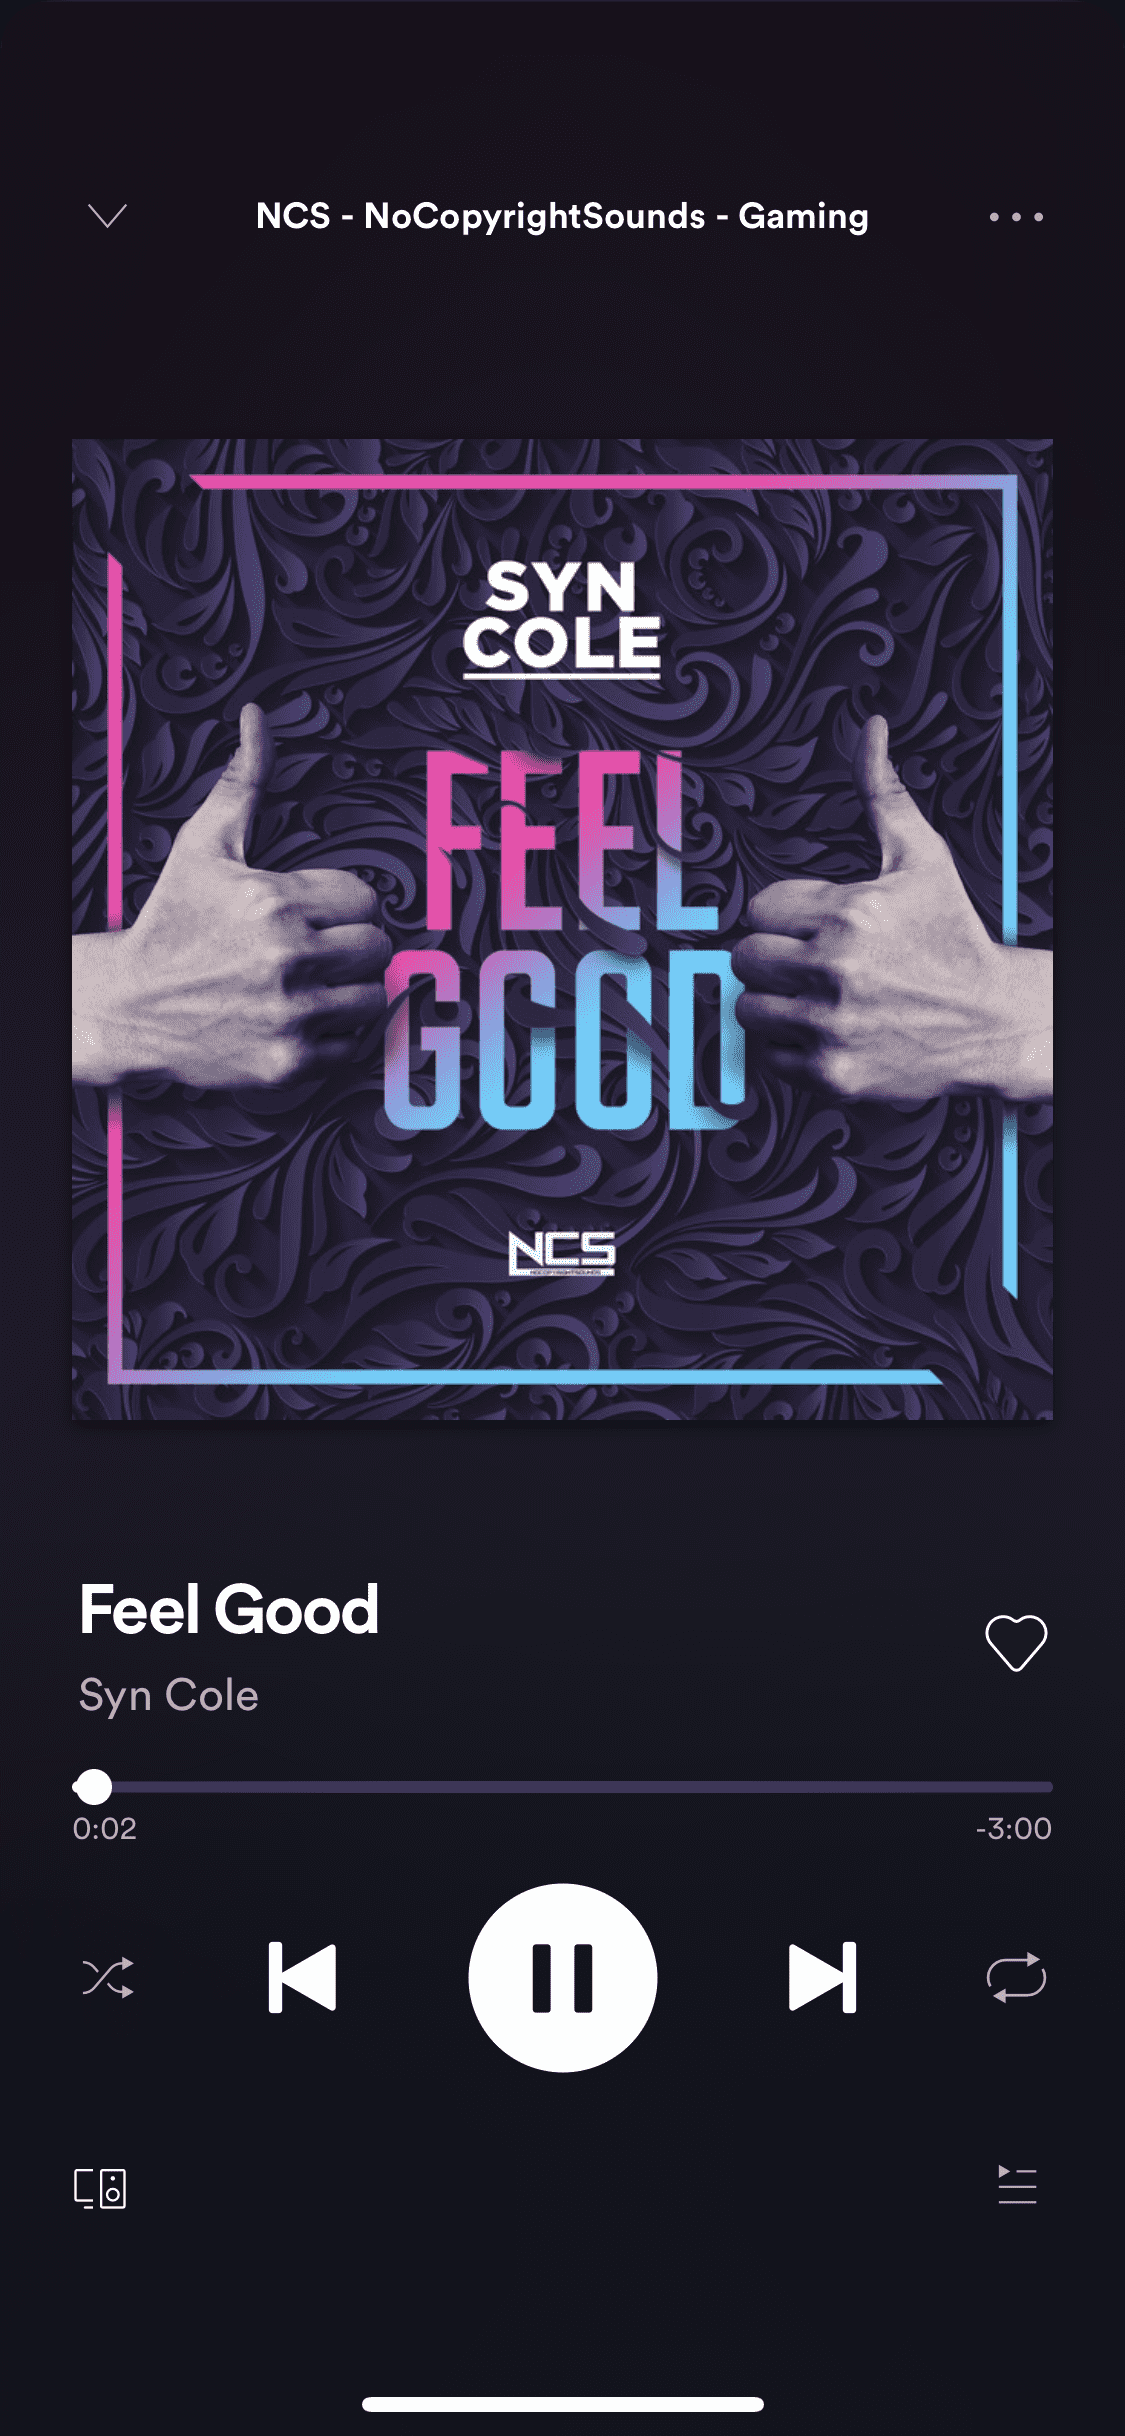
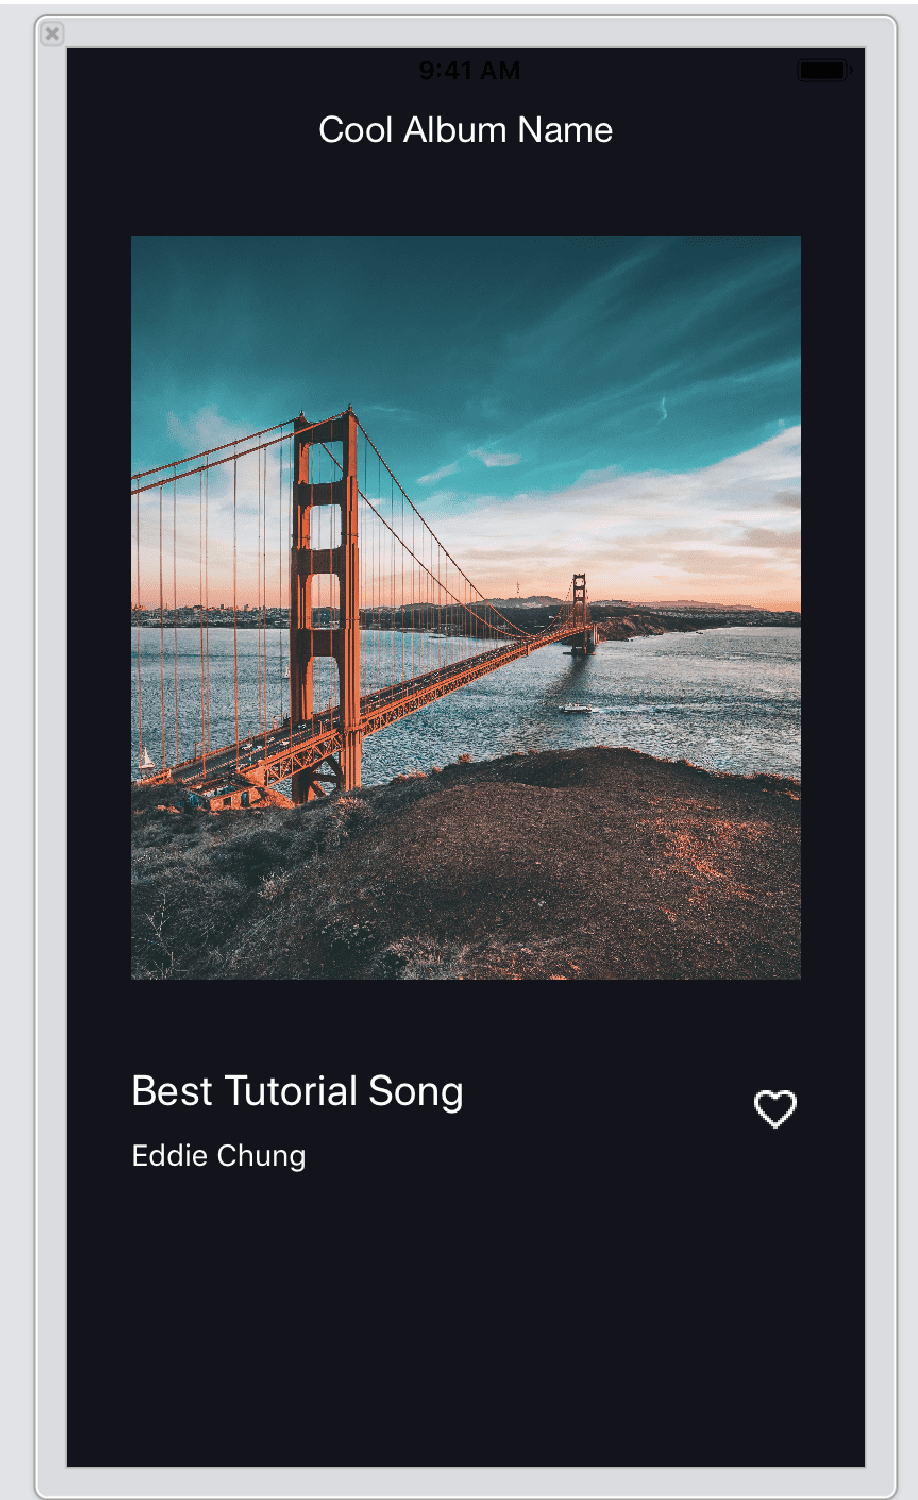
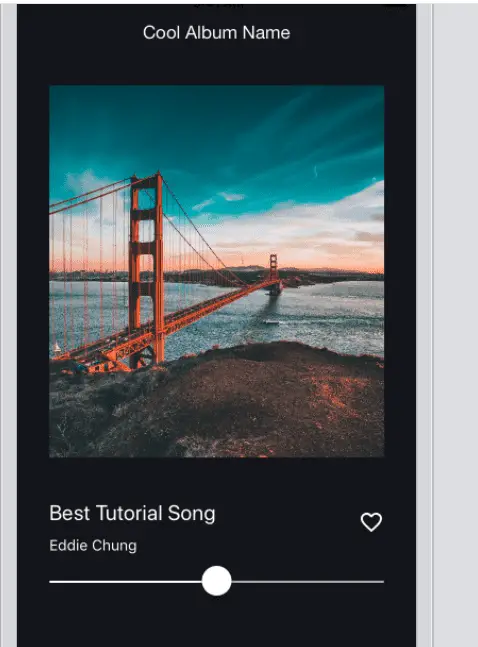
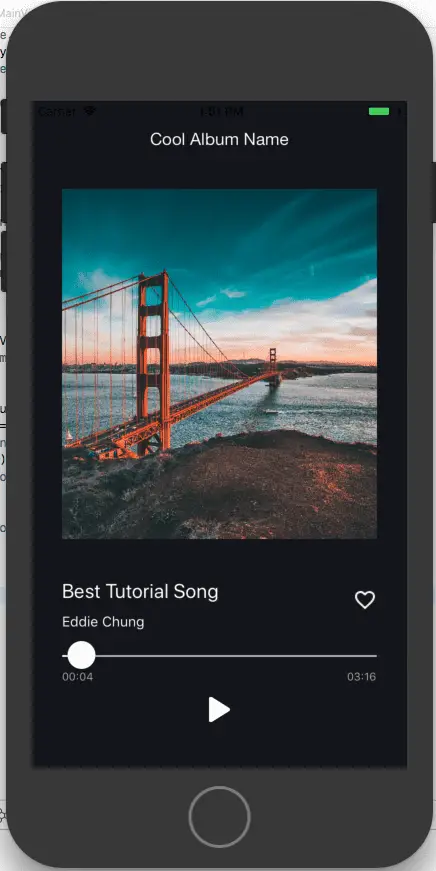
Let’s take a look at how to build their player screen which I use regularly. In this tutorial you’ll learn how to build this screen:
Getting Started
I recommend downloading the starter project here or you can create a new project from blank in Xcode. If you start your own project from blank in Xcode, read this article on how to remove storyboards.
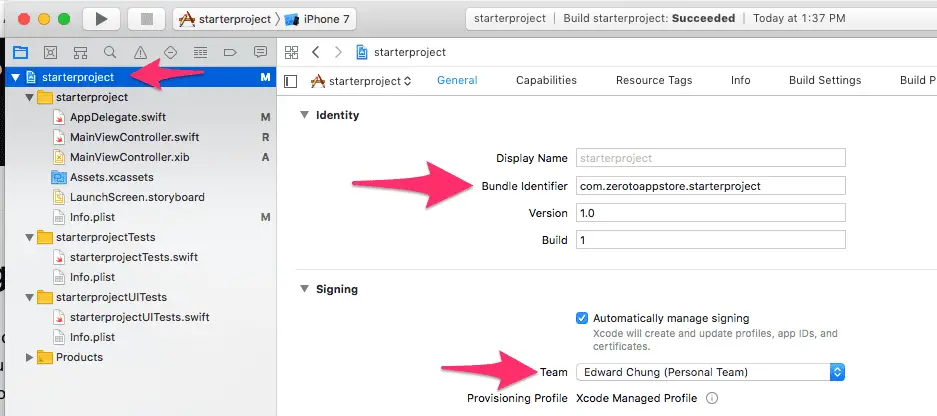
Change the bundle identifier to something unique.
Next select your preferred development team (personal for most people).
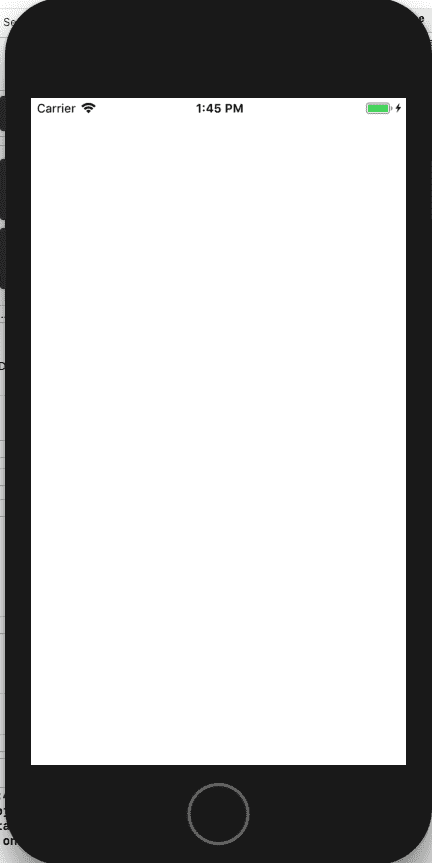
Run and build your app, it will look like this:
This app currently doesn’t do anything. We’re going to be building each of the controls step by step.
User Interface Elements
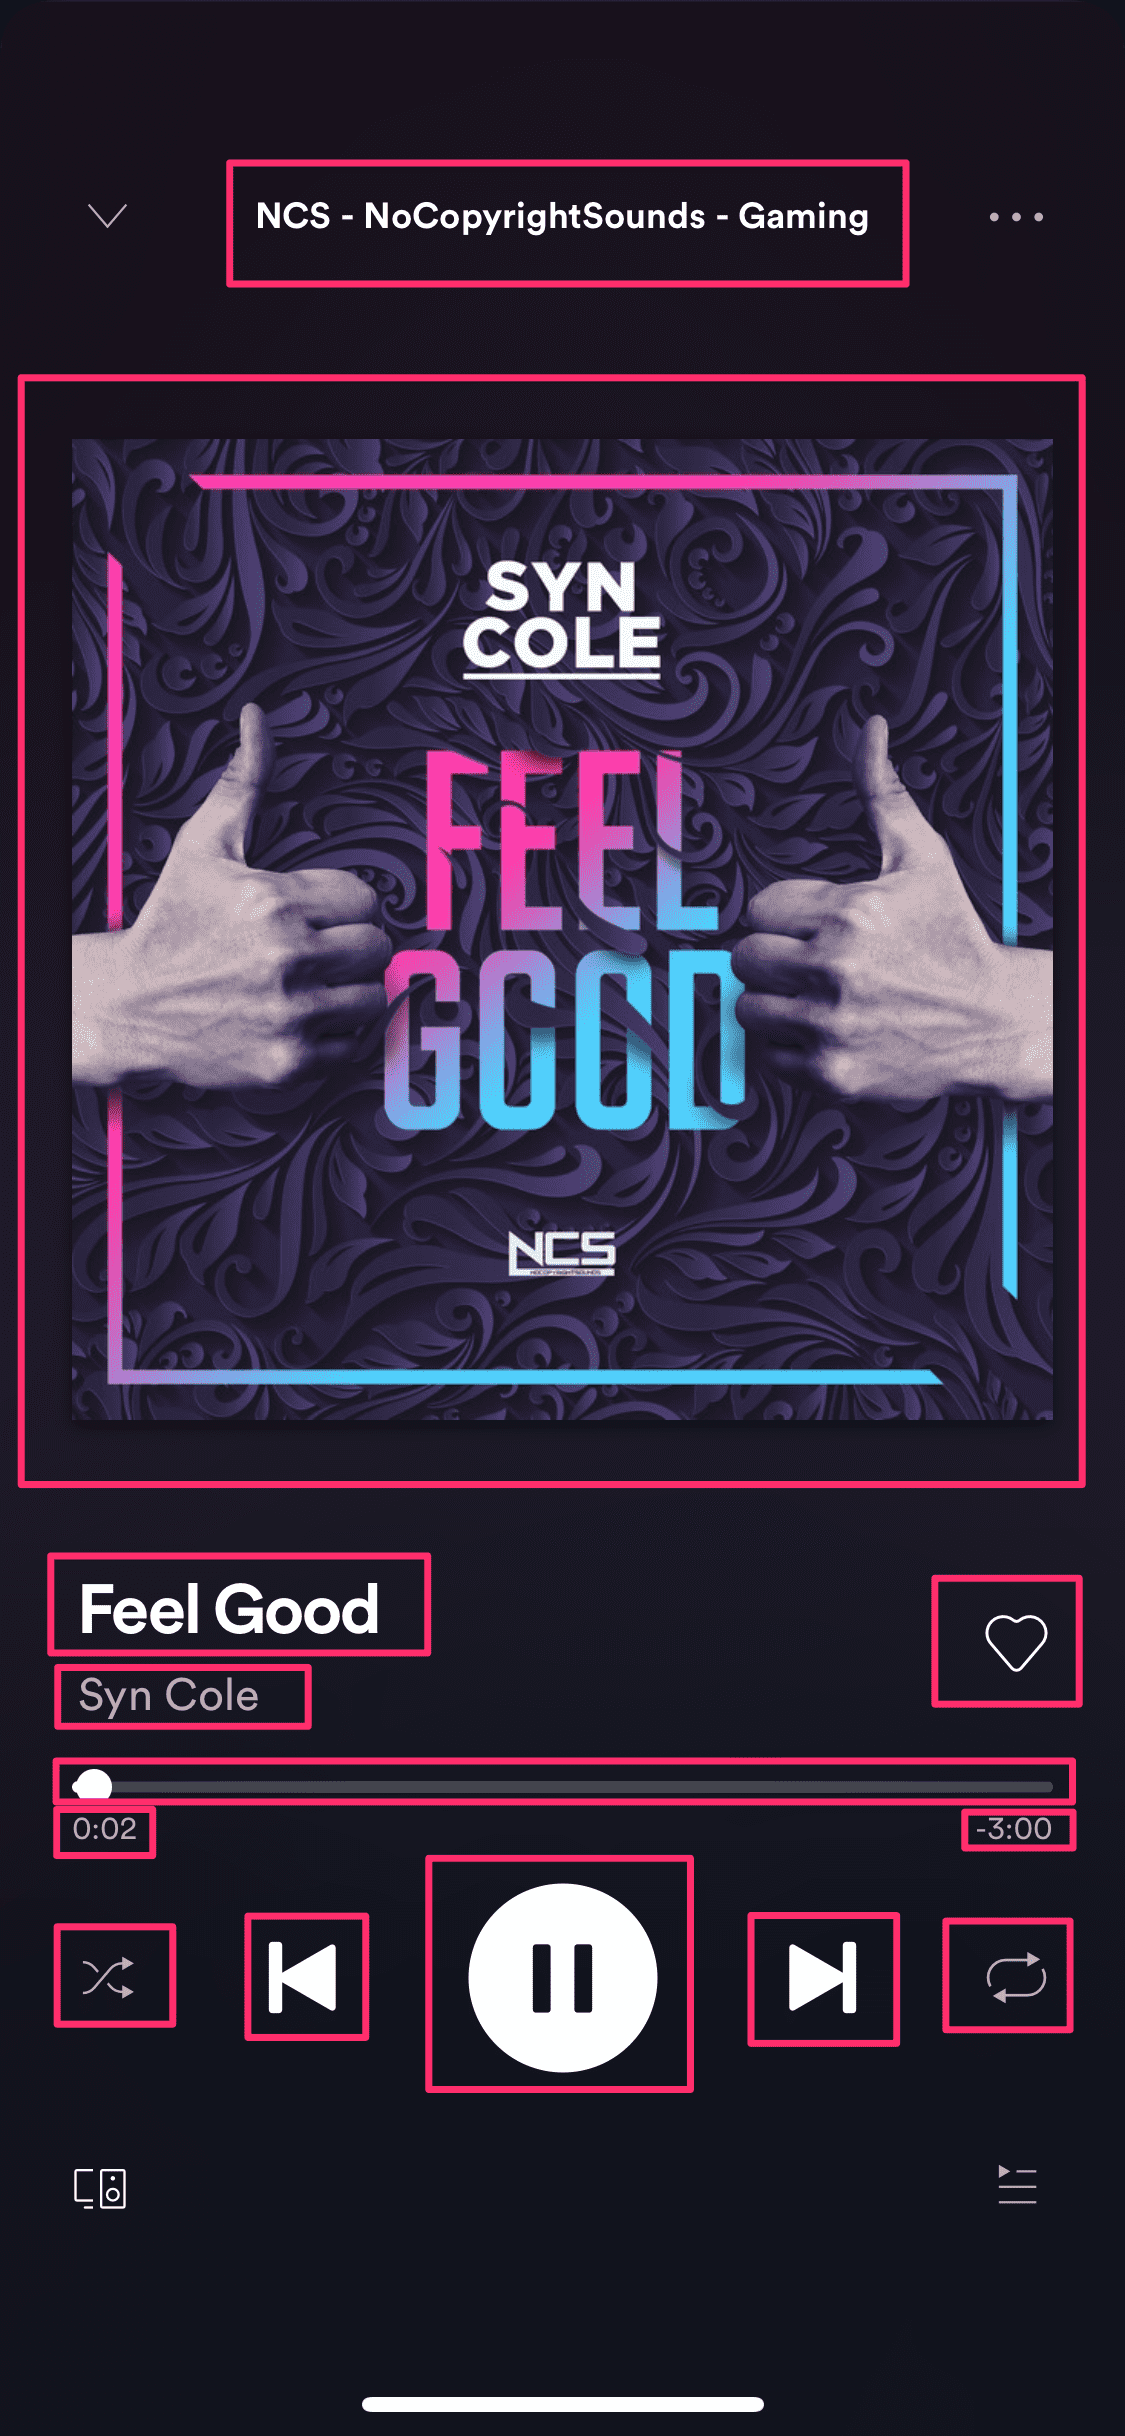
In the above screen shot, I’ve highlighted the screens we’re going to build in this article. The remaining elements will be covered in another article.
Background Color And Album Title
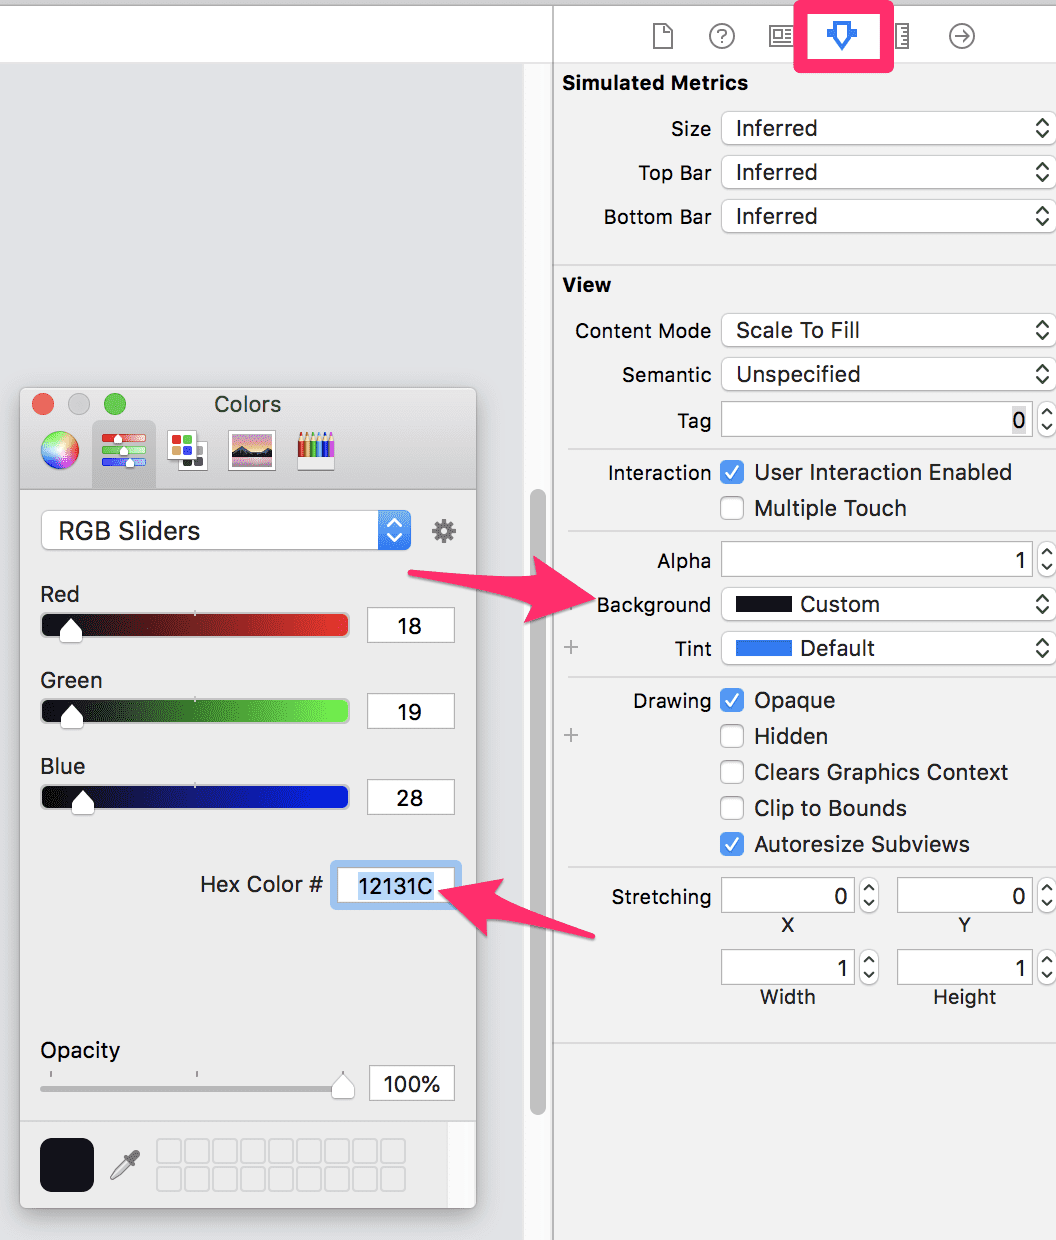
First let’s set the background color to #12131c. Open up your MainViewController.xib and open up the Attribute Inspector.
This can be done by using the keyboard shortcut CMD+Option+4. Or by click the icon in the right-hand pane.
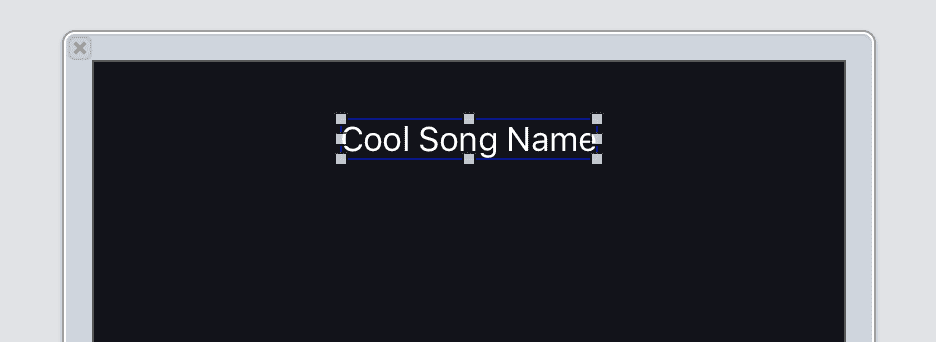
To add the title, we’ll create a new label. Open up the object library by using the shortcut CMD+Shift+L or by clicking the square within a circle icon. Then search for label.
Drag the label onto your screen and move to the top middle position. We’ll add constraints to lock it into the correct location.
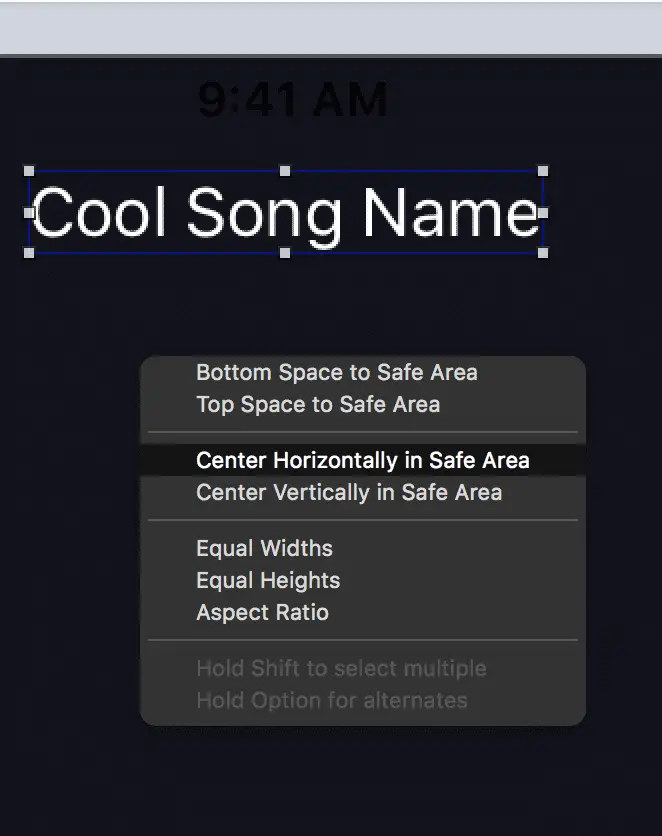
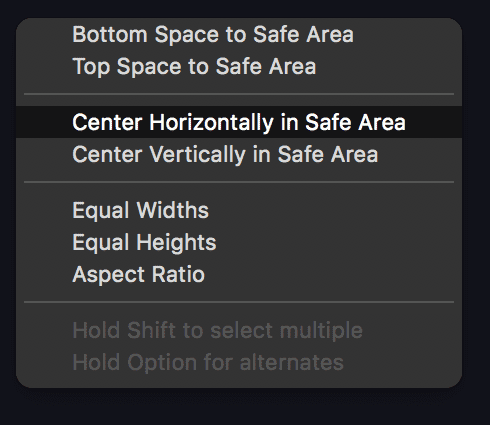
Hold CTRL, click and drag from the label onto your view. This should bring up a popup, allowing you to add constraints.
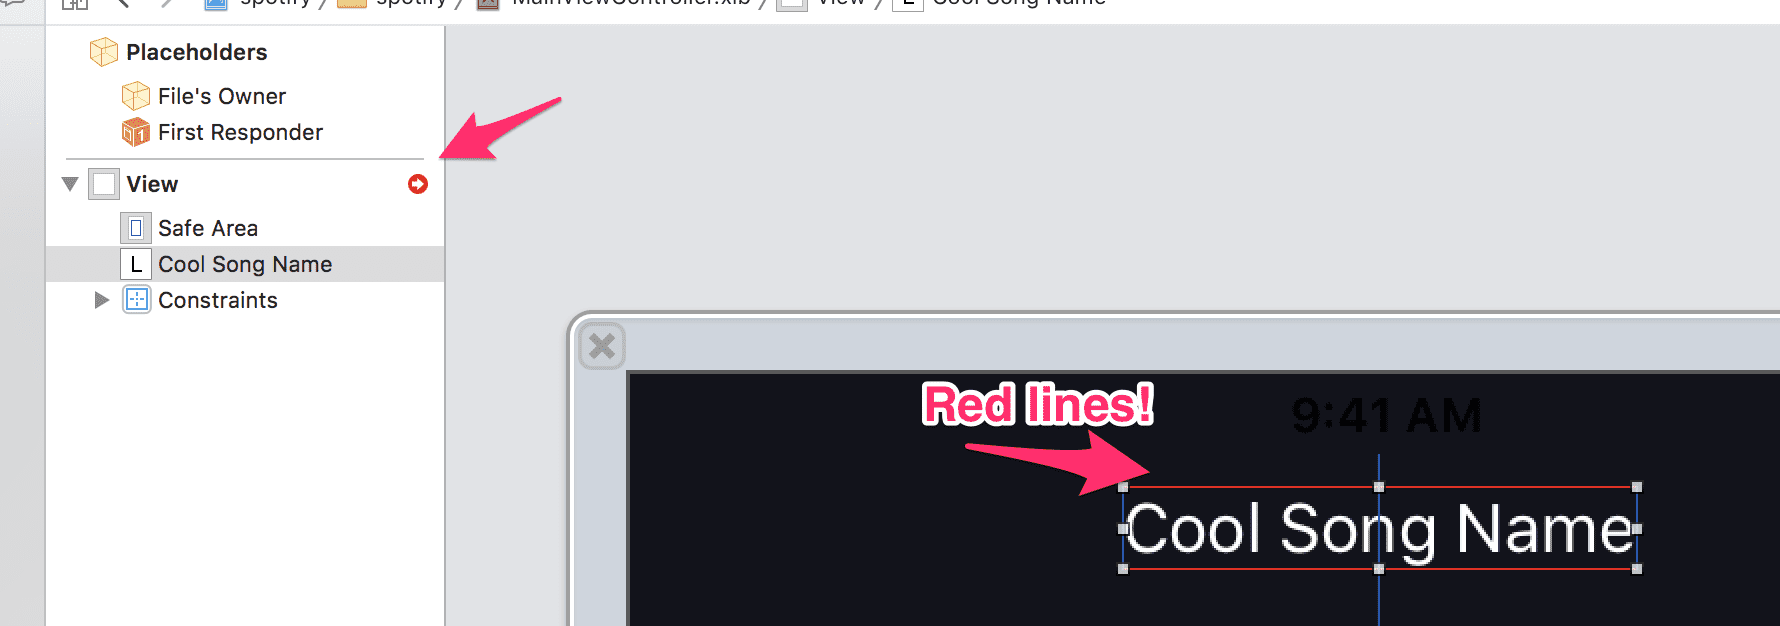
Let’s add a center horizontally in Safe Area action. Once you add it, you’ll see some red lines and errors in your document line. Don’t be alarmed! We’re going to fix that soon.
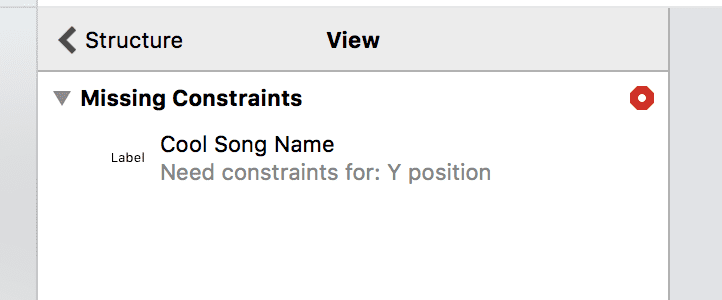
To figure out what this error is, click the red error in your document outline.
You’ll see the missing constraints. We need constraints for the y position for the label. We’ve only added x (horizontal) constraints.
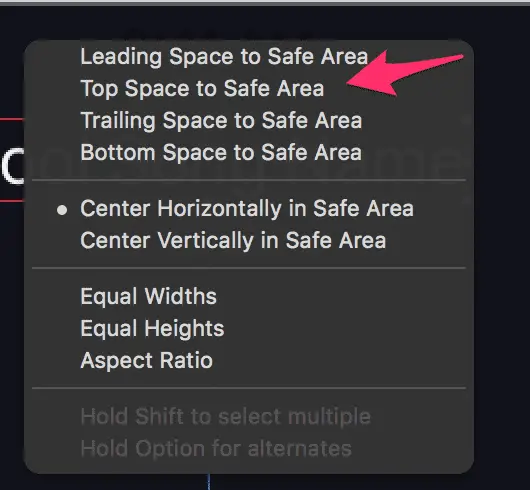
Let’s add a constraint that sets the space between the label and the top of the view. Ctrl + Click + Drag to the top of the view:
Select Top Space to Safe Area:
All the errors and red lines should be cleared now. Great work, we’ve done the easiest part of the Spotify player now.
Song Or Album Art
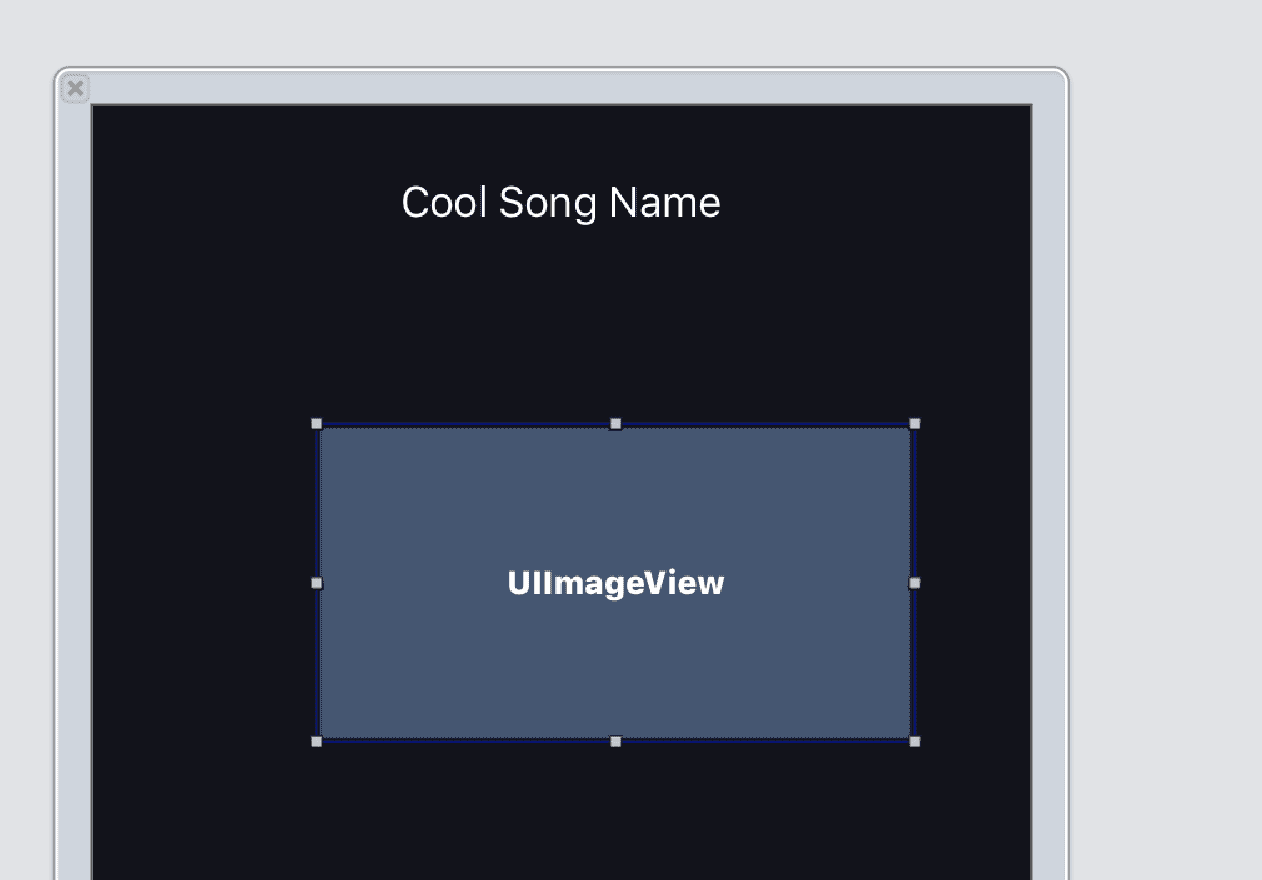
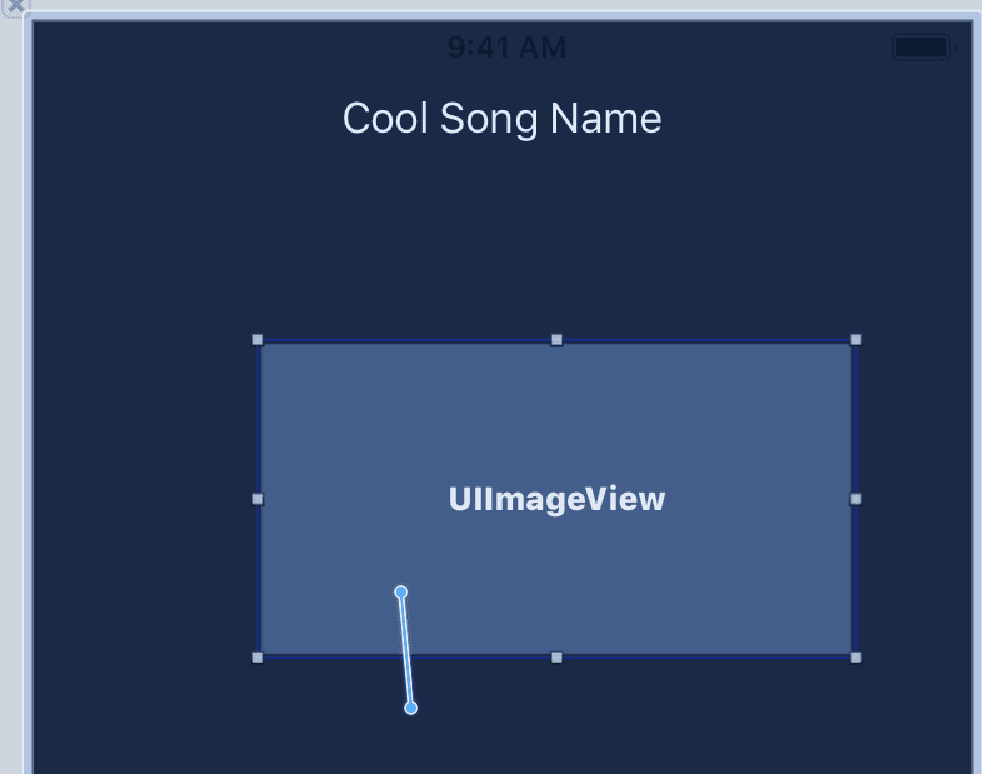
Next let’s work on adding the song art. This is just a image view centered in the middle of the screen.
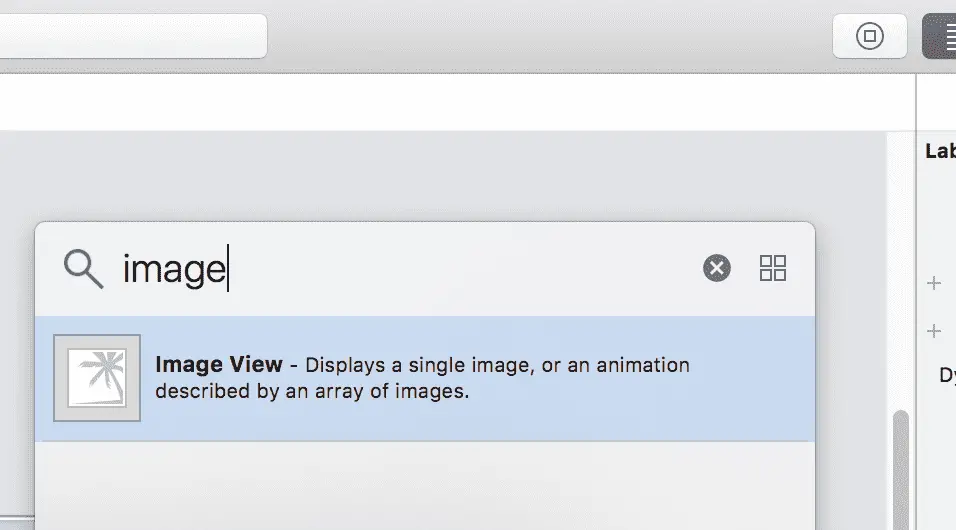
Open up the object library (CMD+Shift+L) and search for image.
Drag it into your view.
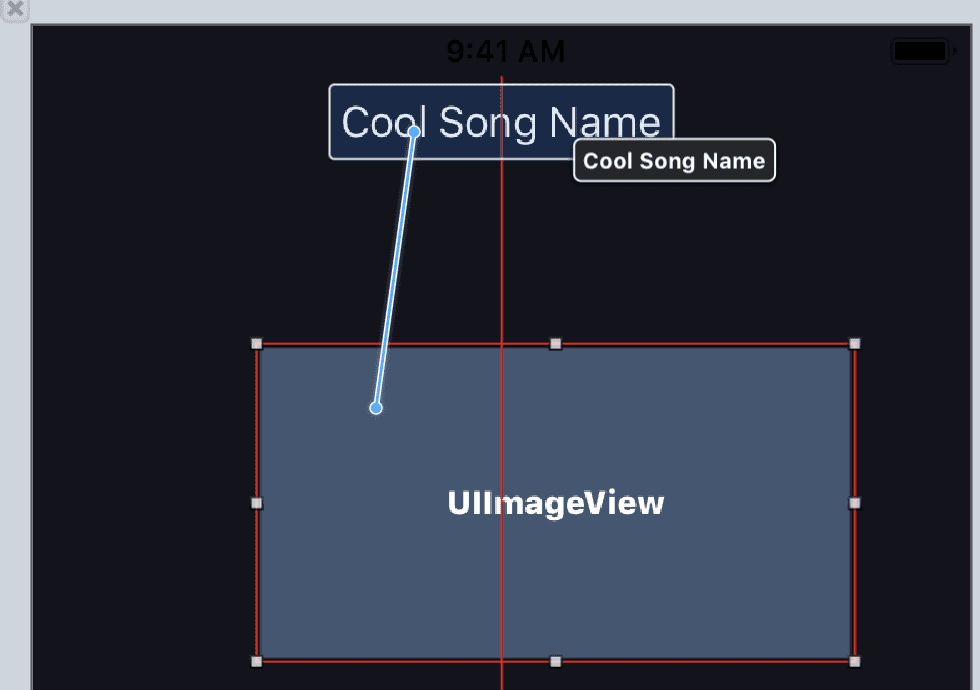
Now center this view. Ctrl + Click + Drag and select Center Horizontally in Safe Area
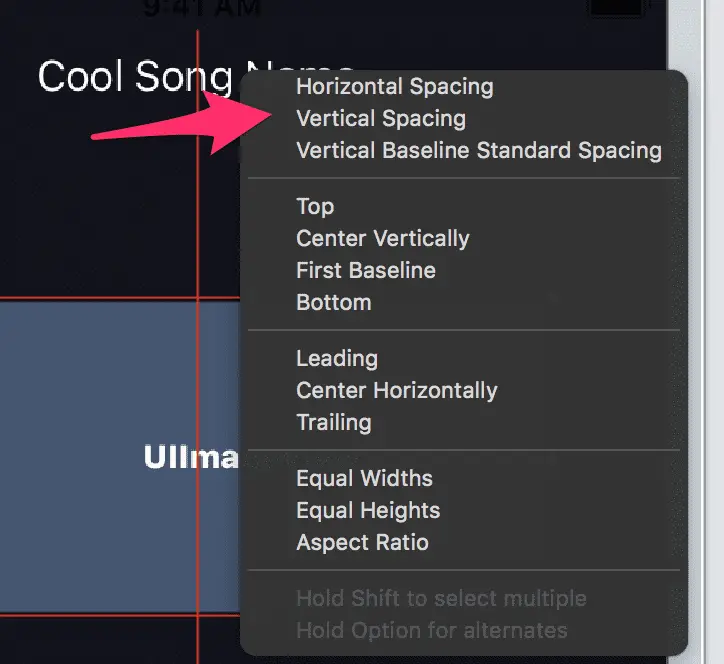
Again the red lines and arrow will show up. To fix this do a Ctrl + Click + Drag to your song name and select Vertical Spacing
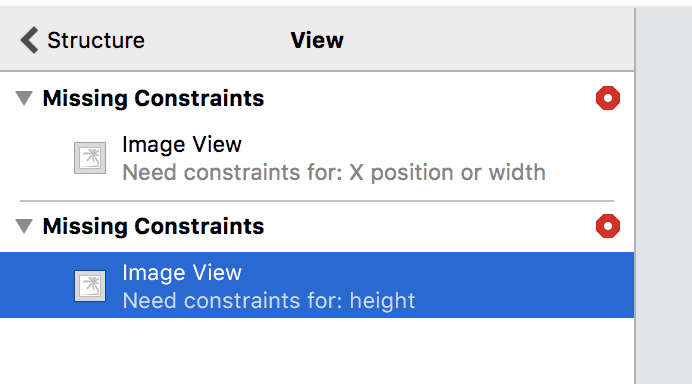
You’ll notice we still have two more errors if you check the document outline:
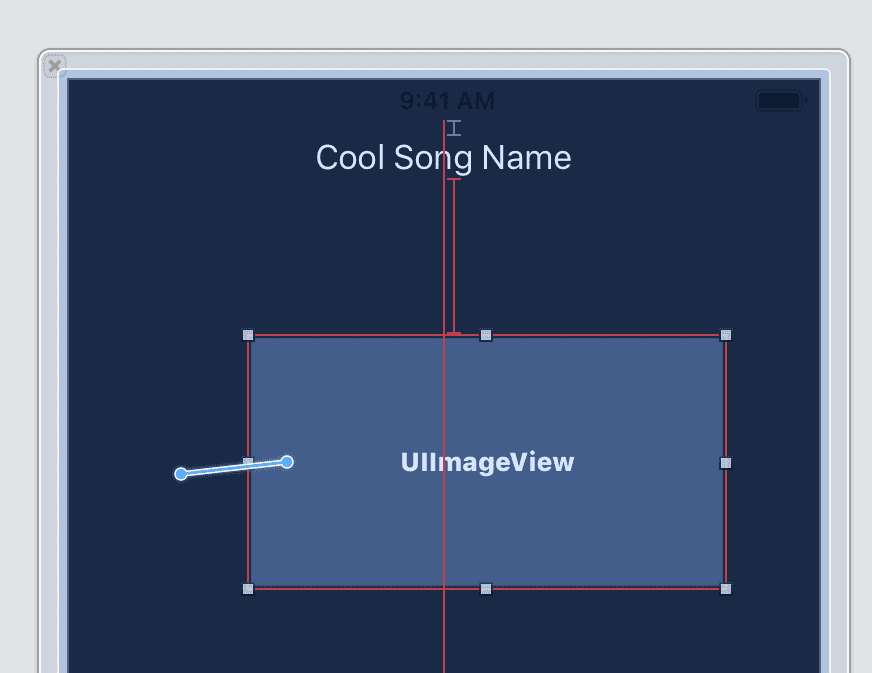
To fix these we’ll add width constraints by setting the leading and trailing space to the view. Do a Ctrl + Click + Drag to the left and add leading space.
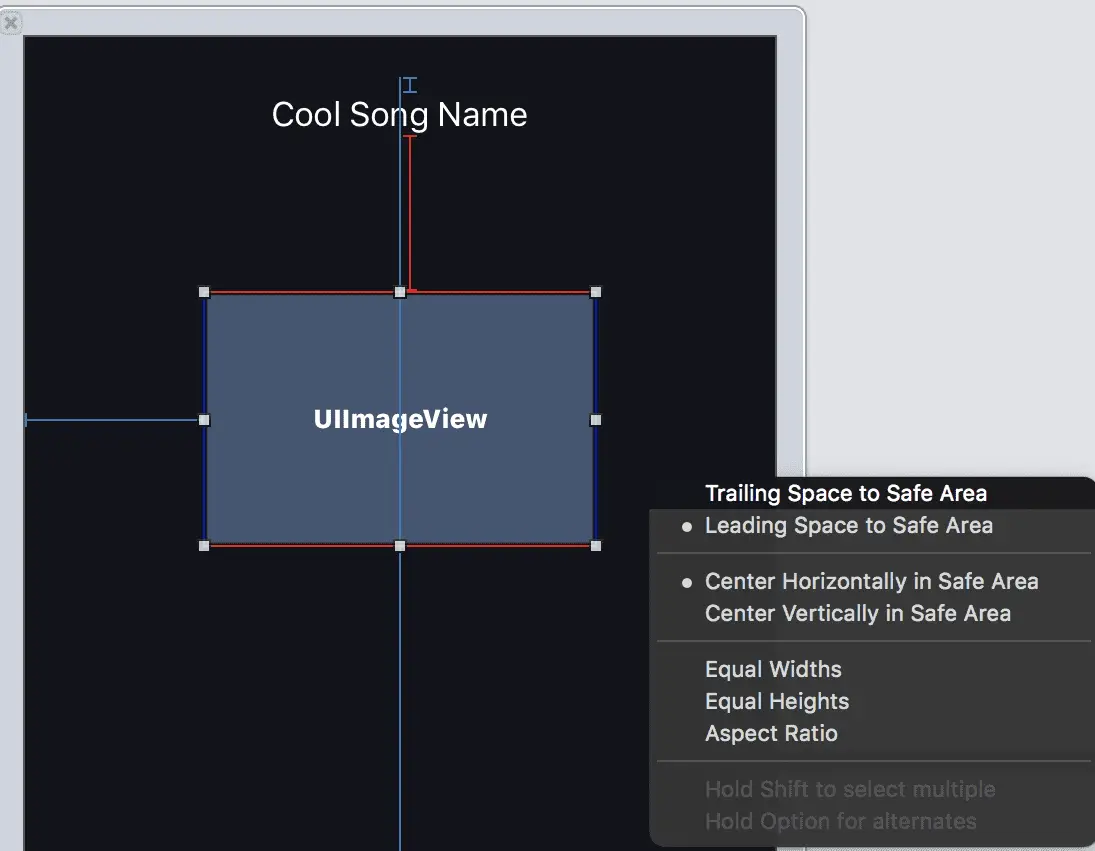
Now do the same on the right and add Trailing Space to Safe Area.
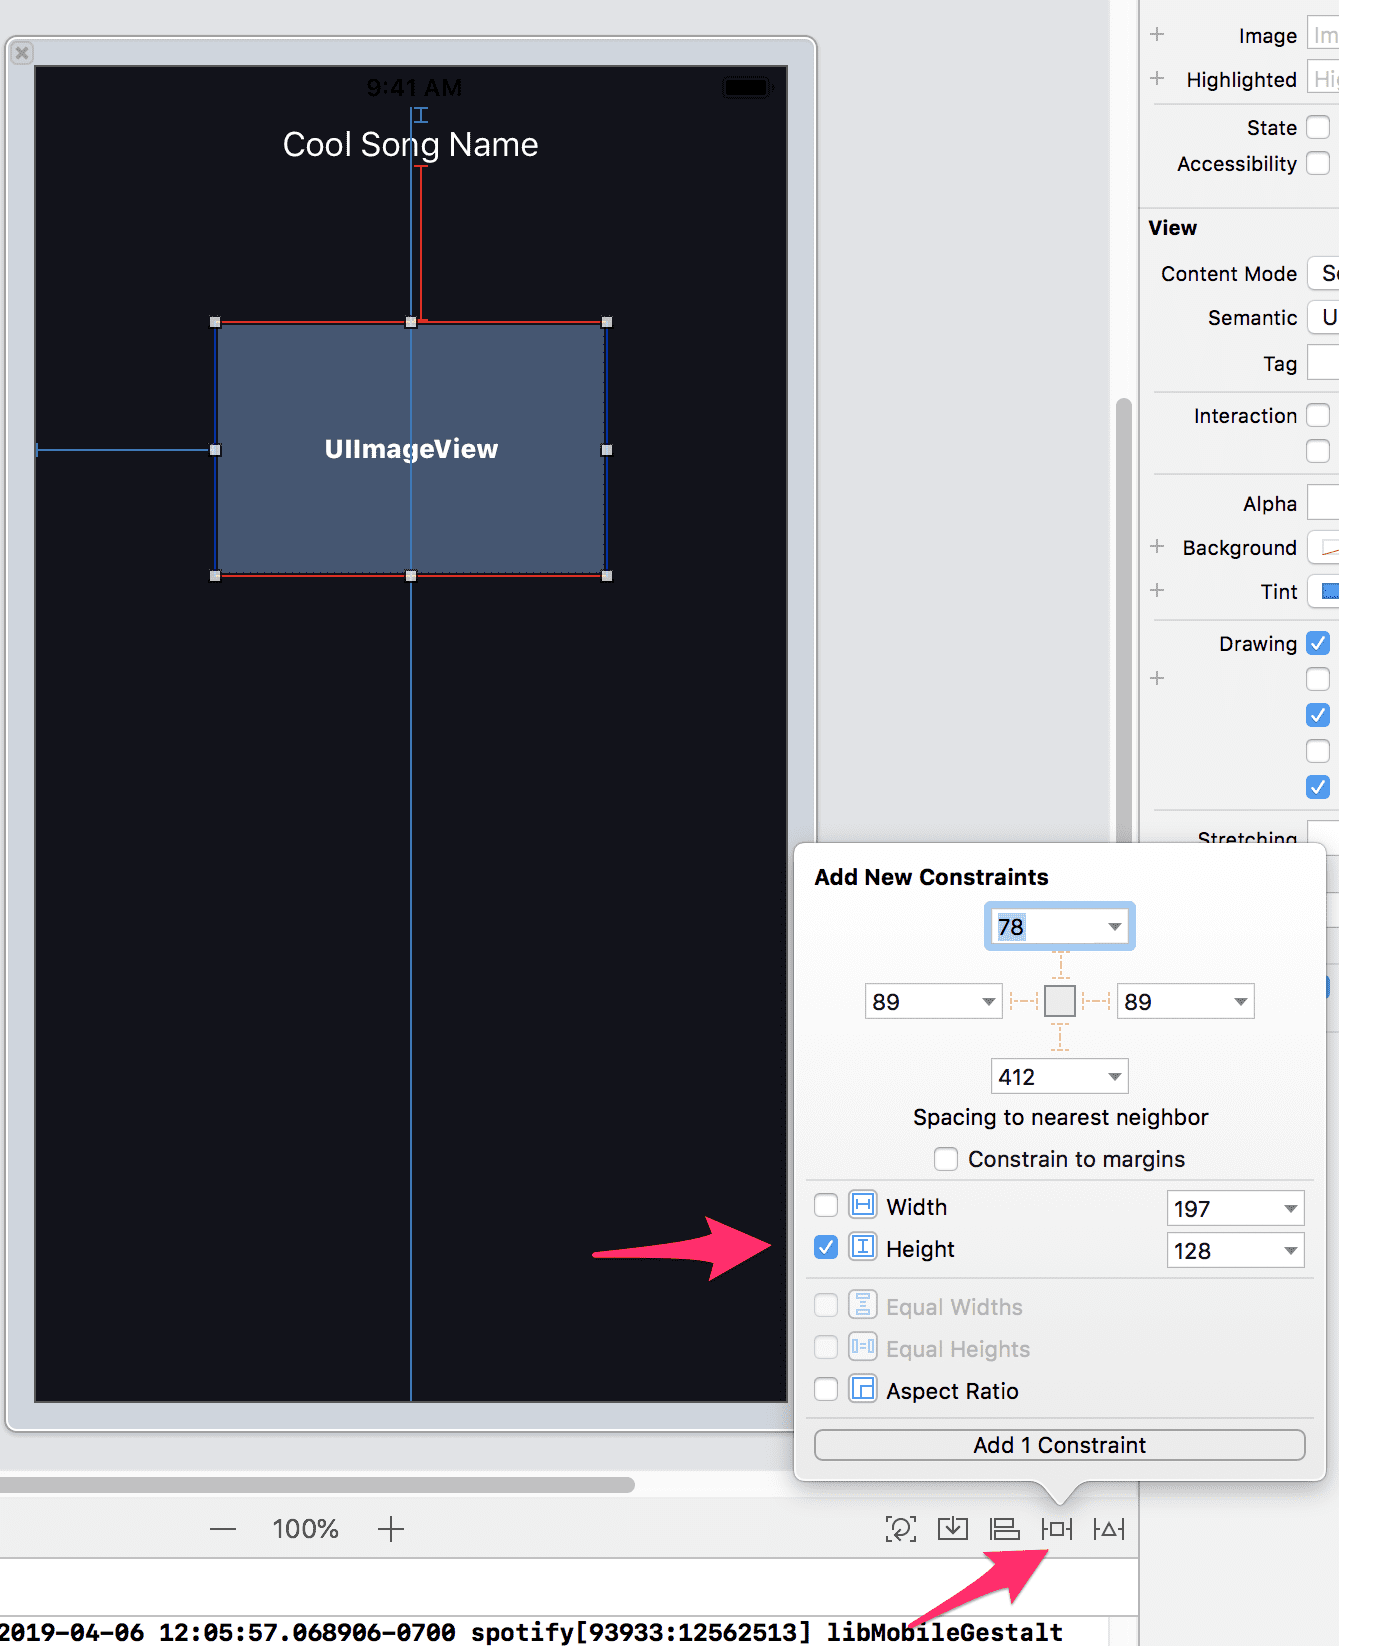
Lastly we’ll have to add a height constraint, you can do this by clicking the icon in the bottom right corner (looks like a tie-fighter) and choose a height. Don’t worry about the value for now, we’ll change it in a second.
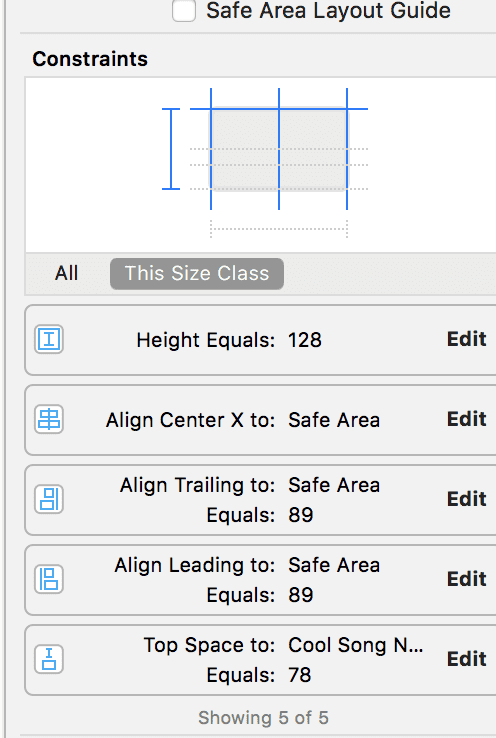
Now all the red lines and arrows should have disappeared. Let’s edit the constraints we’ve just added. Click on the image view and open it’s Size Inspector (keyboard shortcut: CMD+Option+5).
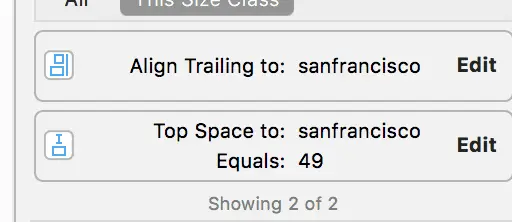
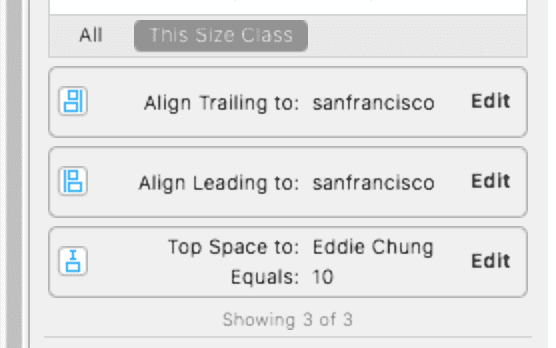
Here we can see all our constraints that we’ve added.
Now I’m going to change these values. Setting the height to 350, the leading and trailing space to 30 and the top space to 40.
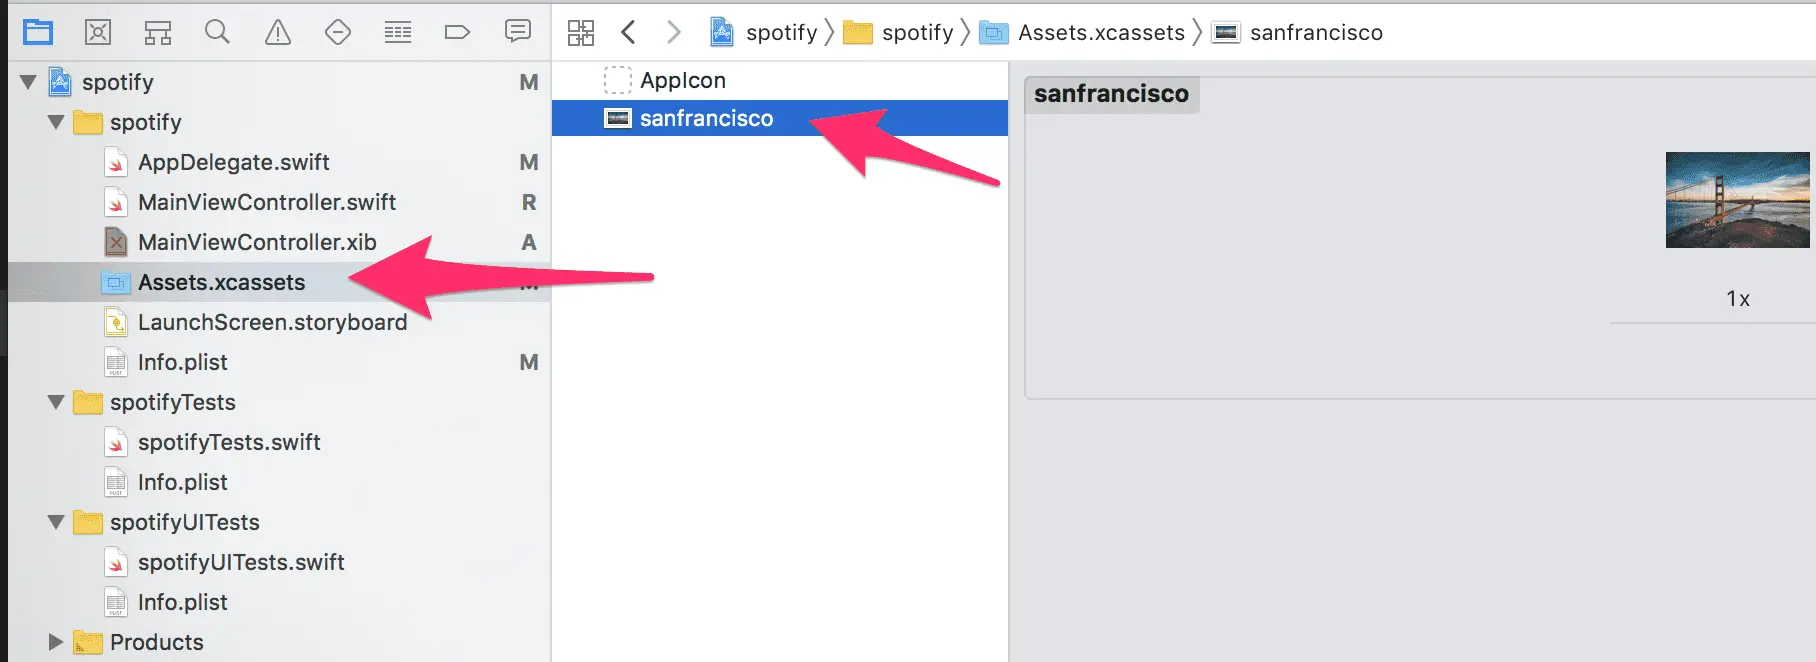
Save this image and drag it into your Assets.xcassets. I renamed my image to sanfrancisco.
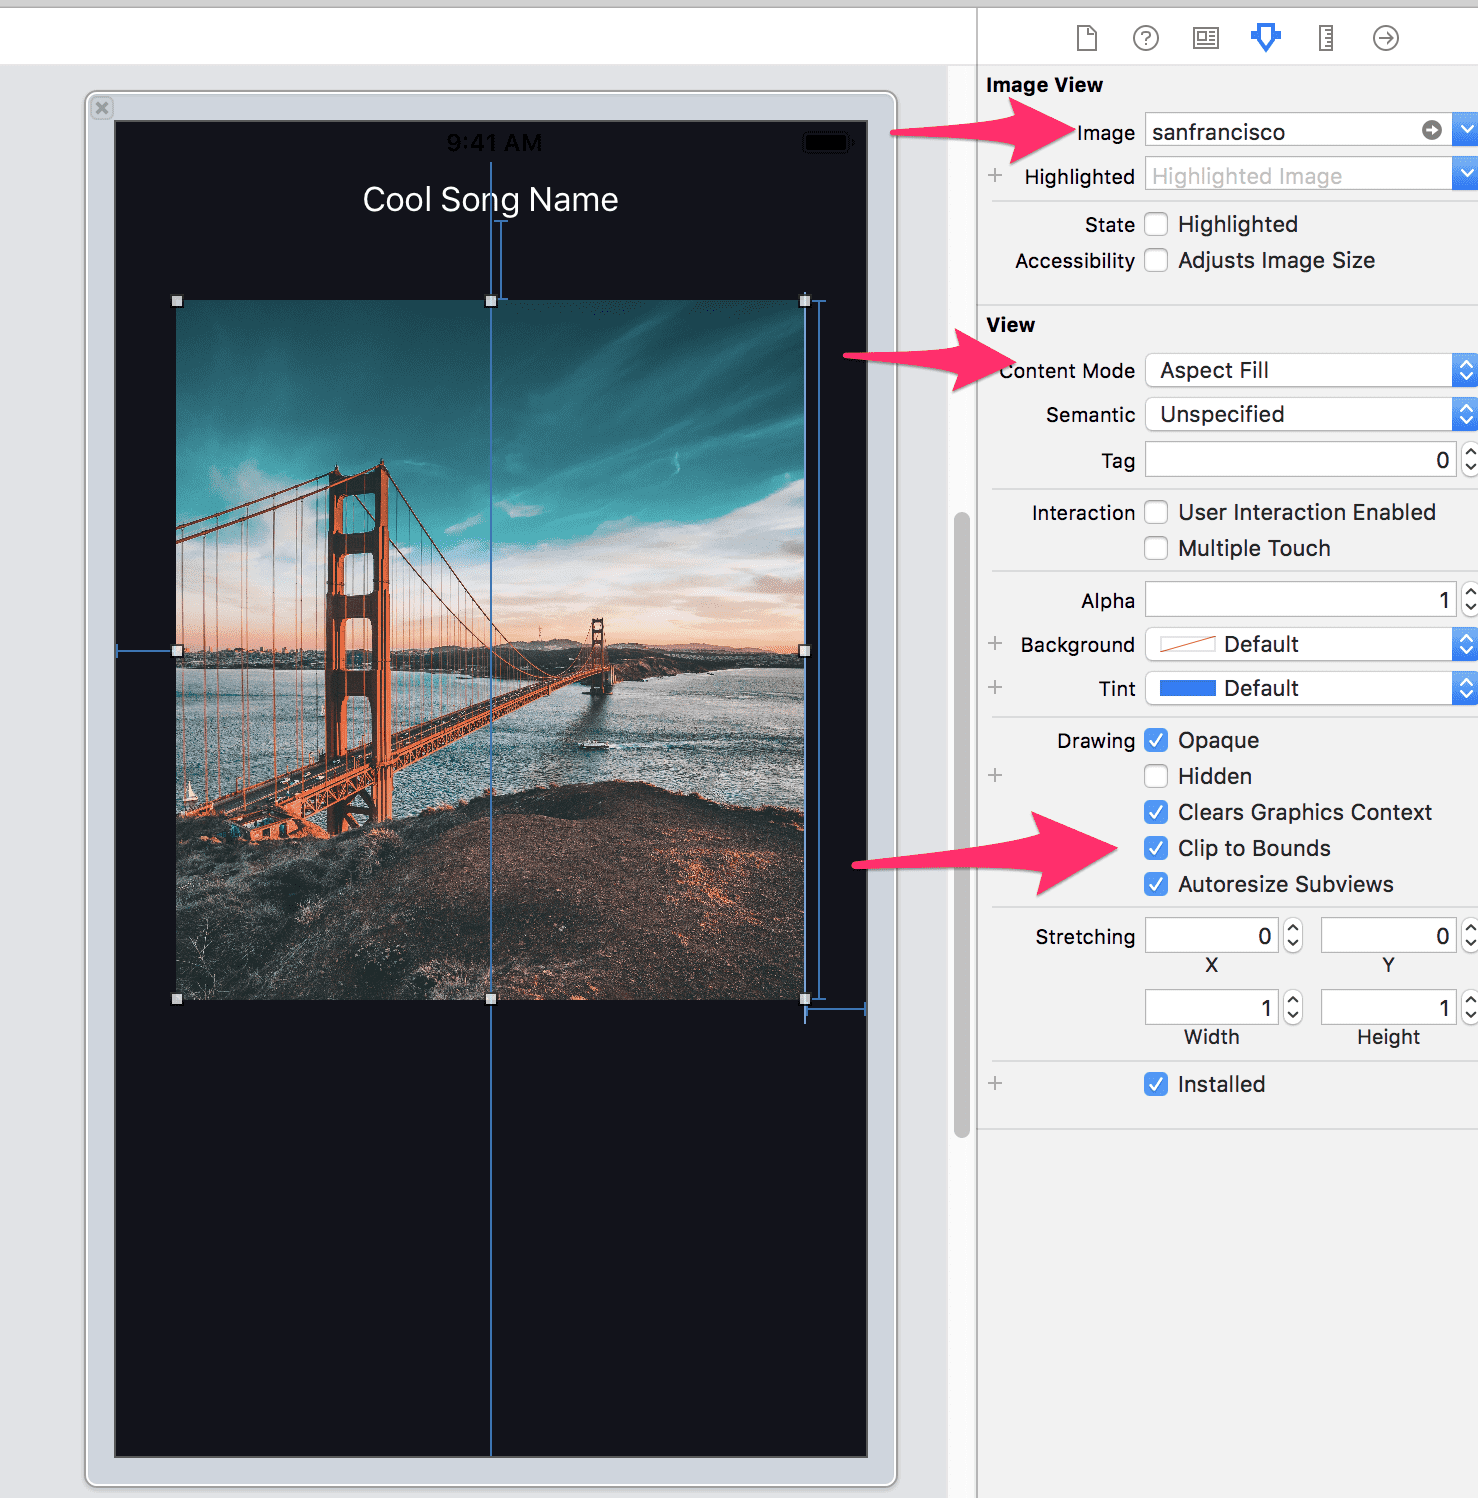
Now go back to MainViewController.xib and select your image view. Go to it’s Attributes Inspector (CMD+Option+4) and change the image to sanfrancisco.
I’ll also set the Content Mode to Aspect Fill and turned on Clip to Bounds so the image fits without any distortion.
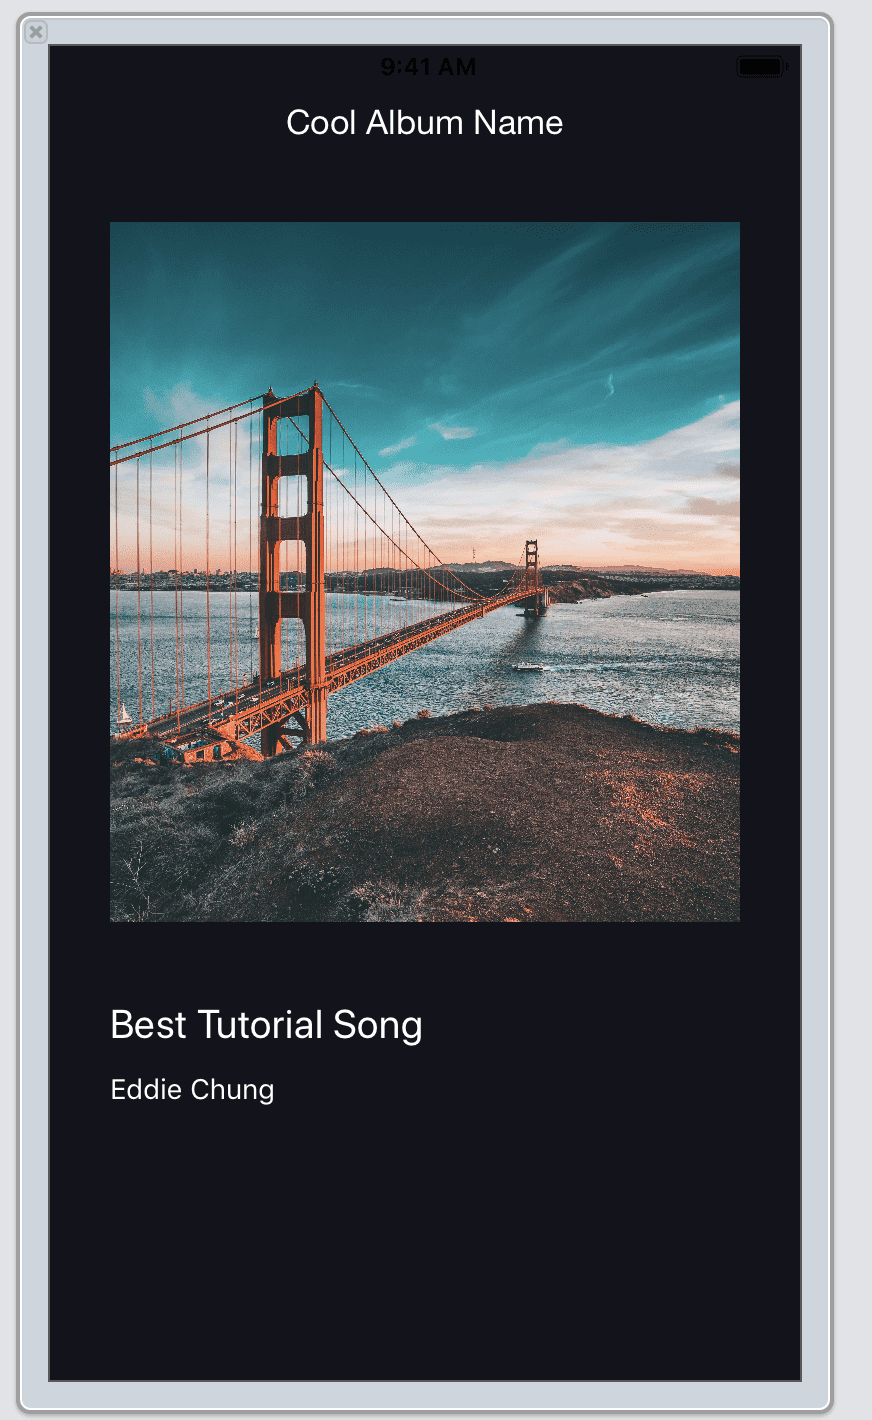
Nice, now we’ve got our song art :)
Player Controls
Now onto the bottom part of the screen, where most of the controls are. This a great design by Spotify, putting these controls here allows users to control their music with just their thumb. The important controls of the app can be used one-handed.
Song Name And Artist Name
Create a new label for the song name. Do this by opening the object library (CMD+Shift+L) and dragging a label to your view. Then create another one for the artist’s name.
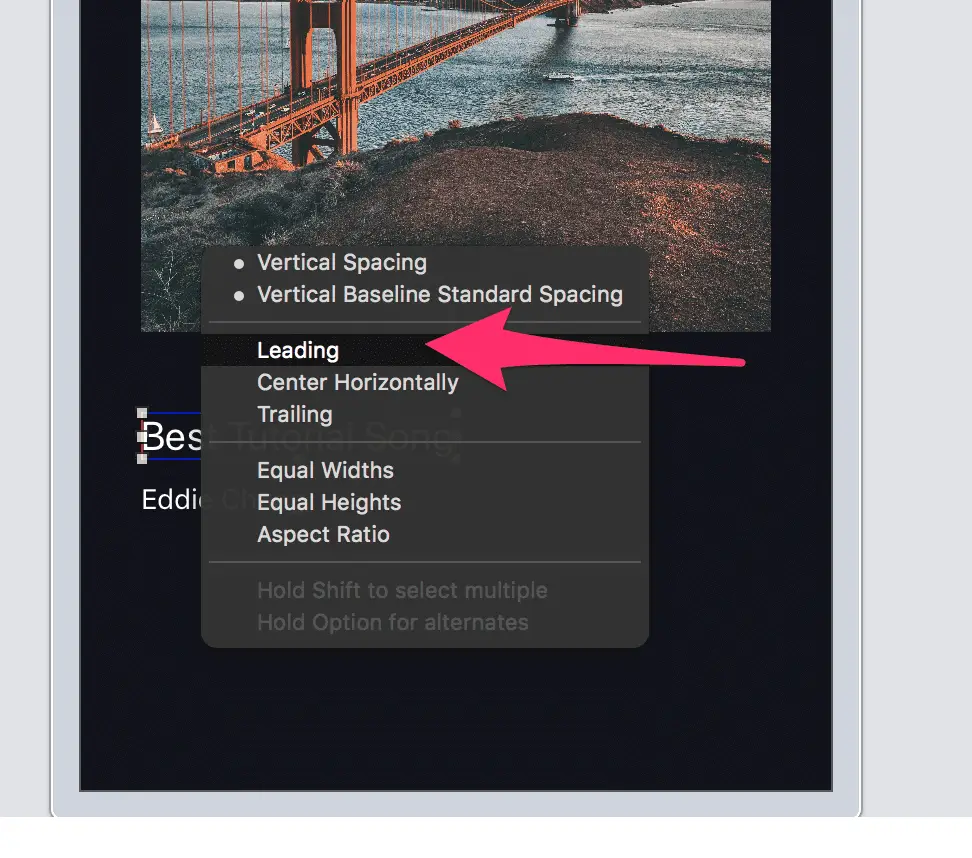
Now let’s add a couple of constraints to fix this into position. I’m going to add a constraint for the Vertical Spacing between the art and the song title.
I’ll also add a constraint for the Leading of the song title and the art.
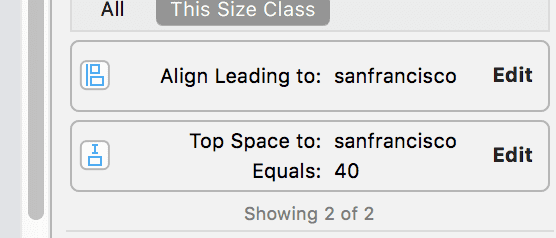
Here are my constraints for my song title label. You can find these by clicking on the song title label and opening the Size Inspector (CMD + Option + 5)
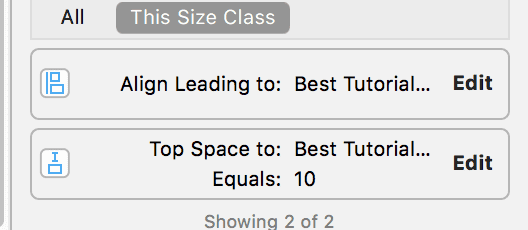
Now we’ll doing something similar for our artist label. Adding a Vertical Spacing constraint between the artist name and the song name and also adding a Leading constraint between these two elements. Here are my artist label constraints:
Favorite Button
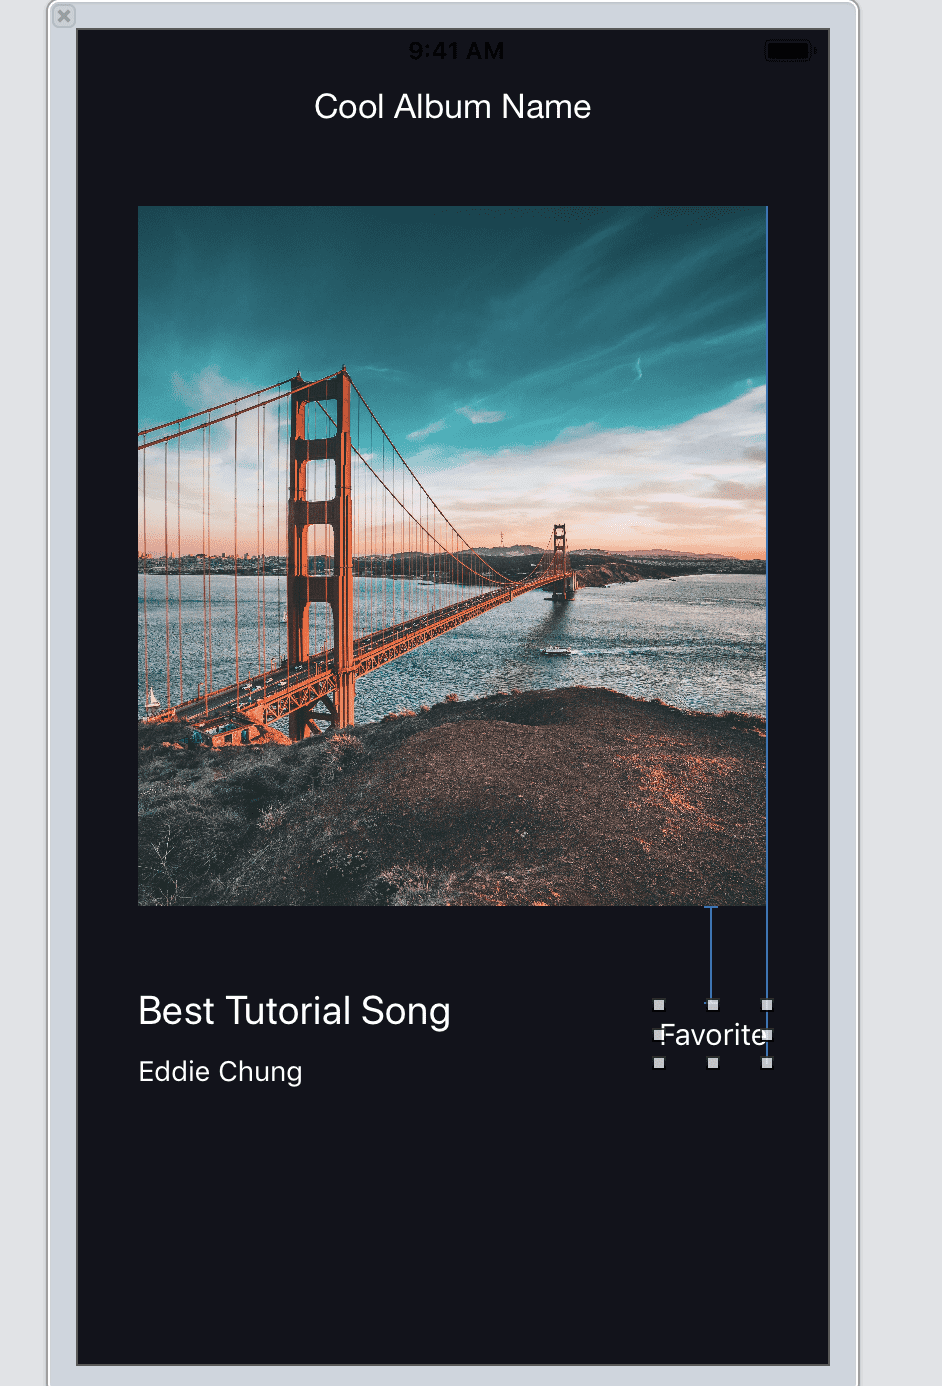
Let’s add the little heart button that allows a user to favorite or un-favorite a song. For this, we’ll add a UIButton. To add it, open up the Object Library (CMD+Shift+L) and drag a button onto your screen:
Position it on the right hand side just underneath the song art and add Trailing and Vertical Spacing constraints.
Of course, we’ll need to change this icon to a heart. Download the heart icons here. Drag the icons into your Assets.xcassets and then set the button to favorite-border*[]:
Awesome, our Spotify app is really coming together. Now let’s make the button work, so that the user can favorite and un-favorite the song. Open up MainViewController.swift in your assistant editor.
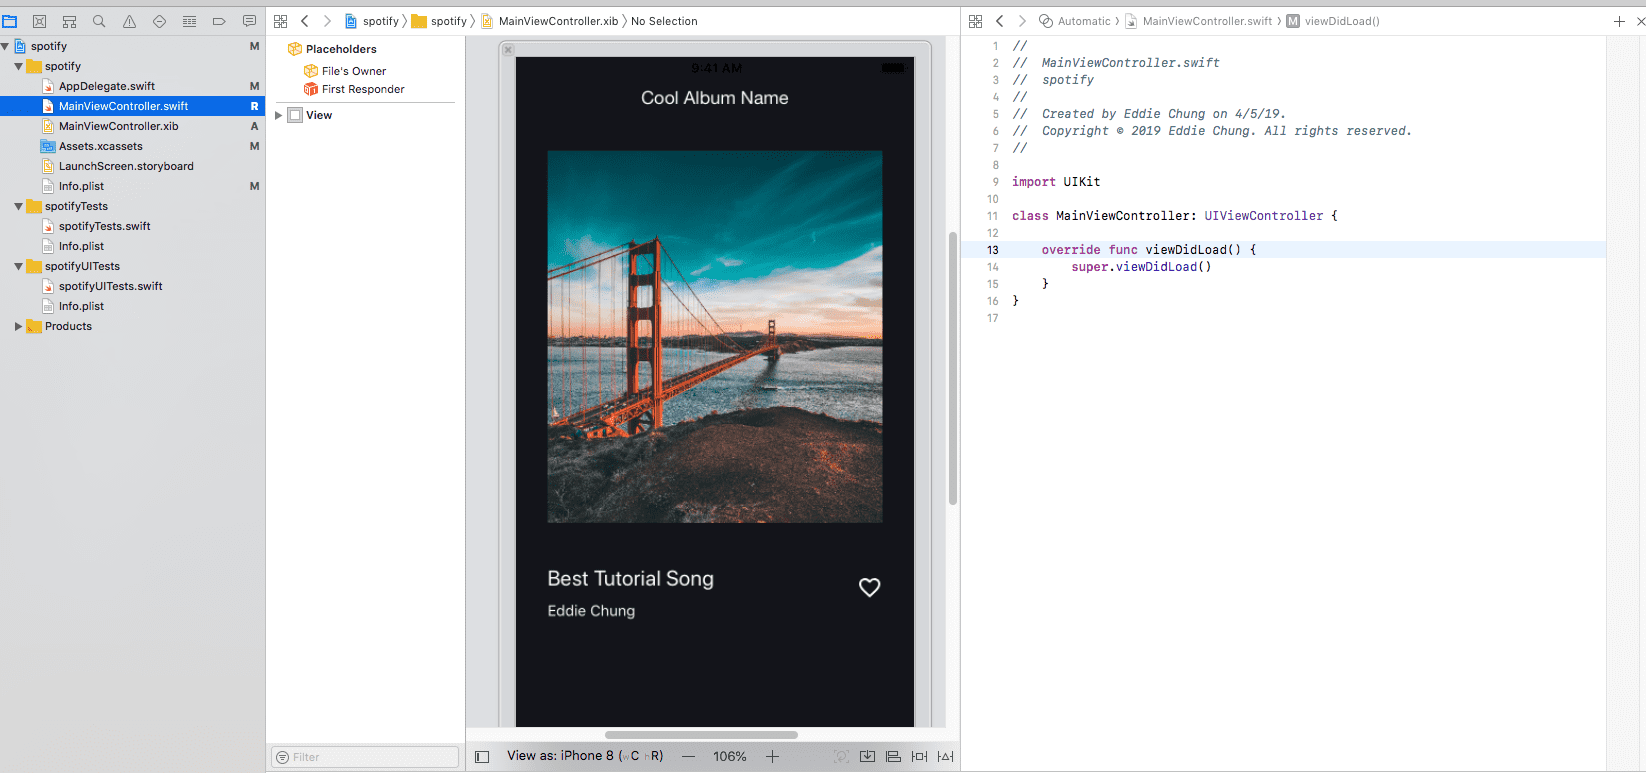
To do this hold Option and click the MainViewController.swift. You should see a split screen setup like this:
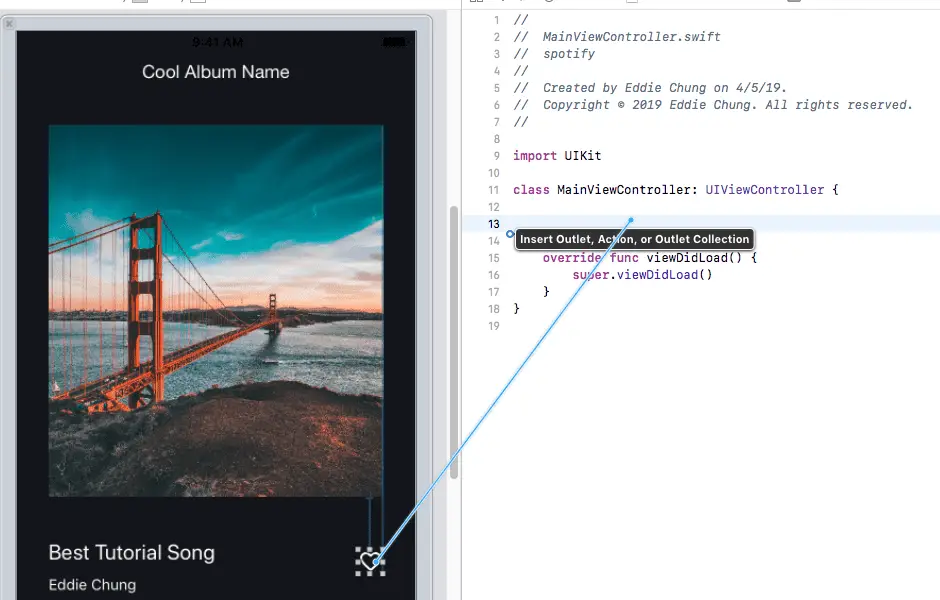
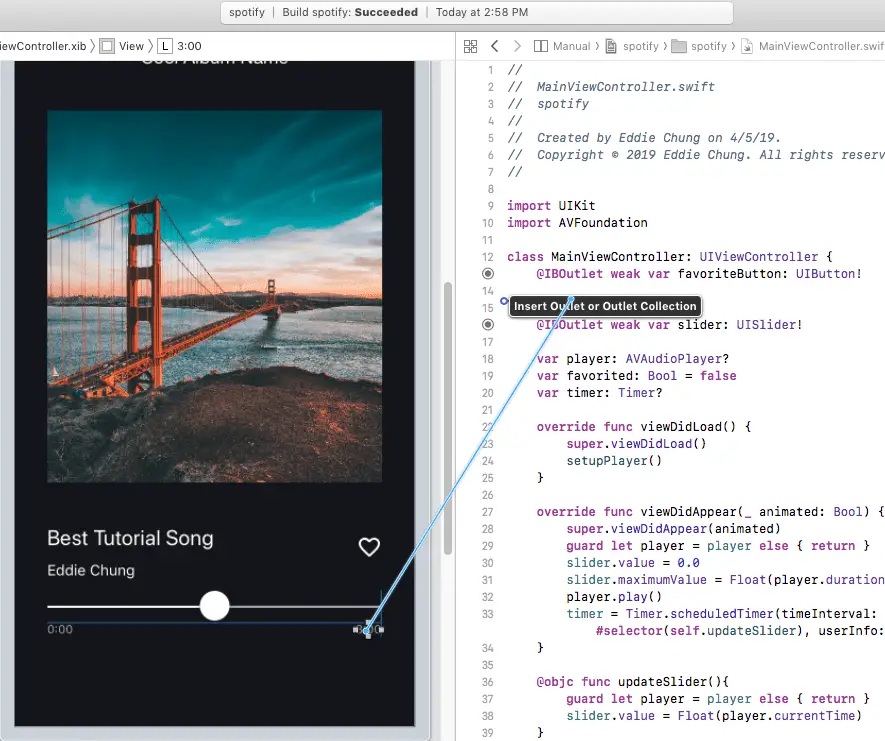
Now lets create an IBOutlet and IBAction for your button. To create an IBOutlet, hold CTRL, click and drag your button into your Swift code.
I’ll name my IBOutlet favoriteButton.
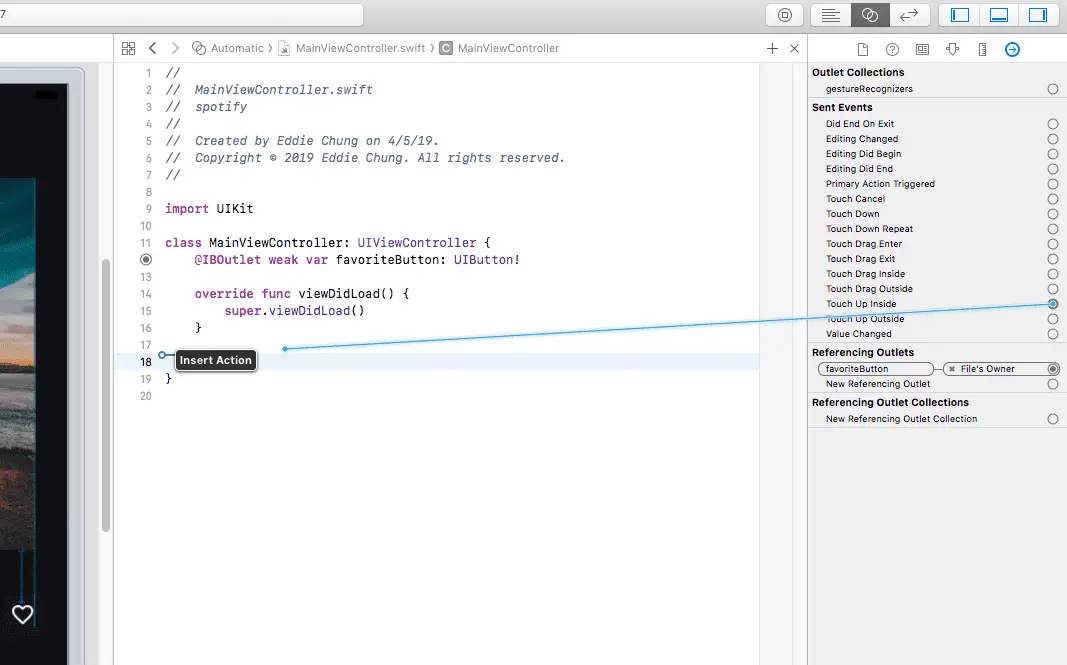
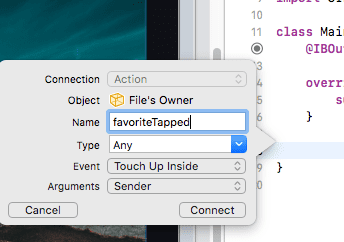
Now to create an IBOutlet, select your favorite button and open its Connection Inspector (keyboard shortcut: CMD+Shift+6). Drag the Touch Up Inside IBAction into your Swift code.
I’ll name my IBAction favoriteTapped.
Your code should now look like this:
import UIKit

class MainViewController: UIViewController {
    @IBOutlet weak var favoriteButton: UIButton!

    override func viewDidLoad() {
        super.viewDidLoad()
    }

    @IBAction func favoriteTapped(_ sender: Any) {
    }
}
Now to change the favorite icon when it is tapped. We’ll create a boolean variable to track whether the user has favorited this track.
var favorited: Bool = falseThen we’ll fill our IBAction to change the icon when the song is favorited.
@IBAction func favoriteTapped(_ sender: Any) {
    favorited = !favorited // toggles favorite boolean
    if favorited {
        favoriteButton.setImage(UIImage(named: "favorite"), for: .normal)
    } else {
        favoriteButton.setImage(UIImage(named: "favorite-border"), for: .normal)
    }
}
The first line toggles the favorite boolean variable. This means if favorite is currently true, it will become false and vice versa. Then we pick the correct favorite icon and set it.
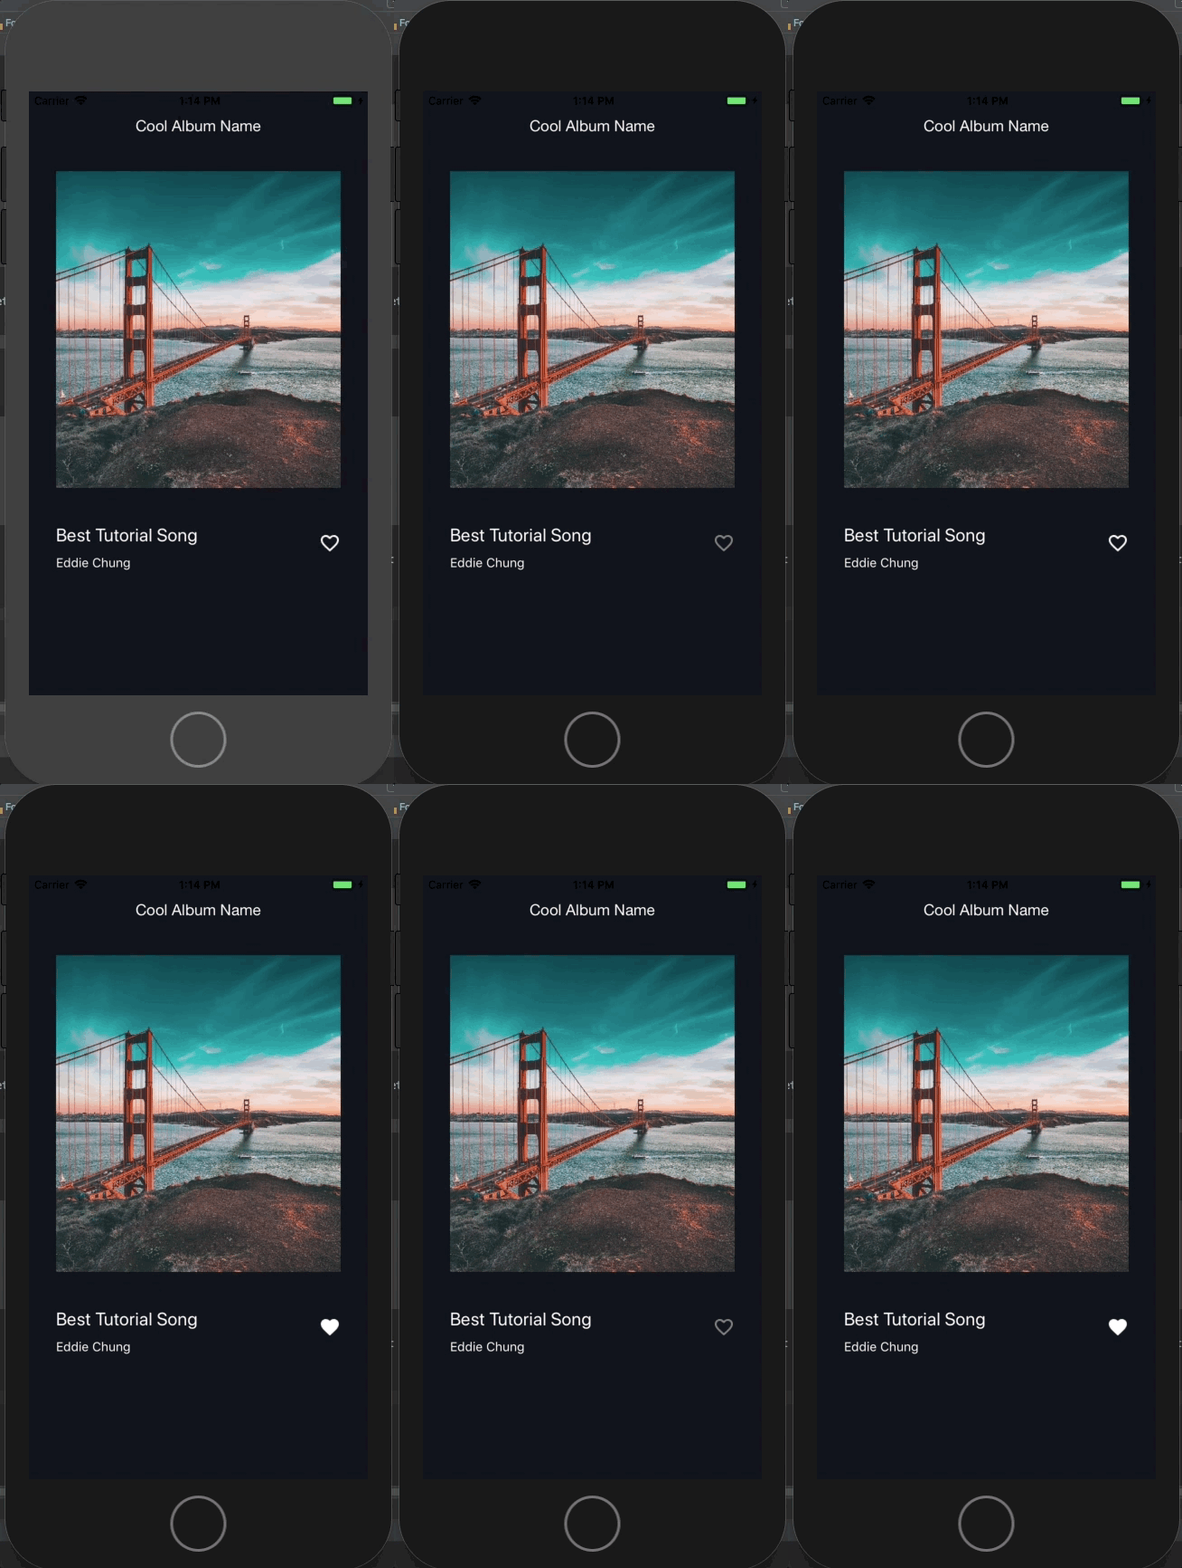
Run your application (CMD+R):
Woot! Our favorite button is now behaving properly.
Music
To build the other controls, we first have to have music playing. Otherwise the controls don’t really do anything! I’ll grab a song from NoCopyrightSounds but you can use whatever track you want. Download the one I’m using here.
To get music playing you’ll do this we’ll need to first import AVFoundation:
import AVFoundationNext we’ll setup up our audio player and load our song “invisible” into the player.
func setupPlayer() {
    guard let url = Bundle.main.url(forResource: "invisible", withExtension: "mp3") else { return }
    do {
        try AVAudioSession.sharedInstance().setCategory(.playback, mode: .default)
        try AVAudioSession.sharedInstance().setActive(true)
        player = try AVAudioPlayer(contentsOf: url, fileTypeHint: AVFileType.mp3.rawValue)
        guard let player = player else { return }
        player.prepareToPlay()
    } catch let error {
        print(error.localizedDescription)
    }
}
We use the guard statement to safely load in the song. Then we attempt to setup the player, but will catch any errors that occur.
Call this method in the viewDidLoad of your view controller.
override func viewDidLoad() {
    super.viewDidLoad()
    setupPlayer()
}
Then play the music in your viewDidAppear:
override func viewDidAppear(_ animated: Bool) {
    super.viewDidAppear(animated)
    self.player?.play()
}
Now run your app (CMD+R)! The song will play. If you hear a minor distortion, this may be due to a bug in Xcode. Try stopping the debugger and re-opening the app on the simulator. That should play the music flawlessly.
Progress Bar
Now we’ve got our music playing, lets add a progress bar. Open up your MainViewController.xib and find spotify in the Object Library (CMD+Shift+L)
Drag it into position underneath your song and arist name. Set the leading and trailing constraints to line up with your art image. Also set the vertical spacing between the spotify and the artist name label.
Now this spotify doesn’t track the song and is static. We need to update the spotifys view according to the progress of the song.
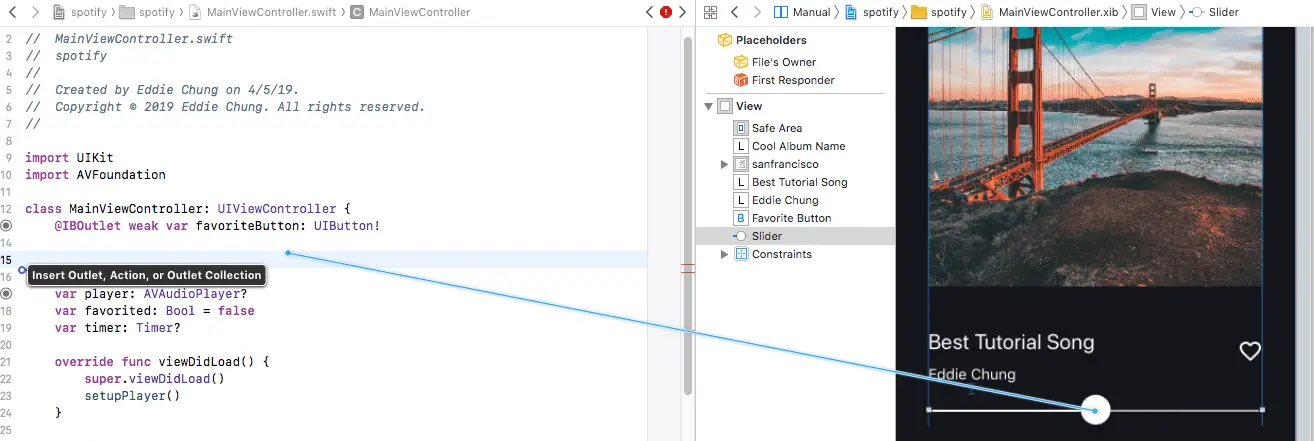
Create an IBOutlet of your spotify by holding CTRL and click-dragging it into your code. Remember you can open up your Swift code in the Assistant Editor by holding Option and clicking in your Project Navigator.
@IBOutlet weak var spotify: UIspotify!To update your spotify according to the song progress, update your viewDidAppear like so:
override func viewDidAppear(_ animated: Bool) {
    super.viewDidAppear(animated)
    guard let player = player else { return }
    spotify.value = 0.0
    spotify.maximumValue = Float(player.duration)
    player.play()
    timer = Timer.scheduledTimer(timeInterval: 0.0001, target: self, selector: #selector(self.updatespotify), userInfo: nil, repeats: true)
}
The above code sets the spotify to 0.0, and the maximum value to the song length. Then we create a timer that will update our spotify every 0.0001 seconds.
You’ll need to declare the timer as a property of this view controller:
var timer: Timer?We’ll also need to create a updatespotify function that the timer calls every time.
@objc func updatespotify() {
    guard let player = player else { return }
    spotify.value = Float(player.currentTime)
}
Now run your app and you should see the spotify update with the progress of the song.
Scrubbing
Scrubbing using the UIspotify is an important feature in case the user wants to skip to a part of the song.
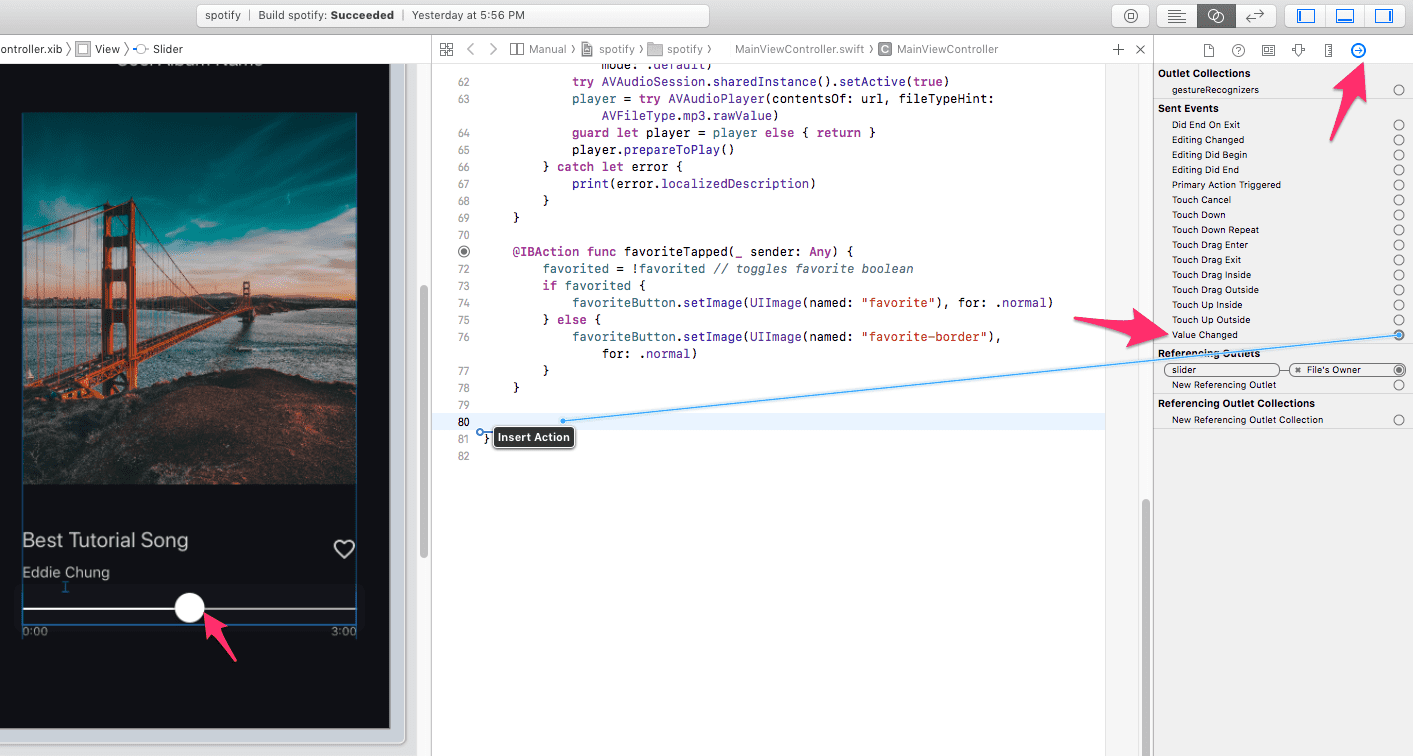
To make scrubbing work, we’ll need to create an IBAction for our UIspotify. Select the UIspotify in the Interface Builder and open up its Connections Inspector (keyboard shortcut: CMD+Option+6).
Drag the IBAction Value Changed into your Swift code.
The code inside this function is pretty simple:
@IBAction func spotifyValueChanged(_ sender:UIspotify) {
    player?.currentTime = Float64(spotify.value)
}
We set the players current time to the spotify value. Since we’ve defined our spotify max value earlier as the song duration, this works fine. Run your app (CMD+R) and try it out!
Time Stamps
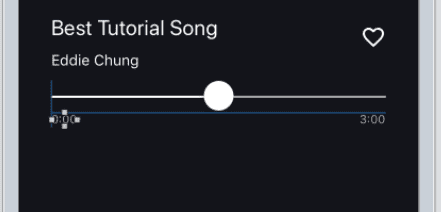
Next we’ll need to add the timestamps for the time elapsed and the time remaining in the song. For this we’ll add two labels and put them in their correct position. Grab labels from your object library (CMD+Shift+L) and then add the appropriate constraints to them.
For my labels I’m using the font color #A6A6A6. I’ve added a vertical spacing constraint of 0 to both of the labels. I’ve also added a leading constraint from the time elapsed label to the spotify and a trailing constraint from the time remaining label to the spotify. The font size I’m using is 11.0.
Now let’s update these labels correctly according to the song’s progress.
Create IBOutlets for both of the labels by doing a CTRL+Click+Drag into your Swift code.
@IBOutlet weak var timeRemainingLabel: UILabel!
@IBOutlet weak var timeElapsedLabel: UILabel!
Now to format the times nicely, we’re going to create a helper function:
func getFormattedTime(timeInterval: TimeInterval) -> String {
    let mins = timeInterval / 60
    let secs = timeInterval.truncatingRemainder(dividingBy: 60)
    let timeformatter = NumberFormatter()
    timeformatter.minimumIntegerDigits = 2
    timeformatter.minimumFractionDigits = 0
    timeformatter.roundingMode = .down
    guard let minsStr = timeformatter.string(from: NSNumber(value: mins)), let secsStr = timeformatter.string(from: NSNumber(value: secs)) else {
        return ""
    }
    return "\(minsStr):\(secsStr)"
}
This function grabs a time interval (either the time remaining or the time elapsed) and returns a nicely formatted string like 00:00.
Let’s use this function in our updatespotify code:
@objc func updatespotify(){
    guard let player = player else { return }
    spotify.value = Float(player.currentTime)
    // Update time remaining label
    let remainingTimeInSeconds = player.duration - player.currentTime
    timeRemainingLabel.text = getFormattedTime(timeInterval: remainingTimeInSeconds)
    timeElapsedLabel.text = getFormattedTime(timeInterval: player.currentTime)
}
Now run your app (CMD+R) and you’ll see your the labels update as the song plays :)
Play Pause Button
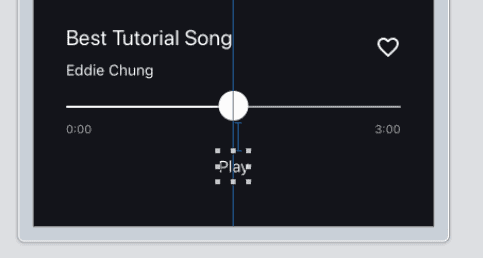
To create a play and pause button, drag a button from the object library (CMD+Shift+L). Position it in the center.
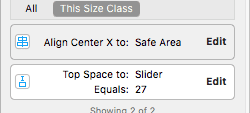
I’ve added two constraints to this button, the top space constraint and the center horizontally constraint.
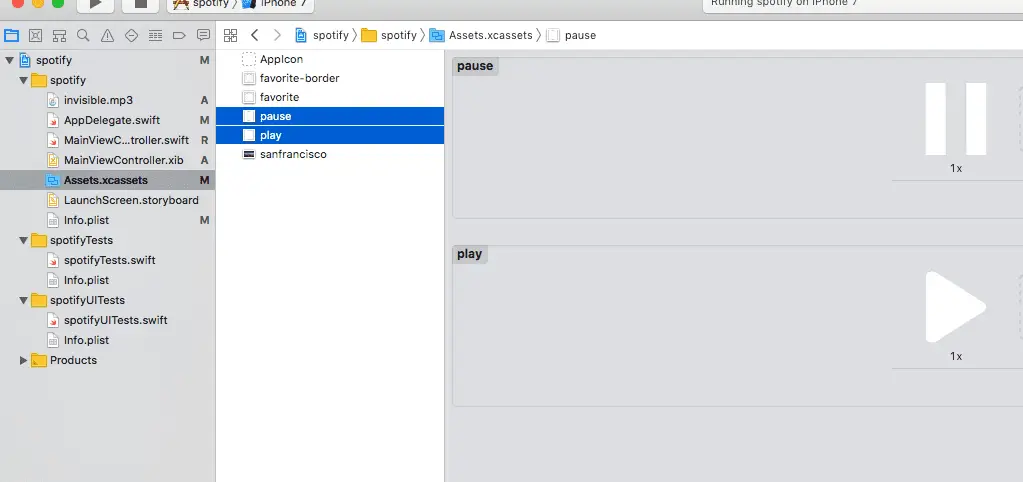
Download the play and pause button icons here. Drag these images into your Assets.xcassets.
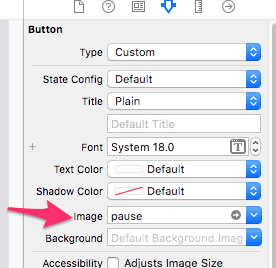
Set your button to the pause image.
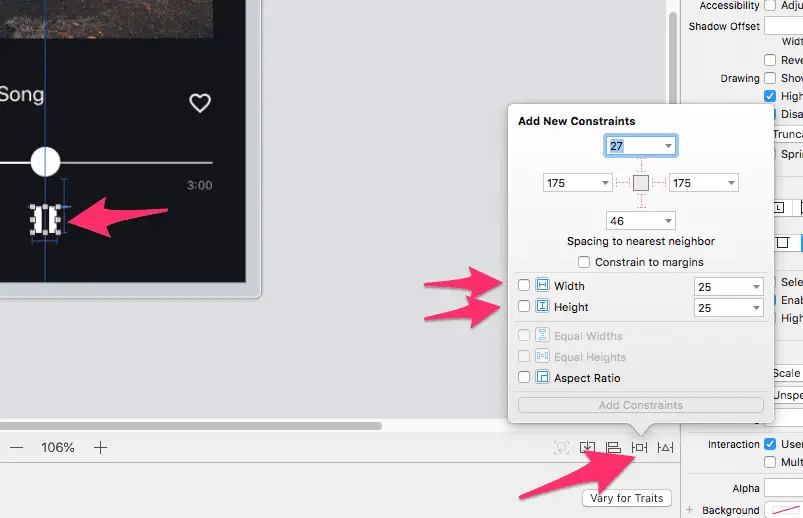
I also recommend adding height and size constraints since the image will be too big. Click the button and then select the tie-fighter icon to set size constraints.
I’ve set mine to 25 height and 25 width.
Now create an IBOutlet for your button by Ctrl + Click + Dragging into your Swift file.
@IBOutlet weak var playPauseButton: UIButton!Also create an IBAction for Touch Up Inside for your playPauseButton. To do this, select your button and open up its Connections Inspector (CMD + Option + 6). Find Touch Up Inside and drag it into your Swift code.
@IBAction func playPausePressed(_ sender: Any) {
    guard let player = player else { return }
    if player.isPlaying {
        player.pause()
        playPauseButton.setImage(UIImage(named: "play"), for: .normal)
    } else {
        player.play()
        playPauseButton.setImage(UIImage(named: "pause"), for: .normal)
    }
}
The code for the IBAction is pretty simple, if the player is playing, pause it. Otherwise, play the music. We’ll set the image of the button accordingly as well.
The play and pause button should now work! Great work!
Basic Music Player
Now you’ve completed a basic music player in iOS. The other controls such as skipping songs, shuffle, etc will be covered in the next article. Thanks for following along!
Eddy Chung
Similar Posts
- How To Add Background Music In Swift?
- 10 Steps To Become An iOS Developer With No Experience
- Best Programming Languages To Learn For Mobile App Development
- Can you build an iOS app without an iPhone or iPad?
- Can I Develop iOS Apps On Windows?
- Colors & Font Styles In Xcode - Lesson 2
- Explanation & Solution for 'fatal error: unexpectedly found nil while unwrapping an Optional value'
- How long does it take to learn iOS development?
- Hello (SwiftUI) World - Beginner Tutorial For SwiftUI
- How To Make an iOS App For Beginners - Lesson 1 Hello World

The Complete iOS App Development Bootcamp
Disclosure: This website may contain affiliate links, meaning when you click the links and make a purchase, we receive a commission.
