How To Make A Phone Call In Swift
One commonly requested feature is having a button that calls a phone number on click. I’ve built many of these buttons throughout my career.
Here’s the code:
guard let number = URL(string: "tel://" + "4151231234") else { return }
UIApplication.shared.open(number)
Read on for a more detailed explanation.
How to make phone call button in iOS:
- Create a UIButton in the Interface Builder
- Link that button’s IBAction into a swift file.
- Inside that swift function, create a URL object with the tel:// string.
- Open that URL string you created when the user presses the button.
There are multiple ways to tackle this problem. In this article I’ll show you my preferred method.
Creating a call button in Swift with pictures
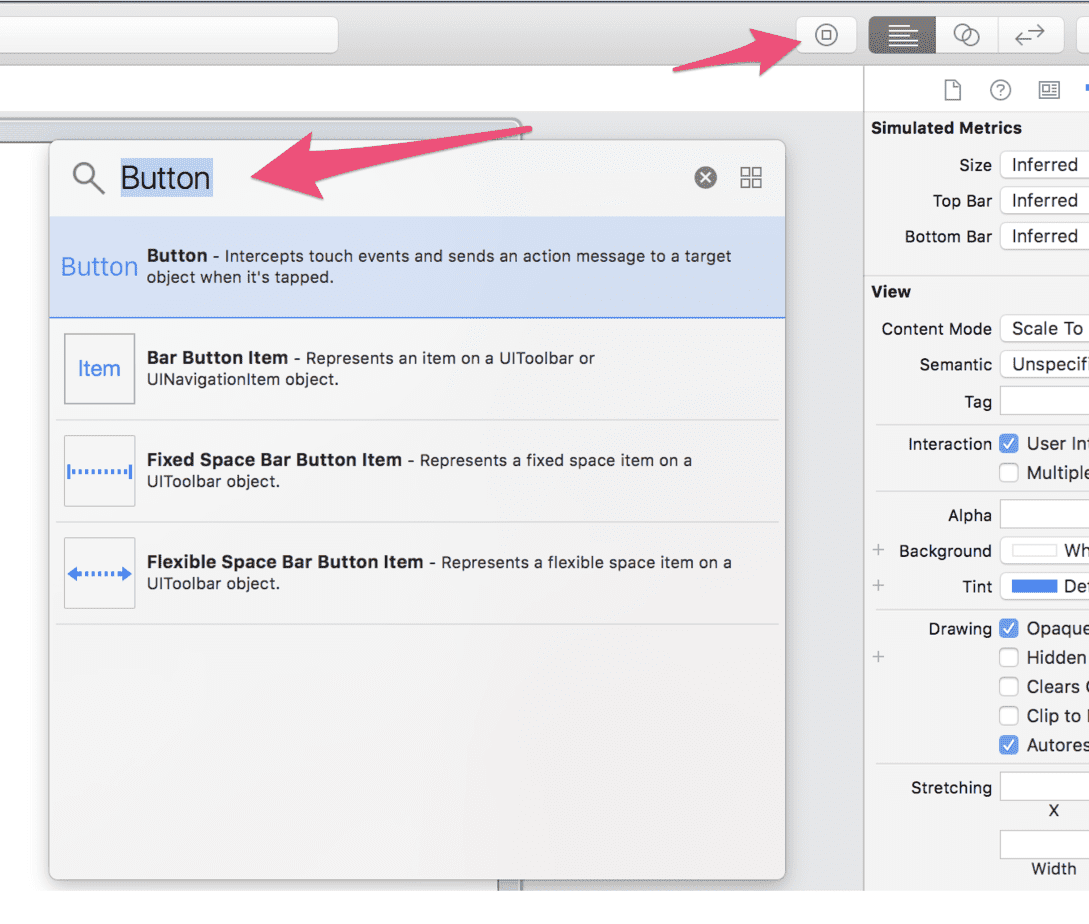
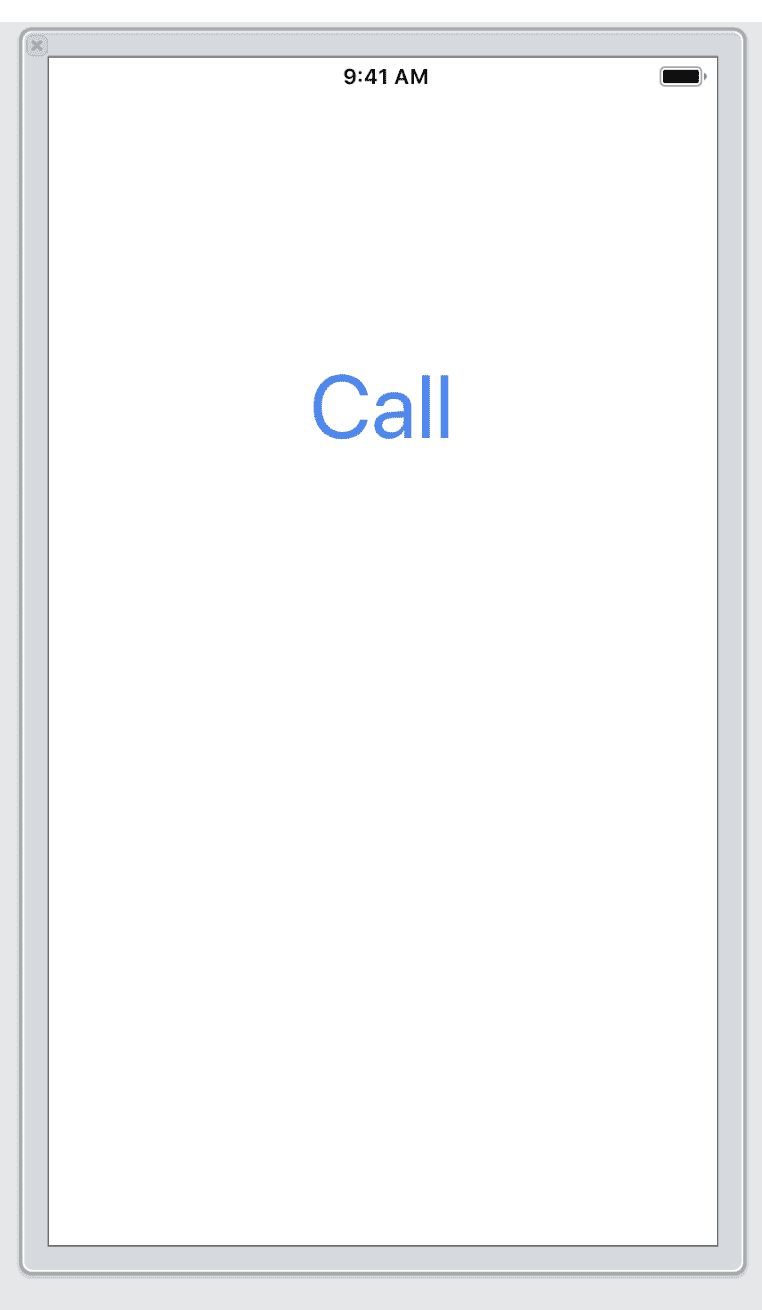
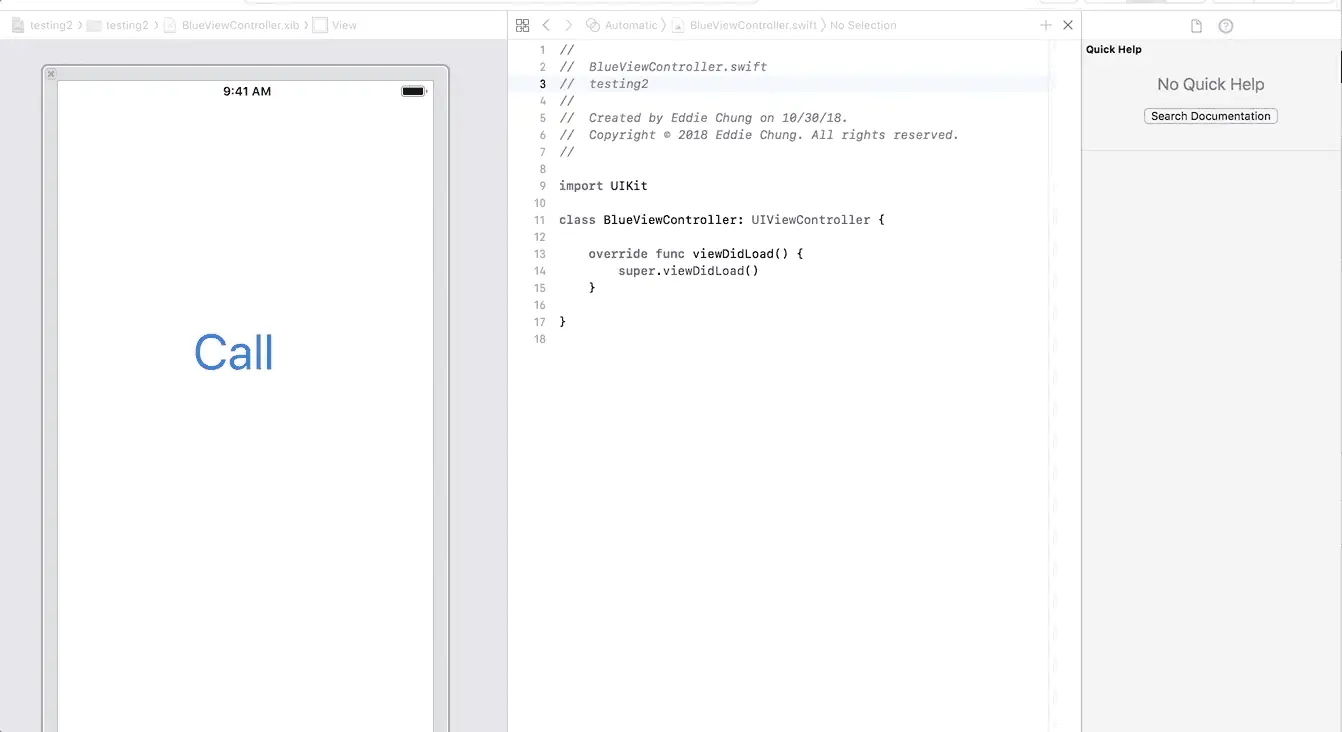
Open up a .XIB or Storyboard file in the interface and create a new button. To do this, open up the UI Library in the top right corner and type in Button. In this example, I’m creating a simple button with the text “Call”.
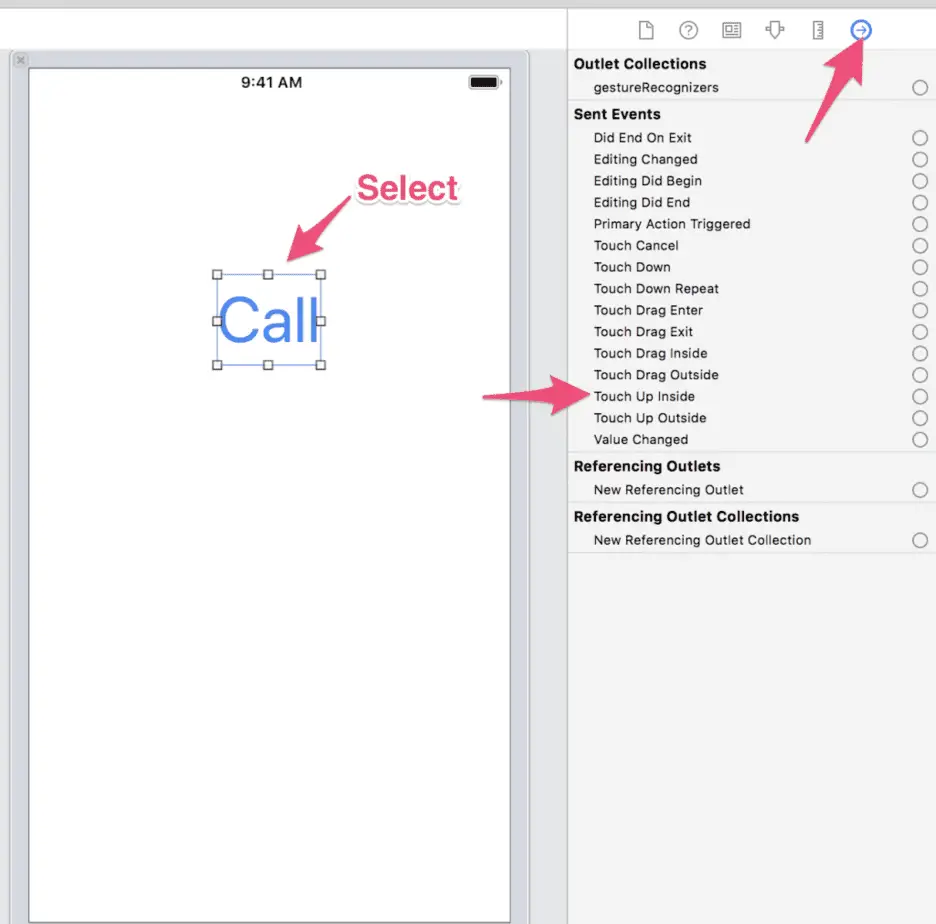
Next we’ll have to link the IBAction Touch Up Inside into our Swift file. To do this, click on the button and open up the Connections Inspector, which is the last tab on the right-hand pane.
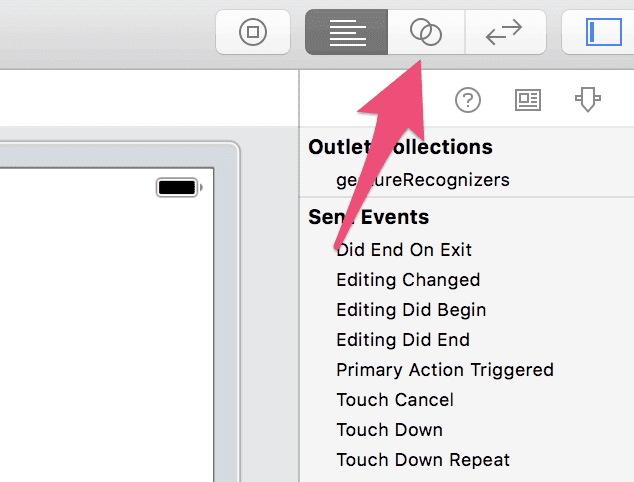
Drag that connection into your swift file. To do this, select the Assistant Editor
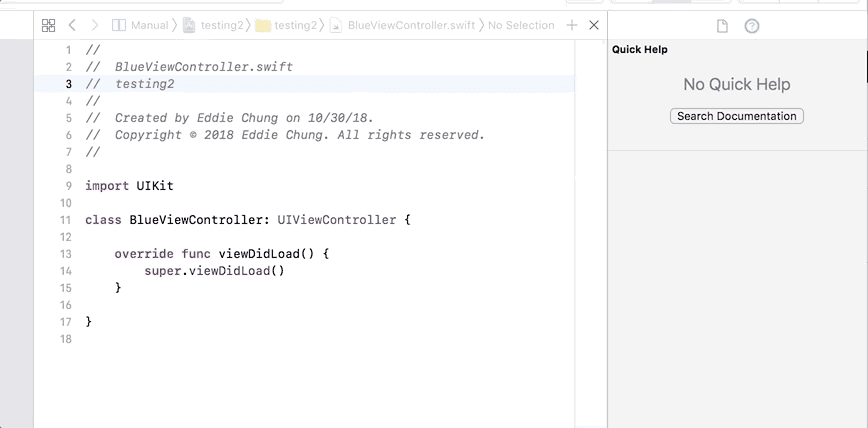
Make sure your Assistant Editor is in Automatic mode
This should open up the corresponding Swift file to your .XIB or Storyboard. Select the button then drag the plus (+) sign from the Connections Inspector into your Swift file:
Now that you have your IBAction outlet in your Swift code you can close out the Interface Builder and focus on the code.
The next step is creating the new URL with the phone number and having your application open that URL. Here is the code to perform that action:
@IBAction func clicked(_ sender: Any) {
    guard let number = URL(string: "tel://" + "4151231234") else { return }
    UIApplication.shared.open(number)
}
Now build and run your app. It should work! 🙂
How to send text messages from Swift
There are some cases where you would like the user to send a text message instead of a phone call. This can include sharing content or an application. For example, Uber uses the text option to share your ride with your friend to let them know when you arrive. Some users also prefer to text customer support instead of calling.
Regardless of the use case, sending texts from an iOS is a simple process. After you’ve created the button and have linked the IBAction (see first section of this article), you need to write the following code in the clicked function:
import UIKit
import MessageUI

class TextingViewController: UIViewController, MFMessageComposeViewControllerDelegate {
    override func viewDidLoad() {
        super.viewDidLoad()
    }

    @IBAction func clicked(_ sender: Any) {
        if (MFMessageComposeViewController.canSendText()) {
            let controller = MFMessageComposeViewController()
            controller.body = "Message Body"
            controller.recipients = ["4151231234"]
            controller.messageComposeDelegate = self
            self.present(controller, animated: true, completion: nil)
        }
    }

    func messageComposeViewController(_ controller: MFMessageComposeViewController!, didFinishWith result: MessageComposeResult) {
        self.dismiss(animated: true, completion: nil)
    }
}
At the top of your file is import to remember to import MessageUI.
Your view controller then must have MFMessageComposeViewControllerDelegate as a type after UIViewController. This means you also must implement the didFinishWith function that the delegate mandates. For our didFinishWith function, we simply dismiss the SMS popup.
Our IBAction function checks that this device can send text messages first. If it is able it then creates a MFMessageComposeViewController, initializing it with the recipients of the text message and the body of the text. It sets its delegate to this view controller and then presents the SMS screen.
You can send your text messages to multiple recipients, simply add more phone numbers to the array. You can also customize the body of the text to make sense for the feature your building. The body can describe a customer support request with some debug information or have a link for sharing content.
How to send emails from Swift
Sending email is often a common feature required for iOS apps. The most common use case for this would be for customer support emails. Having a button where the user can send an email to the developers is a key feature that enables apps to improve.
The process to set up the button is the exact same as the phone call (see above). The code is very similar to sending SMS messages from an iOS app.
import UIKit
import MessageUI

class EmailViewController: UIViewController, MFMailComposeViewControllerDelegate {
    override func viewDidLoad() {
        super.viewDidLoad()
    }

    @IBAction func clicked(_ sender: Any) {
        if MFMailComposeViewController.canSendMail() {
            let mail = MFMailComposeViewController()
            mail.mailComposeDelegate = self
            mail.setToRecipients(["[email protected]"])
            mail.setMessageBody("<p>Awesome tutorial!</p>", isHTML: true)

            present(mail, animated: true)
        }
    }

    func mailComposeController(_ controller: MFMailComposeViewController, didFinishWith result: MFMailComposeResult, error: Error?) {
        controller.dismiss(animated: true)
    }
}
Make sure to import MessageUI for texts as well as emails.
Your view controller also must have the type of MFMailComposeViewControllerDelegate.
In our button’s click function we first check if this device is able to send emails. Then we create a MFMailComposeViewController and set the delegate to this view controller (self). We set up the recipients and message body before presenting the mail view controller.
For our delegate function, we’ll simply dismiss the mail view controller after it’s completed.
When to use phone call buttons in iOS Apps
The best use case for phone calls in iOS apps is customer support. Suppose a customer is confused how to purchase a product or has a question regarding its feature. Instead of losing the sale, providing a phone number can be a useful way of closing the deal.
This is especially true for first transactions or larger transactions. A contact phone number communicates more trust and gives the user a sense of security when purchasing from your iOS app.
Another use case is when your application involves the interaction of two or more people. This is the case in food or furniture delivery when one user is the receiver of the goods and the other is the deliverer. In case there is a mix up or a misunderstanding, it is important to give the users an option to call each other.
You can see this in many popular food delivery apps such as Uber Eats and Postmates. This is also done in many grocery delivery apps around the world.
Should I ask for phone call permissions?
When you request phone call permissions, your app will be able to directly call phone numbers without having a pop-up dialog first. Many users are scared of allowing apps to call phone numbers without asking permission first as it may increase their cell-phone bill.
To determine if you need to ask for phone call permissions, ask yourself if phone calls is a core feature of your application. If your app is a messaging app such as WeChat or WhatsApp, it makes sense that you would request for these permissions.
However if your phone number button is just for customer support or an infrequent feature consider not asking for this permission. It is acceptable for the user to confirm every phone call in this case, since it shouldn’t happen often.
Asking for additional permissions is always a risk. The more permissions you ask, the more likely you will scare away new users from installing your application. Especially for phone calls and SMS permissions, users are cautious to allow as it may increase their phone bill.
Ultimately, you must make the decision for your own application as every application’s case is different.
How to determine where a user click the phone number in the app
Sometimes you want to know if your user clicked the phone number on the home screen of your app or whether it was inside a certain feature.
There are multiple ways of tackling this problem, depending on your needs.
If you need this data real time, like for example a customer support phone number where the customer service representative needs to know what the user is doing in the app – use different phone numbers. You can purchase different phone numbers and set them to different buttons in the application.
Otherwise if you just want to know how many users click one phone button versus another one, you can just track this in code. MixPanel is a good framework for tracking user behavior but you can also do this manually by saving user interactions into your own database.
Consider having the user send a text or email where you pre-fill the body of the text or email to have some contextual information. This information could include the current feature the user clicked the button from or some debug information for your developers to use.
Related Questions
Where to buy phone numbers for customer support? You can buy customer support phone numbers from Twilio.
Where can I download a phone button icon? You can find the phone icon button at FontAwesome or FlatIcons. These sites also have more icons for all kinds of user interactions.
Eddy Chung
Similar Posts
- How To Change Text Or Title Of UIButton in Swift Programmatically
- How To Add a Button in Xcode (Swift)
- How To Change UI Button Image In Swift Programmatically
- How To Set Back Button Text In Swift
- Best Backend For iOS App
- 10 Steps To Become An iOS Developer With No Experience
- Build An Alert Dialog Box With Text Input In Swift
- The Best Tools For iOS Developers
- Best Programming Languages To Learn For Mobile App Development
- Solution: Can't Update Xcode From App Store, Hangs Indefinitely

The Complete iOS App Development Bootcamp
Disclosure: This website may contain affiliate links, meaning when you click the links and make a purchase, we receive a commission.
